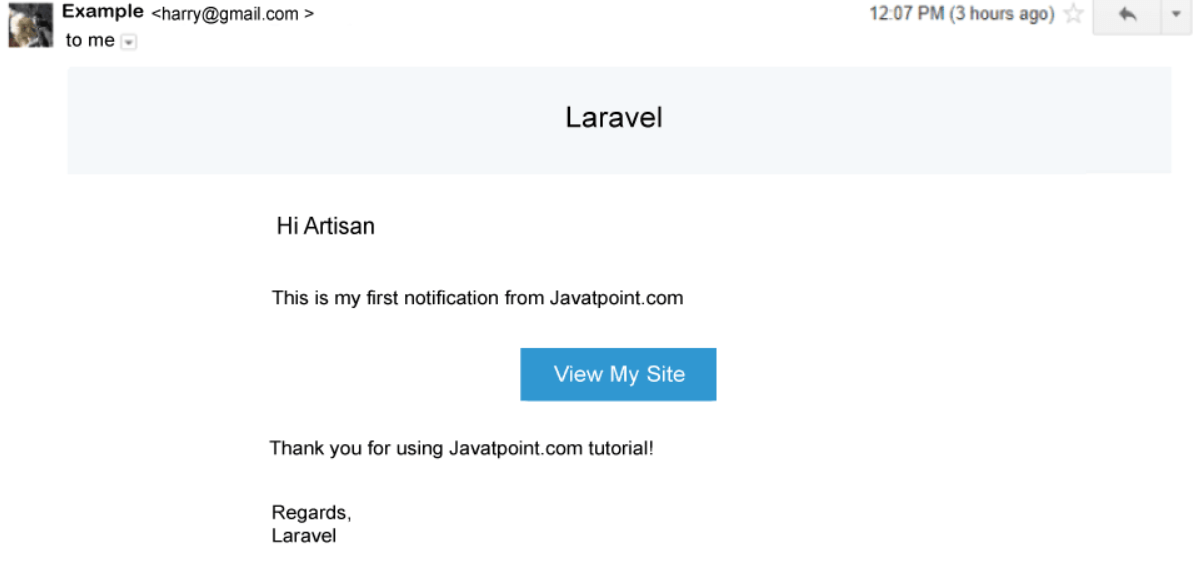
使用Laravel 5.7的新通知系统
在这个部分,我们将学习一个新的通知系统。我们将使用Laravel 5.7来完成这个任务。我们将使用各种通知系统,如邮件、Markdown、slack、数据库、广播和短信来发送通知。这里我们将提供一个电子邮件通知系统的例子。使用新的通知系统,我们可以轻松地同时向所有用户发送通知。
在Laravel中,我们可以使用各种方式发送通知,如短信、邮件、slack或数据库。使用Laravel的artisan命令,我们可以简单地创建通知。通知的自定义非常简单,如邮件正文、邮件主题、邮件操作等等。如果我们正在开发一个大项目,如电子商务,那么我们需要使用通知向客户发送通知。通知可以以订单接收、付款接收、发票等形式发送。
在我们的Laravel应用程序中,我们将创建一个电子邮件通知,然后将其发送给一个特定的用户。发送完成后,我们将使用数据库保存它。为了创建通知,我们将按照以下步骤进行:
步骤1:
在这一步骤中,我们将 下载Laravel 5.7 。在我们的应用程序中,我们需要一个新鲜的Laravel 5.7版本。因此,我们将使用下面的命令来获取它。为此,我们将使用终端并运行以下命令:
composer create-project --prefer-dist laravel/laravel blog
步骤2:
在这个步骤中,我们将要 创建数据库表格 。我们会使用Laravel 5的artisan工具来创建一个名为”notifications”的新数据库表格。创建表格的命令如下所示:
php artisan notifications:table
php artisan migrate
步骤3:
在这一步中,我们将要 创建通知 。我们将使用 Laravel 5 的 artisan 工具来创建 MyFirstNotification。为此,我们会使用以下命令,命令的描述如下:
php artisan make:notification MyFirstNotification
当我们成功执行上述命令时,将在应用文件夹中创建一个名为“Notification”的新文件夹。现在我们将进行一些更改,具体如下:
app/Notifications/MyFirstNotification.php
<?php

namespace App\Notifications;

use Illuminate\Bus\Queueable;
use Illuminate\Notifications\Notification;
use Illuminate\Contracts\Queue\ShouldQueue;
use Illuminate\Notifications\Messages\MailMessage;

class MyFirstNotification extends Notification
{
    use Queueable;

    private details;

    /**
     * It is used to create a new notification instance.
     *
     * @return void
     */
    public function __construct(details)
    {
        this->details =details;
    }

    /**
     * It is used to get delivery channels of notification.
     *
     * @param  mixed  notifiable
     * @return array
     */
    public function via(notifiable)
    {
        return ['mail','database'];
    }

    /**
     * It is used to get notification?s mail representation.
     *
     * @param  mixed  notifiable
     * @return \Illuminate\Notifications\Messages\MailMessage
     */
    public function toMail(notifiable)
    {
        return (new MailMessage)
                    ->greeting(this->details['greeting'])
                    ->line(this->details['body'])
                    ->action(this->details['actionText'],this->details['actionURL'])
                    ->line(this->details['thanks']);
    }

    /**
     * It is used to get notification?s array representation.
     *
     * @param  mixednotifiable
     * @return array
     */
    public function toDatabase(notifiable)
    {
        return [
            'order_id' =>this->details['order_id']
        ];
    }
}
步骤4:
在这一步中,我们要 创建路由 . 我们需要向用户发送通知,所以我们将创建路由。为此,我们将使用名为“routes/web.php”的文件,并将以下代码放入其中,如下所示:
routes/web.php
Route::get('send', 'HomeController@sendNotification');
步骤5:
在这一步中,我们要创建控制器 创建控制器 。因此,我们将创建一个名为HomeController的新控制器,用于处理路由的generatePDF方法。为此,我们将添加以下代码:
app/Http/Controllers/HomeController.php
<?php

namespace App\Http\Controllers;

use Illuminate\Http\Request;
use App\User;
use Notification;
use App\Notifications\MyFirstNotification;

class HomeController extends Controller
{
    /**
     * It is used to create a new controller instance.
     *
     * @return void
     */
    public function __construct()
    {
        this->middleware('auth');
    }

    /**
     * It is used to display the dashboard of application.
     *
     * @return \Illuminate\Contracts\Support\Renderable
     */
    public function index()
    {
        return view('home');
    }

    public function sendNotification()
    {user = User::first();

        details = [
            'greeting' => 'Hi Artisan',
            'body' => 'This is my first notification from Javatpoint.com',
            'thanks' => 'Thank you for using Javatpoint.com tutorial!',
            'actionText' => 'View My Site',
            'actionURL' => url('/'),
            'order_id' => 101
        ];

        Notification::send(user, new MyFirstNotification($details));

        dd('done');
    }

}
当我们运行上述命令时,我们能够向用户发送第一条通知。为此,我们将运行以下命令:
php artisan serve
现在我们可以使用我们的浏览器打开下面的URL:
http://localhost:8000/sends
我们还可以使用以下命令发送类似的通知:
$user->notify(new MyFirstNotification($details));
可以使用以下命令获取发送的通知,如下所示:
dd($user->notifications);
当我们运行这个命令时,将生成以下输出:

 极客笔记
极客笔记