在Laravel 5中使用Maatwebsite将数据导入导出到Excel和CSV
在这一部分中,我们将使用Maatwebsite来实现导入和导出CSV和Excel的功能。我们将使用Laravel 5来实现这个功能。我们将使用数据库来存储导入的CSV或Excel文件。通过使用Maatwebsite,我们可以从数据库的表中下载或导出CSV或Excel文件。
我们可以通过使用Maatwebsite包轻松地获取数据。它还可以用于对数据进行分组,并且我们可以创建多个工作表。在下面的示例中,我们描述了items表的数据。我们可以使用CSV、XLS和XLSV格式来下载它,并且我们还可以使用CSV、XLS和XLSX文件来导入数据。在我们的Laravel 5项目中,我们可以按照以下逐步过程来实现导出和导入功能:
步骤1:
在这一步中,我们将进行 安装 。我们将使用名为composer.json的文件,然后使用所需的软件包,并根据我们的Laravel版本将以下行放入其中。
Laravel 5
"maatwebsite/excel": "~2.1.0"
Laravel 4
"maatwebsite/excel": "~1.3"
现在我们将运行以下命令:
Composer update
现在我们将使用名为config/app.php的文件,然后将别名和服务提供者添加到其中:
'providers' => [
    ....
    'Maatwebsite\Excel\ExcelServiceProvider',
],
'aliases' => [
    ....
    'Excel' => 'Maatwebsite\Excel\Facades\Excel',
],
配置
如果我们使用Laravel 5,我们将使用以下命令:
php artisan vendor:publish
如果我们使用Laravel 4,我们将使用以下命令:
php artisan config:publish maatwebsite/excel
为了创建一个配置文件,以下命令将非常有用。该文件将用于 Excel 包中。
步骤2:
在第二步中,我们将要 创建表格和模型 。我们将使用 item 表格创建一个迁移。使用 Laravel 5 的 php artisan 命令来完成此操作,具体描述如下:
php artisan make:migration create_items_table
当我们成功执行上述命令时,我们将使用 database/migrations 路径获取一个文件。现在我们将使用我们的迁移文件,并将以下代码添加到其中,以创建如下的项目表:
use Illuminate\Database\Schema\Blueprint;
use Illuminate\Database\Migrations\Migration;
class CreateItemsTable extends Migration
{
   public function up()
   {
       Schema::create('items', function (Blueprint table) {table->increments('id');
           table->string('title');table->text('description');
           $table->timestamps();
       });
   }
   public function down()
   {
       Schema::drop("items");
   }
}
当我们成功创建这个“items”表格后,我们需要创建一个Item模型。为此,我们将使用app/Item.php路径,然后我们将把以下代码添加到其中:
app/item.php:
namespace App;
use Illuminate\Database\Eloquent\Model;
class Item extends Model
{
   public $fillable = ['title','description'];
}
步骤3:
在这一步中,我们要 创建路由 。我们将为导入导出文件创建路由。为此,我们将使用名为app/Http/routes.php的文件,然后添加以下路由:
Route::get('importExport', 'MaatwebsiteDemoController@importExport');
Route::get('downloadExcel/{type}', 'MaatwebsiteDemoController@downloadExcel');
Route::post('importExcel', 'MaatwebsiteDemoController@importExcel');
步骤4:
在此文件中,我们要 创建控制器 。我们将创建 MaatwebsiteDemoController 作为一个新的控制器。我们将使用app/Http/Controllers/MaatwebsiteDemoController.php路径来创建这个控制器。所有importExcel请求、importExport、返回响应和downloadExcel都可以由此控制器管理。现在我们将使用控制器文件并将以下内容添加到其中:
app/Http/Controllers/MaatwebsiteDemoController.php:
use Input;
use App\Item;
use DB;
use Excel;
class MaatwebsiteDemoController extends Controller
{
    public function importExport()
    {
        return view('importExport');
    }
    public function downloadExcel(type)
    {data = Item::get()->toArray();
        return Excel::create(?javatpoint?_example', function(excel) use (data) {
            excel->sheet('mySheet', function(sheet) use (data)
            {sheet->fromArray(data);
            });
        })->download(type);
    }
    public function importExcel()
    {
        if(Input::hasFile('import_file')){
            path = Input::file('import_file')->getRealPath();data = Excel::load(path, function(reader) {
            })->get();
            if(!empty(data) &&data->count()){
                foreach (data askey => value) {insert[] = ['title' => value->title, 'description' =>value->description];
                }
                if(!empty(insert)){
                    DB::table('items')->insert(insert);
                    dd('Insert Record successfully.');
                }
            }
        }
        return back();
    }
}
步骤5:
在这一步中,我们将 创建视图 . 我们将通过创建名为importExport.blade.php的文件来创建布局。这个文件将用于编写设计代码。我们将把以下代码添加到该文件中:
importExport.blade.php:
<html lang="en">
<head>
    <title>Import - Export Laravel 5</title>
    <link rel="stylesheet" href="https://maxcdn.bootstrapcdn.com/bootstrap/3.3.6/css/bootstrap.min.css" >
</head>
<body>
    <nav class="navbar navbar-default">
        <div class="container-fluid">
            <div class="navbar-header">
                <a class="navbar-brand" href="#"> Laravel 5 - Import and Export CSV and Excel </a>
            </div>
        </div>
    </nav>
    <div class="container">
        <a href="{{ URL::to('downloadExcel/xls') }}"><button class="btn btn-success">Download Excel xls</button></a>
        <a href="{{ URL::to('downloadExcel/xlsx') }}"><button class="btn btn-success">Download Excel xlsx</button></a>
        <a href="{{ URL::to('downloadExcel/csv') }}"><button class="btn btn-success">Download CSV</button></a>
        <form style="border: 4px solid #a1a1a1;margin-top: 15px;padding: 10px;" action="{{ URL::to('importExcel') }}" class="form-horizontal" method="post" enctype="multipart/form-data">
            <input type="file" name="import_file" />
            <button class="btn btn-primary">Import File</button>
        </form>
    </div>
</body>
</html>
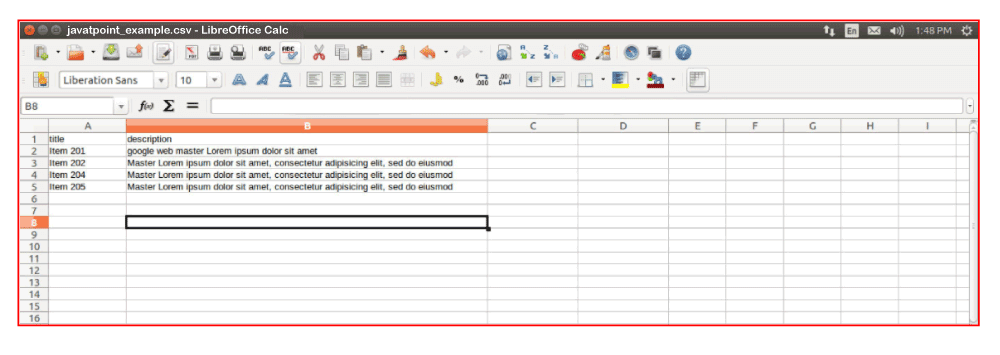
现在我们的上述脚本已经准备好运行了。为了快速运行上述脚本,我们将使用我们的浏览器。当我们打开浏览器时,我们将看到如下的预览:

导入文件:

 极客笔记
极客笔记