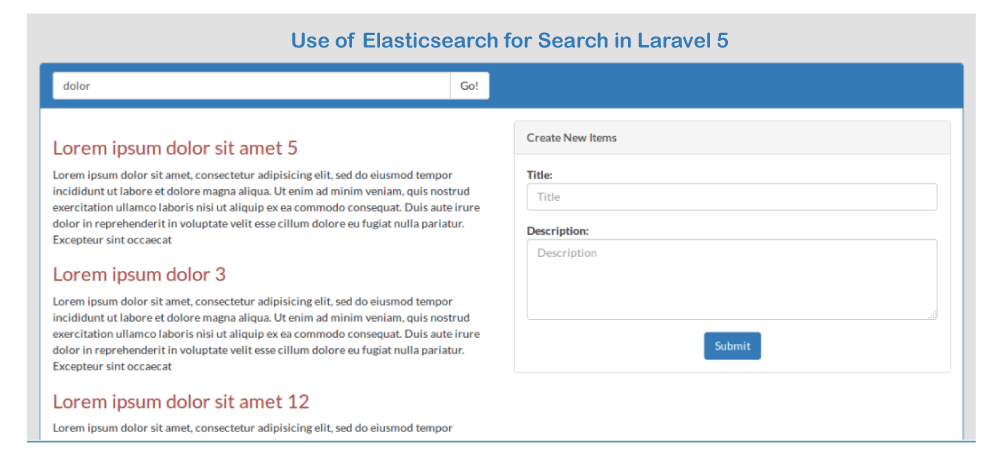
在Laravel 5中从头开始使用Elasticsearch
在本节中,我们将从头开始学习如何使用Elasticsearch。我们将使用laravel来实现。假设我们正在使用Laravel创建一个电子商务网站。在这种情况下,我们的网站需要搜索引擎选项。而对于我们的网站来说,最好的搜索引擎就是Elasticsearch。通过使用Elasticsearch,我们可以获得分布式和多租户能力的全文搜索引擎。这个搜索引擎将包含JSON文档和HTTP Web界面。在给定的示例中,我们将提供一个从零开始的完整示例。为了从头开始使用Elasticsearch,我们需要按照以下步骤进行:
步骤1:
在这一步中,我们将安装Elasticsearch。为了安装它,我们将使用我们的本地机器。我们可以通过使用以下链接轻松地将其安装到我们的系统中:
ElasticSearch文档
如果我们的操作系统是Ubuntu,我们无法从上面的链接下载它。我们必须使用以下链接进行下载:
如何在本地系统中配置Elasticsearch
步骤2:
在这一步中,我们将安装包。在下面的示例中,我们将使用Elasticsearch API,所以我们需要安装Elastiquent package或Elastiquent。为此,我们将使用composer.json文件,并将以下行添加到该文件中。使用以下内容,我们将更新composer,如下所示:
"elasticquent/elasticquent": "dev-master"
当我们完成了elastiquent包或elastiquent的安装之后,我们将使用config/app.php文件。在这个文件中,我们将添加提供者和别名的路径。为了实现这一点,我们将使用该文件并将以下代码放入该文件中,如下所示:
config/app.php:
return [
    ......
    'provides' => [
        ......
        ......,
        Elasticquent\ElasticquentServiceProvider::class,
    ],
    'aliases' => [
        ......
        ......,
        'Es' => Elasticquent\ElasticquentElasticsearchFacade::class,
    ],
]
现在需要Elasticsearch生成配置文件。为此,我们将打开命令提示符或终端,并运行以下命令:
php artisan vendor:publish --provider="Elasticquent\ElasticquentServiceProvider"
步骤3:
在第三步中,我们要创建项目表和模型。我们将使用Laravel 5的PHP艺术家命令来为项目表创建迁移。为此,我们将执行以下描述的命令:
php artisan make:migration create_items_table
当我们完成运行上述命令后,我们将在database/migrations路径下看到一个文件。现在我们将使用该迁移文件创建一个items表,并将以下代码添加到文件中,如下所示:
use Illuminate\Database\Schema\Blueprint;
use Illuminate\Database\Migrations\Migration;

class CreateItemsTable extends Migration
{
 public function up()
    {
        Schema::create('items', function (Blueprint table) {table->increments('id');
            table->string('title');table->text('description');
            $table->timestamps();
        });
    }

    public function down()
    {
        Schema::drop("items");
    }
}
当我们成功创建了”items”表后,我们将会创建一个Item模型。为了这个目的,我们将使用app/Item.php路径。我们会将以下代码添加到那个文件中,就像这样:
app/Item.php:
namespace App;
use Illuminate\Database\Eloquent\Model;
use Elasticquent\ElasticquentTrait;

class Item extends Model
{
    use ElasticquentTrait;

    public $fillable = ['title','description'];

}
步骤4:
在这一步中,我们将要 创建路由和控制器 。我们将使用我们的路由文件,并在其中添加一些路由。为此,我们将复制以下路由,然后像这样将该路由添加到我们的文件中:
app/Http/routes.php:
Route::get('ItemSearch', 'ItemSearchController@index');
Route::post('ItemSearchCreate', 'ItemSearchController@create');
现在我们需要创建一个新的控制器。为此,我们将使用app/Http/Controllers/ItemSearchController.php路径,并将控制器设置为ItermSearchController。使用这个控制器,我们可以管理所有的elasticsearch搜索,如下所示:
app/Http/Controllers/ItemSearchController.php:
namespace App\Http\Controllers;
use Illuminate\Http\Request;
use App\Http\Requests;
use App\Item;

class ItemSearchController extends Controller
{
    /**
     * It will Display the resource list.
     *
     * @return \Illuminate\Http\Response
     */
    public function index(Request request)
    {
        if(request->has('search')){
            items = Item::search(request->input('search'))->toArray();
        }
        return view('ItemSearch',compact('items'));
    }

    /**
     * It will Display the resource list.
     *
     * @return \Illuminate\Http\Response
     */
    public function create(Request request)
    {this->validate(request, [
            'title' => 'required',
            'description' => 'required',
        ]);item = Item::create(request->all());item->addToIndex();

        return redirect()->back();
    }
}
步骤5:
在这个步骤中,我们将创建视图。为此,我们将创建一个名为 ItemSearch.blade.php 的文件。通过这个文件,我们可以管理搜索功能列表。现在我们将在该文件中添加以下代码:
ItemSearch.blade.php:
@extends('layouts.app')
@section('content')
<div class="row">
    <div class="col-md-8 col-md-offset-2">
        <h1 class="text-primary" style="text-align: center;"> Use of Elasticsearch for Search in Laravel 5 </h1>
    </div>
</div>

<div class="container">
    <div class="panel panel-primary">
      <div class="panel-heading">
        <div class="row">
          <div class="col-lg-6">
            {!! Form::open(array('method'=>'get','class'=>'')) !!}
            <div class="input-group">

              <input name="search" value="{{ old('search') }}" type="text" class="form-control" placeholder="Search for...">
              <span class="input-group-btn">
                <button class="btn btn-default" type="submit">Go!</button>
              </span>

            </div><!-- /input-group -->
            {!! Form::close() !!}
          </div><!-- /.col-lg-6 -->
        </div><!-- /.row -->
      </div>
      <div class="panel-body">


            <div class="row">
                <div class="col-lg-6">
                    @if(!empty(items))
                        @foreach(items as key =>value)
                            <h3 class="text-danger">{{ value['title'] }}</h3>
                            <p>{{value['description'] }}</p>
                        @endforeach
                    @endif
                </div>
                <div class="col-lg-6">
                    <div class="panel panel-default">
                        <div class="panel-heading">
                            Create New Items
                        </div>
                        <div class="panel-body">

                            @if (count(errors)>0)
                                <div class="alert alert-danger">
                                    <strong>Whoops!</strong> There were some problems with your input.<br><br>
                                    <ul>
                                        @foreach (errors->all() as error)
                                            <li>{{error }}</li>
                                        @endforeach
                                    </ul>
                                </div>
                            @endif

                            {!! Form::open(array('url' => 'ItemSearchCreate','autocomplete'=>'off')) !!}
                                <div class="row">
                                    <div class="col-xs-12 col-sm-12 col-md-12">
                                        <div class="form-group">
                                            <strong>Title:</strong>
                                            {!! Form::text('title', null, array('placeholder' => 'Title','class' => 'form-control')) !!}
                                        </div>
                                    </div>
                                    <div class="col-xs-12 col-sm-12 col-md-12">
                                        <div class="form-group">
                                            <strong>Description:</strong>
                                            {!! Form::textarea('description', null, array('placeholder' => 'Description','class' => 'form-control','style'=>'height:100px')) !!}
                                        </div>
                                    </div>
                                </div>

                                <div class="text-center">
                                    <button type="submit" class="btn btn-primary">Submit</button>
                                </div>

                            {!! Form::close() !!}

                        </div>
                    </div>
                </div>
            </div>

      </div>
    </div>
</div>
@endsection
现在我们的上述代码已准备好运行。运行后将生成以下输出:

 极客笔记
极客笔记