JavaScript 随机图片生成器
在本章中,您将学习如何使用JavaScript在网页上生成随机图片。因此,我们将使用JavaScript和HTML源代码创建不同的随机图片生成器。首先,它需要一个包含要在网页上显示的图像URL的数组。
随机图片生成器的概念主要用于广告。你在一个网站上看到的随机生成的图片,都已经存储在数据库或数组中。这些图片以固定的时间间隔显示给用户,或者通过点击进行更换。您还可以直接提供来自互联网的图像地址。
我们将讨论使用JavaScript的两种不同的随机图片生成器的方法。请参阅下面的两种方法:
方法1
在这种方法中,在网页上单击一个按钮,图片将以固定的时间间隔随机显示。我们将使用JavaScript中的setInterval()内置函数来设置图片之间的计时器。
在这个示例中,我们使用了图像的原始大小。您也可以为每个要显示的图像定义大小。现在,请按照以下步骤进行操作:
随机图片生成器的步骤
- 使用JavaScript声明一个数组来存储图像。
- 在声明的数组中提供图像的链接或URL。您还可以在数组中传递图像大小的高度和宽度以在网页上显示。
- 声明一个JavaScript变量来存储使用此方法计算出的随机值floor(Math.random()*randomImage.length)。它将生成一个介于0和数组长度之间的随机数,该随机数将分配给要随机显示的图像。
- 现在,返回在上一步中计算的数字中选择的随机图像。
- 将所有上述步骤放入一个用户定义的函数(getRandomImage)中,在点击”生成图片”时调用该函数。
- 在HTML代码中,我们将使用一个标签并提供一个ID以在另一个图像上显示一个图像。因此,这些图像将逐个显示,并覆盖彼此。
将这些步骤转化为实际实现。
<html>
<head>
<title> Random Image Generator </title>
</head>
<script>
function getRandomImage() {
//declare an array to store the images
var randomImage = new Array();

//insert the URL of images in array
randomImage[0] = "https://images.pexels.com/photos/858115/pexels-photo-858115.jpeg?auto=compress&cs=tinysrgb&dpr=1&w=500";
randomImage[1] = "http://www.petsworld.in/blog/wp-content/uploads/2014/09/running-cute-puppies.jpg";
randomImage[2] = "https://images.pexels.com/photos/142497/pexels-photo-142497.jpeg?auto=compress&cs=tinysrgb&dpr=1&w=500";
randomImage[3] = "https://images.unsplash.com/photo-1543877087-ebf71fde2be1?ixlib=rb-1.2.1&ixid=eyJhcHBfaWQiOjEyMDd9&auto=format&fit=crop&w=500&q=60";
randomImage[4] = "https://wi.wallpapertip.com/wsimgs/156-1565522_puppies-desktop-wallpaper-desktop-background-puppies.jpg";
randomImage[5] = "https://images.unsplash.com/photo-1501265976582-c1e1b0bbaf63?ixlib=rb-1.2.1&ixid=eyJhcHBfaWQiOjEyMDd9&auto=format&fit=crop&w=500&q=60";

//generate a number and provide to the image to generate randomly
var number = Math.floor(Math.random()*randomImage.length);

//return the images generated by a random number
return document.getElementById("result").innerHTML = '<img src="'+randomImage[number]+'" />';
}

</script>
<body>
<center><h2 style="color:green"> Random Image Generator </h2></center>
<h4> Click the button to generate and display random images on the webpage </h4>
<!-- call user-defined getRandomImage function after 2 seconds -->
<button onclick = "setInterval(getRandomImage, 2000)"> Generate Image </button>
<br> <br>
<span id="result" align="center"> </span>

</body>
</html>
输出
通过执行此代码,将出现一个网页,其中包含一个 生成图片 按钮。当您点击此按钮时,图片将在网页上随机显示。

点击 生成图片 按钮以显示随机生成的图片。这些图片将在每隔几秒钟自动更换一次,一旦你点击这个 生成图片 按钮。
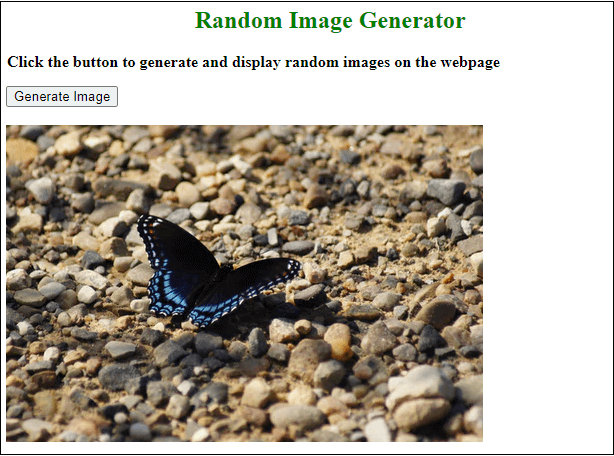
请看下面的输出:

请记住 ,我们在互联网上提供了一个图片地址的数组。我们没有下载或将这些图片存储在我们的数据库中。
示例2:生成多个随机图片
在这个示例中,当用户点击按钮时,我们将一次生成并展示多个随机图片。我们将使用HTML代码生成一个按钮,名称为“生成图片”。这些图片将存储在一个由用户选择的数组中。每当用户点击这个 生成图片 按钮时,将会生成并在网页上展示出五张批量随机生成的图片。
请看下面的步骤,了解如何实现:
- 使用JavaScript声明一个数组,并在该数组中提供图片的链接或URL以存储这些图片。
- 使用for循环一次生成多个随机图片。我们将使用0到5的for循环,以便在单击一个按钮时展示五张图片。
- 将以下步骤放在这个for循环中。
- 使用 floor(Math.random()*randomImage.length) 方法计算0到数组长度之间的随机数。该生成的数字将赋值给随机显示的图片。
- 现在,通过在上一步计算中生成的数字来打印出所有五个随机选择的图片。
- 将以上所有步骤放在用户定义的函数(getRandomImage)中,该函数将在点击 生成图片 按钮时调用。
将这些步骤转换为实际实现,并查看下面的代码:
<html>
<head>
<title> Random Image Generator </title>
</head>
<script>
function getRandomImage() {
//declare an array to store the images
var randomImage = new Array();

//insert the URL of images in array
randomImage[0] = "https://wi.wallpapertip.com/wsimgs/15-155208_desktop-puppy-wallpaper-hd.jpg";
randomImage[1] = "http://www.petsworld.in/blog/wp-content/uploads/2014/09/running-cute-puppies.jpg";
randomImage[2] = "https://wi.wallpapertip.com/wsimgs/156-1564365_golden-retriever-puppy-desktop-wallpaper-desktop-wallpaper-puppy.jpg";
randomImage[3] = "https://wi.wallpapertip.com/wsimgs/156-1564140_free-puppy-wallpapers-for-computer-wallpaper-cave-cute.jpg";
randomImage[4] = "https://wi.wallpapertip.com/wsimgs/156-1565522_puppies-desktop-wallpaper-desktop-background-puppies.jpg";
randomImage[5] = "https://wi.wallpapertip.com/wsimgs/156-1566650_cute-puppies-desktop-wallpaper-cute-puppies.jpg";

//loop to display five randomly chosen images at once
for (let i=0; i< 5; i++) {
//generate a number and provide to the image to generate randomly
var number = Math.floor(Math.random()*randomImage.length);
//print the images generated by a random number
document.getElementById("result").innerHTML += '<img src="'+ randomImage[number] +'" style="width:150px" />';
}
}

</script>
<body>
<center><h2 style="color:green"> Random Image Generator </h2></center>
<h4> Click the button to generate and display the five random images: </h4>
<!-- call user-defined getRandomImage function to generate image -->
<button onclick = "getRandomImage()"> Generate Image </button>
<br> <br>
<span id="result" align="center"> </span>

</body>
</html>
输出
通过运行上面的代码,您将得到响应,并带有一个 生成图像 按钮。最初,没有图像。

当您点击这个 生成图片 按钮时,会在网页上随机选择五张图片显示给您。
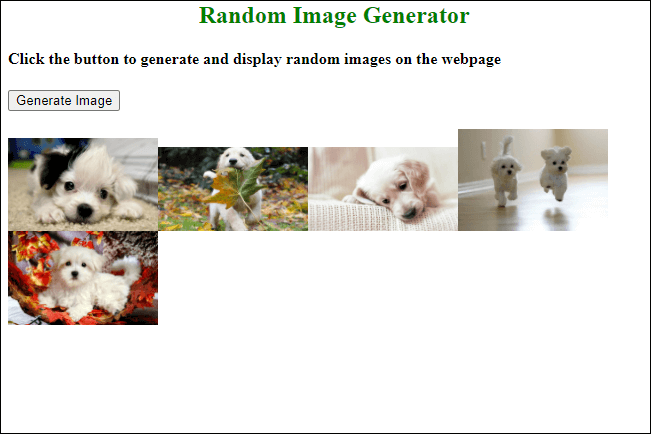
再次,点击 生成图像 按钮,将再次随机显示5张带有先前输出的图像。

方法2
在此方法中,我们将通过点击一个按钮来每次显示不同的随机图片。这些图片不会像前面的方法那样自动更换。
在本例中,我们还将为每个要在网页上显示的图片提供大小(高度和宽度)。因此,图片将按照您在JavaScript代码中指定的大小显示。
随机图片生成器的步骤
- 创建一个用户定义的函数 randomImageGenerator() ,并将以下所有步骤放入其中。
- 使用JavaScript创建一个包含要在网页上显示的图片的位置/URL、高度和宽度的图像数组。
- 将图像的URL、高度和宽度存储在另一个数组索引中。
- 使用 floor() 方法生成一个随机数,该方法将使用图像数组随机地显示在网页上。它将生成一个介于0到数组长度之间的随机数,该随机数将被分配给随机显示的图像。
- 显示与上一步生成的随机数匹配的图像。
- 我们将使用一种方法来删除前一个图像,并用新图像覆盖。
- 在HTML中创建一个按钮来更改图片。
将这些步骤转化成实际的实现,并查看下面的代码:
<html>
<head>
<title>Display random images</title>
<style>
body {
margin-top: 30px;
}
</style>
</head>

<script>
function displayRandomImages()
{
   //array of images with image location, height, and width
   var imageArray = [
   {
     //address URL of the image
     src: "https://wi.wallpapertip.com/wsimgs/15-155208_desktop-puppy-wallpaper-hd.jpg",
     //size for the image to be display on webpage
     width: "280",
     height: "200"
   },
   {
     src: "https://wi.wallpapertip.com/wsimgs/156-1564365_golden-retriever-puppy-desktop-wallpaper-desktop-wallpaper-puppy.jpg",
     width: "320",
     height: "195"
   },
   {
     src: "https://wi.wallpapertip.com/wsimgs/156-1564140_free-puppy-wallpapers-for-computer-wallpaper-cave-cute.jpg",
     width: "320",
     height: "195"
   },
   {
     src: "https://wi.wallpapertip.com/wsimgs/156-1566650_cute-puppies-desktop-wallpaper-cute-puppies.jpg",
     width: "350",
     height: "250"
    } ];

    //find the length of the array of images
    var arrayLength = imageArray.length;
    var newArray = [];
    for (var i = 0; i < arrayLength; i++) {
        newArray[i] = new Image();
        newArray[i].src = imageArray[i].src;
        newArray[i].width = imageArray[i].width;
        newArray[i].height = imageArray[i].height;
    }

  // create random image number
  function getRandomNum(min, max)
  {
      // generate and return a random number for the image to be displayed
      imgNo = Math.floor(Math.random() * (max - min + 1)) + min;
      return newArray[imgNo];
  }

  // 0 is first image and (preBuffer.length - 1) is last image of the array
  var newImage = getRandomNum(0, newArray.length - 1);

  // remove the previous images
  var images = document.getElementsByTagName('img');
  var l = images.length;
  for (var p = 0; p < l; p++) {
     images[0].parentNode.removeChild(images[0]);
  }
  // display the new random image
  document.body.appendChild(newImage);
}
</script>

<body>
<div>
<center>
<h2 style="color:green"> Random Image Generator </h2>
<h4> Press the button to display and change the image </h4>
<button onclick="displayRandomImages();"> Display Images </button>
</center>
</div>
</body>
</html>
输出
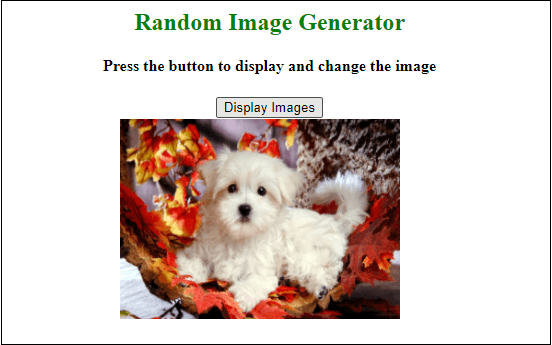
通过执行这段代码,将会出现一个网页,其中只有一个 显示图像 按钮。点击该按钮即可生成一张图片。
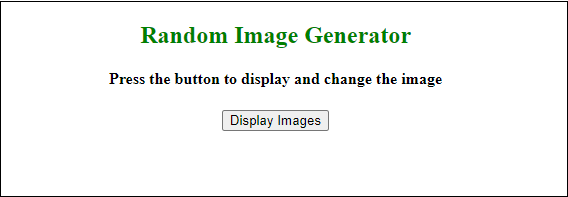
通过点击 显示图片 按钮,可以随机显示一幅图像。
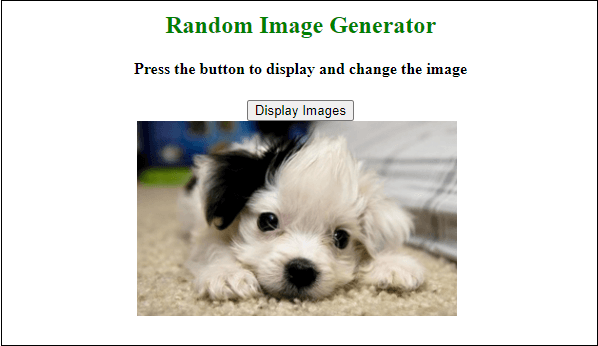
每次当你点击这个 显示图片 按钮时,都会展示一张新的图片给你。
我们将逐步解释上述JavaScript代码,以便更容易理解。
声明并初始化一个数组
声明一个数组,并存储要在网页上显示的图像的地址、高度和宽度。
var imageArray = [
   {
     //address URL of the image
     src: "https://wi.wallpapertip.com/wsimgs/15-155208_desktop-puppy-wallpaper-hd.jpg",
     //size for the image to be display on webpage
     width: "280",
     height: "200"
   },
   {
     src: "https://wi.wallpapertip.com/wsimgs/156-1564365_golden-retriever-puppy-desktop-wallpaper-desktop-wallpaper-puppy.jpg",
     width: "320",
     height: "195"
   }];
将图片的URL、宽度和高度存储到另一个数组索引中
这段代码用于将图片的URL、宽度和高度存储到另一个数组索引中,以便可以方便地访问它们。因此,我们将找到初始数组的长度,并将它们的元素转移到另一个新数组中。
    //find the length of the array of images
    var arrayLength = imageArray.length;
    var newArray = [];
    for (var i = 0; i < arrayLength; i++)
   {
        newArray[i] = new Image();
        newArray[i].src = imageArray[i].src;
        newArray[i].width = imageArray[i].width;
        newArray[i].height = imageArray[i].height;
    }
生成一个随机数
这将生成一个在0到数组长度之间的随机数。
function getRandomNum(min, max)
  {
      // generate and return a random number for the image to be displayed
      imgNo = Math.floor(Math.random() * (max - min + 1)) + min;
      return newArray[imgNo];
  }

  // 0 is first image and (preBuffer.length - 1) is last image of the array
  var newImage = getRandomNum(0, newArray.length - 1);
移除前一张图片
此代码用于从网页中移除前一张图片,以便新的图片可以显示。
// remove the previous images
  var images = document.getElementsByTagName('img');
  var l = images.length;
  for (var p = 0; p < l; p++) {
     images[0].parentNode.removeChild(images[0]);
  }
显示图像
最后,我们使用此代码在移除前一个图像后显示图像。
// display the new random image
  document.body.appendChild(newImage);
 极客笔记
极客笔记