OpenCV Python 如何将彩色图像转换为二进制图像
我们使用 cv2.threshold() 将灰度图像转换为二进制图像。要将彩色图像转换为二进制图像,我们首先使用 cv2.cvtColor() 将彩色图像转换为灰度图像,然后在灰度图像上应用 cv2.threshold() 。
步骤
可以按照以下步骤将彩色图像转换为二进制图像-
- 导入所需的库。在以下所有示例中,所需的Python库是 OpenCV 。请确保您已经安装了它。
-
使用 cv2.imread() 读取输入图像。使用此方法读取的RGB图像是BGR格式。可选择将读取的BGR图像分配给img。
-
现在将此BGR图像转换为灰度图像,如下所示使用 cv2.cvtColor() 函数。可选择将转换后的灰度图像分配给gray。
-
对灰度图像gray应用阈值处理 cv2.threshold() 将其转换为二进制图像。调整第二个参数( threshValue )以获得更好的二进制图像。
-
显示转换后的二进制图像。
让我们来看一些示例,以更清楚地理解问题。
我们将使用以下图像作为 输入文件 在下面的示例中。

示例
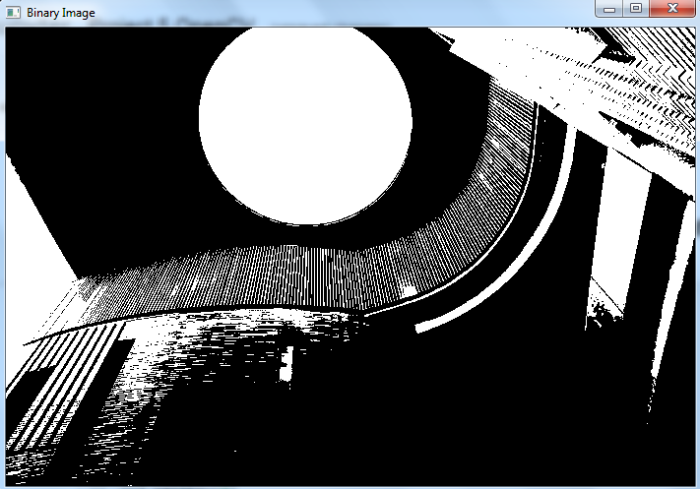
在此Python程序中,我们将彩色图像转换为二进制图像。我们还显示二进制图像。
# import required libraries
import cv2

# load the input image
img = cv2.imread('architecture1.jpg')

# convert the input image to grayscale
gray = cv2.cvtColor(img, cv2.COLOR_BGR2GRAY)

# apply thresholding to convert grayscale to binary image
ret,thresh = cv2.threshold(gray,70,255,0)

# Display the Binary Image
cv2.imshow("Binary Image", thresh)
cv2.waitKey(0)
cv2.destroyAllWindows()
输出
当您运行上述程序时,它将产生以下输出窗口,显示二进制图像。

示例
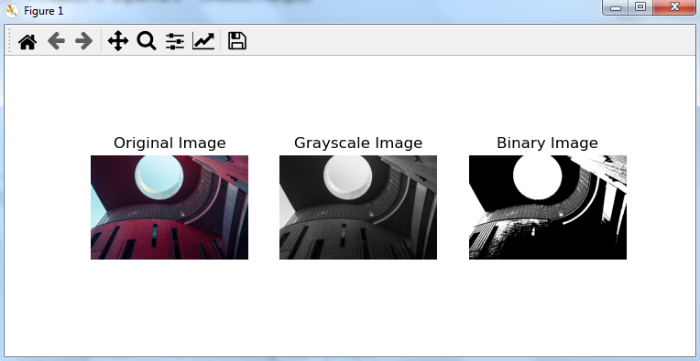
在此示例中,我们将一幅彩色图像转换为二进制图像。我们还会显示原始图像、灰度图像和二进制图像。
# import required libraries
import cv2
import matplotlib.pyplot as plt

# load the input image
img = cv2.imread('architecture1.jpg')

# convert the input image to grayscale
gray = cv2.cvtColor(img, cv2.COLOR_BGR2GRAY)

# apply thresholding to convert grayscale to binary image
ret,thresh = cv2.threshold(gray,70,255,0)

# convert BGR to RGB to display using matplotlib
imgRGB = cv2.cvtColor(img, cv2.COLOR_BGR2RGB)

# display Original, Grayscale and Binary Images
plt.subplot(131),plt.imshow(imgRGB,cmap = 'gray'),plt.title('Original Image'), plt.axis('off')
plt.subplot(132),plt.imshow(gray,cmap = 'gray'),plt.title('Grayscale Image'),plt.axis('off')
plt.subplot(133),plt.imshow(thresh,cmap = 'gray'),plt.title('Binary Image'),plt.axis('off')
plt.show()
输出
当你运行上述程序时,它将产生以下输出窗口,显示原始、灰度和二进制图像。

注意灰度图像和二进制图像之间的差异。二进制图像只有两种颜色:白色和黑色。二进制图像的像素值只能是0(黑色)或255(白色)。
 极客笔记
极客笔记