Javascript history.pushState() 方法
每当浏览器的历史记录发生改变时,我们需要找出这个改变。这就是调用 pushState() 方法的作用。它用于监控浏览器历史记录的变化。当使用 pushState() 方法时,可以对 window.history 进行修改。
这样,我们可以在每次浏览器历史记录被修改时,为 history 函数添加自己的逻辑。
换句话说,我们可以使用 history.pushState() 方法往web浏览器的会话历史栈中添加一条记录。
语法
pushState() 方法的语法如下:
history.pushState(state, title, [,url]) (state, title, [,url])
pushState() 方法接受三个参数:
1) state
一个可序列化的对象是一个状态。每当导航到不同状态时,将启动一个 popstate 事件。另外,popstate 事件有一个指向历史条目的状态对象的 state 属性。
2) title
如今,大多数浏览器都忽略了 title 属性。如果我们想要更新文档的标题,可以使用 document.title 属性替代。在实际应用中,title 参数通常传递一个空字符串。
3) url
我们可以使用可选的 url 参数来指定新历史条目的 URL。如果 URL 与当前使用的 URL 没有相同的源,该方法将抛出异常。
当我们设置新的地址时,Web 浏览器不会加载它。如果用户未提供 URL,默认使用当前 URL。
示例
以下示例描述了使用 history.pushstate() 方法的不同信息。
示例1: :
以下示例展示了 history.pushstate() 方法的基本功能。在这里我们可以使用 window.location.url 获取当前链接,使用当前网址获取方法的数据。
<!DOCTYPE html>
<html>
<head>
<title> JavaScript history.pushState Event </title>
</head>
<body>
<h2 id = "data"> JavaScript history.pushState Event </h2>
<p> write history.pushState() method in the console and see the output </p>
<script>
//use url of the window's location
const url_data = new URL(window.location);
//set the data in url link
url_data.searchParams.set('get', 'data method');
//get the value with a link
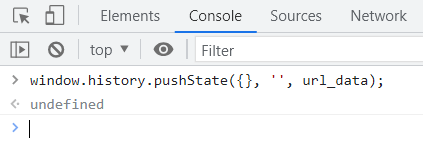
window.history.pushState({}, '', url_data);
</script>
</body>
</html>
输出
图像显示历史URL的数据作为输出。

示例2
下面的示例显示了history.pushstate()方法的功能。我们可以使用空状态、当前URL和空参数。
<!DOCTYPE html>
<html>
<head>
<title> JavaScript history.pushState Event </title>
</head>
<body>
<h2 id = "data"> JavaScript history.pushState Event </h2>
<p> write history.pushState() method in the console and see the output </p>
<script>
//get the value with link
const url_data = new URL(window.location);
history.pushState(null, "", url_data);
</script>
</body>
</html>
输出
图像显示数据作为历史网址的输出。

示例3
下面的示例展示了history.pushstate()方法的功能。我们可以获取所需id的url路径。如果一个网页有一个可用的id,那么可以将它用作URL的一部分或选项卡。
<html>
<head>
<title> JavaScript history.pushState Event </title>
</head>
<body>
<h2 id = "data"> JavaScript history.pushState Event </h2>
<p> write history.pushState() method in the console and see the output </p>
<script>
//get the value with link
const url_data = new URL(window.location);
const state ={'id':data}
url_data.searchParams.set('get', state);
history.pushState({'id':'data'}, "", url_data);
</script>
</body>
</html>
输出
这张图片展示了历史URL的输出数据。

JavaScript的PushState()历史示例
我们将创建一个简单的应用程序,显示React、Vue和Angular选项卡。
当您点击选项卡时,将显示指定项目的内容。使用历史记录还会更新URL。pushState()函数遵循以下步骤:
- 如果您复制包含哈希标记的URL并在在线浏览器中加载,应用程序将加载关联的内容。
<div class="container">
<div class = "displays">
<ul>
<li class = "active" id = "display1">link</li>
</ul>
<div class = "datash">
content
</div>
</div>
- 首先,使用querySelector()函数选择标签和内容元素。
const displays = document.querySelector(".displays");
const datash = document.querySelector(".displays > .datash");
- 其次,创建一个映射对象,将每个选项卡的id与其对应的URL哈希链接起来。
const hashes = new Map([
["#url_link", "display1"],
]);
- 接下来,为关联对象的标签ID创建一个名为data的新地图。URL和内容是对象的两个属性。
const data = new Map([
    [
        "display1",
        {
            url: "file.html#react",
            content:
                "content.",
        },
    ],
]);
- 第四,每次点击一个选项卡(或li元素)时,点击事件将发生。我们将利用事件委托来提高效率。
- 因此,我们将处理每个选项卡的父级上的点击事件,而不是每个单独的选项卡。
- if子句确保事件处理程序在每个不同的选项卡上发生点击事件时修改文本和URL。当我们点击选项卡的内容区域时,不会发生任何事情。
- 第五,update()函数将CSS类分配给所选用户选项卡,同时从活动选项卡中删除active类。我们在事件处理程序内部运行update()方法并向其提供选项卡ID。
displays.addEventListener("click", function (event) {
//write condition with update method.
});
- 另外,根据选项卡的ID,它从数据中检索URL和信息。它使用history.pushState()函数来修改URL。
history.pushState(null, "", entry.url);
示例
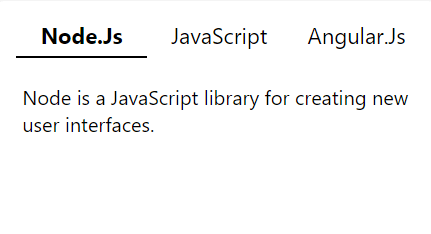
以下示例显示了history.pushState()方法在单个容器中具有不同URL标签的情况。在这里,我们创建了三个标签及其信息。如果我们点击标签,URL将显示标签数据。
<!DOCTYPE html>
<html lang = "en">
<head>
<meta charset = "UTF-8" />
<meta name = "viewport" content = "width=device-width, initial-scale=1.0" />
<title>JavaScript History API: pushState()  Demo</title>
<style>
:root {
--active-border-color:black;
--bg-color: #f4f4f4;
--text-color: black;
--tab-bg-color: white;
}
* {
margin: 0;
padding: 0;
box-sizing: border-box;
}
body {
font-family: -apple-system, BlinkMacSystemFont, "Segoe UI", Roboto, Oxygen,
Ubuntu, Cantarell, "Open Sans", "Helvetica Neue", sans-serif;
font-size: 1rem;
background-color: var(--bg-color);
color: var(--text-color);
}
.container {
display: flex;
justify-content: center;
align-items: center;
height: 100vh;
overflow: hidden;
}
.displays {
display: flex;
flex-direction: column;
min-height: 200px;
background-color: var(--tab-bg-color);
padding: 10px;
border-radius: 5px;
width: 350px;
}
.displays ul {
list-style: none;
display: flex;
justify-content: space-between;
border-radius: 5px;
}
.displays ul li {
width: 100%;
text-align: center;
padding: 5px;
margin-left: 5px;
cursor: pointer;
font-size: 1.1rem;
}
.displays ul li:hover {
border-bottom: solid 2px var(--active-border-color);
}
.displays ul li.active {
border-bottom: solid 2px var(--active-border-color);
font-weight: bold;
}
.displays .datash {
padding: 10px;
margin: 10px auto;
}
</style>
</head>
<body>
<div class = "container">
<div class = "displays">
<ul>
<li class = "active" id = "display1"> Node.Js </li>
<li id = "display2"> JavaScript </li>
<li id = "display3"> Angular.Js  </li>
</ul>
<div class = "datash">
A JavaScript library for building user interfaces
</div>
</div>
</div>
<script>
const displays = document.querySelector(".displays");
const datash = document.querySelector(".displays > .datash");
const hashes = new Map([
["#node", "display1"],
["#jst", "display2"],
["#angular", "display3"],
]);
const data = new Map([
[
"display1",
{
url: "file.html#node",
datash:
"Node is a JavaScript library for creating new user interfaces.",
},
],
[
"display2",
{
url: "file.html#jst",
datash: "JavaScript Framework creating web applications.",
},
],
[
"display3",
{
url: "file.html#angular",
datash:
"Angular is a platform for building mobile and desktop applications.",
},
],
]);
displays.addEventListener("click", function (event) {
if (!event.target.id) return;
update(event.target.id);
});
const update = (tabId) => {
// remove the active class of the previously selected tab
const currentTab = displays.querySelector(".active");
if (currentTab.id != tabId) {
currentTab.classList.remove("active");
}
// add active class to the selected tab
const selectedTab = document.getElementById(tabId);
selectedTab.classList.add("active");
const entry = data.get(tabId);
if (entry) {
// update the URL
history.pushState(null, "", entry.url);
// change the content
datash.innerHTML = entry.datash;
}
};
</script>
</body>
</html>
输出
图像显示了具有多个链接的标签页,用于显示URL的历史记录。

结论
要将记录添加到Web浏览器的会话历史堆栈中,请使用history.pushState()方法。
 极客笔记
极客笔记