使用OpenCV Python在图像中绘制多个矩形
OpenCV是一个开源的计算机视觉库,在Python中使用。它提供了许多函数来执行各种图像和视频处理操作。该库使用Numpy模块将所有视频帧和图像表示为ndarray类型。它需要numpy库,我们需要确保numpy模块也已在我们的Python解释器中安装。
在本文中,我们将看到使用OpenCV Python在图像中绘制多个矩形的不同方法。要在图像上绘制矩形形状,Python OpenCV模块提供了一个名为cv2.rectangle()的方法。
cv2.rectangle()函数
该方法将在图像上绘制矩形形状。以下是该函数的语法 –
cv.rectangle(img, pt1, pt2, color[, thickness[, lineType[, shift]]] )
参数
以下是此函数的参数:
- img:用于绘制矩形的源图像。
-
pt1:一个包含矩形顶点的 x 和 y 坐标的元组(矩形的左上角)。
-
pt2:一个包含与前一个坐标相对的矩形对角上顶点的 x 和 y 坐标的元组(矩形的右下角)。
-
color:指定矩形的颜色。
-
thickness:可选参数。指定矩形的线宽。默认线宽为 1。
使用预定义维度
在这种方法中,我们将使用预定义的坐标在图像中绘制多个对象的矩形形状。这意味着我们将手动定义 pt1 和 pt2 的值。
示例
在这个示例中,我们将使用列表的列表来定义图像中每个对象的坐标,然后我们将绘制这些对象周围的矩形形状。
import cv2

# Load the image
img = cv2.imread("Images/Tajmahal.jpg")
cv2.imshow('Input Image', img)

# Define the dimensions and position of the rectangle using two points
img_obj_data = [[(60, 150), (90, 250)], [(120, 170), (155, 250)],
   [(200, 120), (400, 230)], [(450, 160), (480, 250)],
   [(500, 150), (555, 255)], [(330, 80), (550, 130)]]

# defining the color and thickness of the rectangle
thickness = 2
color = (0, 255, 0) # Green color

for dimensions in img_obj_data:
    cv2.rectangle(img, dimensions[0], dimensions[1], color, thickness)

# Display the image with the drawn rectangle
cv2.imshow("Image with multiple rectangles", img)

cv2.waitKey(0)
cv2.destroyAllWindows()
输入图像
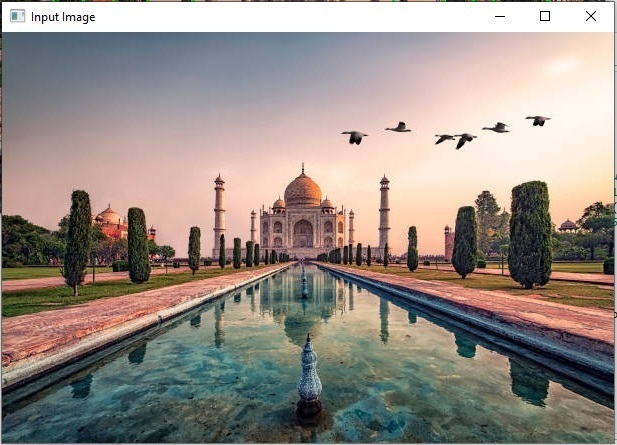
输出图像
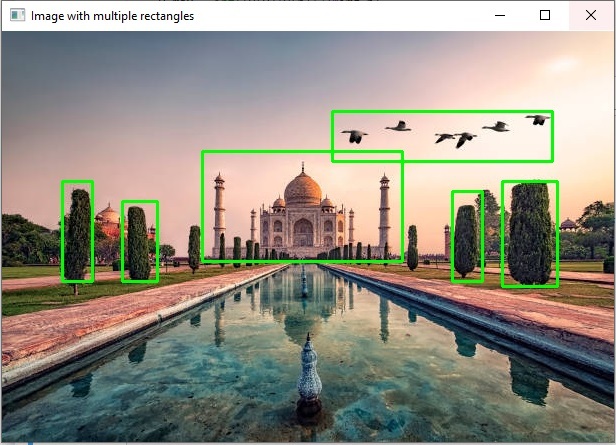
我们通过遍历预定义坐标列表对象中指定的坐标,成功地在图像中绘制了多个矩形。
示例
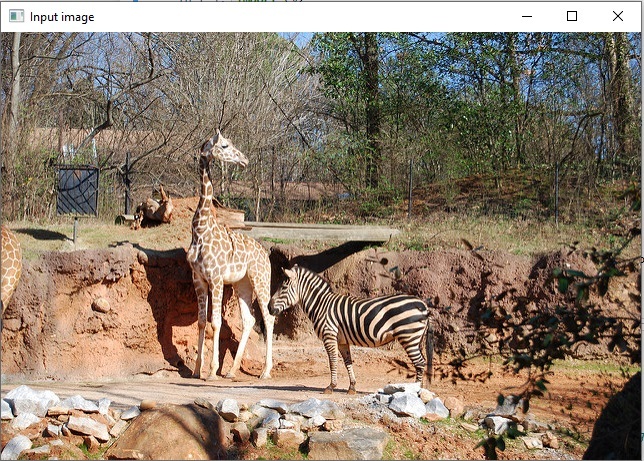
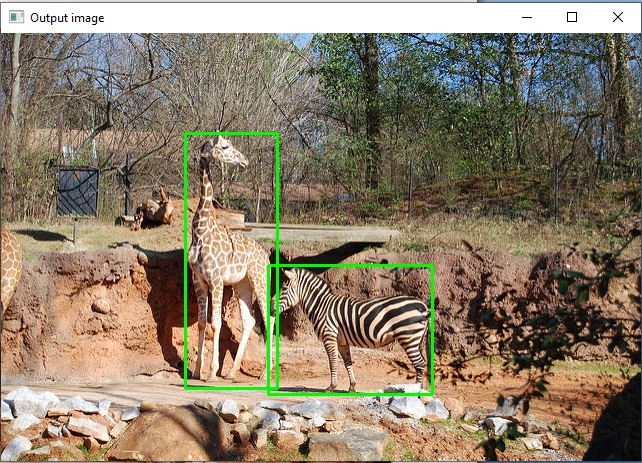
在本示例中,我们将使用预定义坐标的字典来绘制矩形。
import cv2
from random import randint

img = cv2.imread('Images/Zoo.jpg')
cv2.imshow('Input image', img)
img_h, img_w = img.shape[:2]

img_obj_data = {'giraffe': {'center_x': 0.360333,'center_y': 0.532274,'height': 0.596343,'width': 0.144651},
   'zebra' : {'center_x': 0.545974,'center_y': 0.693267,'height': 0.301859,'width': 0.257102}}

for v in img_obj_data.values():
    x, y, h, w = v

    x_min = int((v[x]-v[w]/2)*img_w)
    y_min = int((v[y]-v[h]/2)*img_h)
    x_max = int((v[x]+v[w]/2)*img_w)
    y_max = int((v[y]+v[h]/2)*img_h)
    cv2.rectangle(img, (x_min, y_min), (x_max, y_max), color=[0, 250, 0], thickness=2)

cv2.imshow('Output image', img)
cv2.waitKey(0)
输入图像
输出图像
使用cv2.findContours()方法:
在Python的OpenCV模块中,cv2.findContours()方法用于在二进制图像中检测物体。以下是图像的语法:
cv2.findContours(image, mode, method[, contours[, hierarchy[, offset]]])
参数
- image:一个8位单通道图像(二进制图像)。
-
contours:检测到的轮廓。
方法
我们将按照以下步骤在图像中绘制多个矩形框:
- 加载图像。
-
将图像转换为灰度图像。
-
定义阈值。
-
查找轮廓。
-
遍历轮廓并使用轮廓面积进行过滤。
-
最后绘制每个轮廓的矩形框。
示例
我们以一个示例来说明,我们将使用cv2.findContours()和cv2.rectangle()方法绘制图像对象周围的多个矩形框。
import cv2
import numpy as np

# read image
image = cv2.imread('Images/WhiteDots2.jpg')

# convert to grayscale
gray = cv2.cvtColor(image,cv2.COLOR_BGR2GRAY)

# set the thresholds
thresh = cv2.threshold(gray,128,255,cv2.THRESH_BINARY)[1]

# find contours
result = image.copy()
contours = cv2.findContours(thresh, cv2.RETR_EXTERNAL, cv2.CHAIN_APPROX_SIMPLE)
contours = contours[0] if len(contours) == 2 else contours[1]
for cntr in contours:
    x,y,w,h = cv2.boundingRect(cntr)
    cv2.rectangle(result, (x, y), (x+w, y+h), (0, 0, 255), 2)

# show thresh and result
cv2.imshow("bounding_box", result)
cv2.waitKey(0)
cv2.destroyAllWindows()
输入图像

输出图像
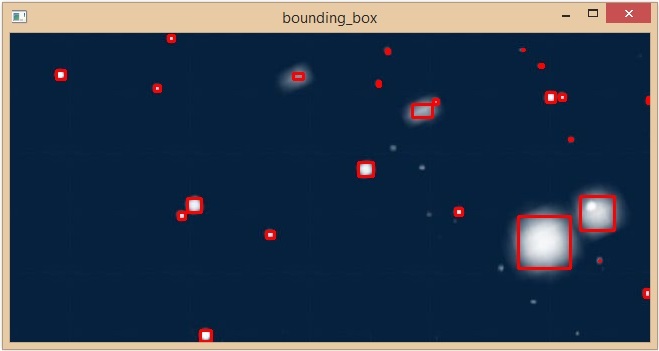
我们成功地在图像中的所有物体周围画了多个矩形。
 极客笔记
极客笔记