NumPy where函数在3D数组中的高效应用与实践
NumPy是Python中用于科学计算的核心库,其中的where函数是一个强大而灵活的工具,特别是在处理多维数组时。本文将深入探讨NumPy where函数在3D数组中的应用,通过详细的解释和实例代码,帮助读者全面理解和掌握这一功能。
1. NumPy where函数简介
NumPy的where函数是一个非常有用的工具,它可以根据给定的条件从数组中选择元素。在3D数组的情况下,where函数的功能更加强大,可以在三个维度上同时进行条件筛选和值替换。
基本语法如下:
numpy.where(condition, [x, y])
其中,condition是一个布尔数组,x和y是可选参数。当condition为True时,返回x中的对应元素;当condition为False时,返回y中的对应元素。
让我们看一个简单的例子:
import numpy as np

# 创建一个3D数组
arr = np.array([[[1, 2, 3],
                 [4, 5, 6]],
                [[7, 8, 9],
                 [10, 11, 12]]])

# 使用where函数
result = np.where(arr > 5, arr, 0)
print("numpyarray.com - Result:")
print(result)
Output:

在这个例子中,我们创建了一个3D数组,然后使用where函数将所有大于5的元素保留,其他元素替换为0。
2. 在3D数组中使用where函数的高级应用
2.1 条件筛选
where函数最基本的用途是根据条件筛选数组元素。在3D数组中,我们可以应用复杂的条件来筛选特定的元素。
import numpy as np

# 创建一个3D数组
arr = np.random.randint(0, 100, size=(3, 4, 5))

# 筛选出大于50且小于80的元素
result = np.where((arr > 50) & (arr < 80), arr, 0)
print("numpyarray.com - Filtered array:")
print(result)
Output:
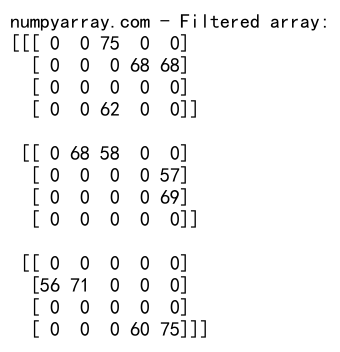
这个例子展示了如何使用多个条件来筛选3D数组中的元素。我们创建了一个随机的3D数组,然后筛选出了所有大于50且小于80的元素,其他元素被设置为0。
2.2 元素替换
where函数不仅可以用于筛选,还可以用于替换元素。这在数据预处理和清洗中非常有用。
import numpy as np

# 创建一个3D数组
arr = np.random.randint(-10, 10, size=(3, 3, 3))

# 将负数替换为0,正数替换为1
result = np.where(arr < 0, 0, np.where(arr > 0, 1, arr))
print("numpyarray.com - Replaced array:")
print(result)
Output:
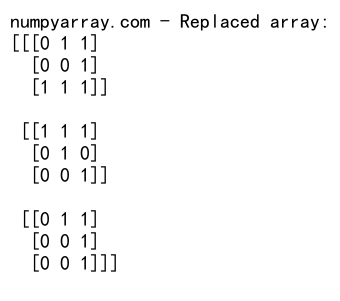
在这个例子中,我们创建了一个包含正负数的3D数组,然后使用嵌套的where函数将负数替换为0,正数替换为1,保留0不变。
2.3 条件索引
where函数还可以用于获取满足特定条件的元素的索引。这在需要知道特定元素在3D数组中的位置时非常有用。
import numpy as np

# 创建一个3D数组
arr = np.random.randint(0, 100, size=(4, 4, 4))

# 获取大于80的元素的索引
indices = np.where(arr > 80)
print("numpyarray.com - Indices of elements > 80:")
print(indices)
Output:

这个例子展示了如何获取3D数组中所有大于80的元素的索引。返回的结果是一个元组,包含三个数组,分别对应满足条件的元素在三个维度上的索引。
2.4 多条件组合
在实际应用中,我们经常需要组合多个条件来筛选或替换元素。where函数可以与逻辑运算符结合使用,实现复杂的条件组合。
import numpy as np

# 创建一个3D数组
arr = np.random.randint(0, 100, size=(3, 4, 5))

# 组合多个条件
condition = (arr > 30) & (arr < 70) | (arr % 2 == 0)
result = np.where(condition, arr, -1)
print("numpyarray.com - Result of multiple conditions:")
print(result)
Output:
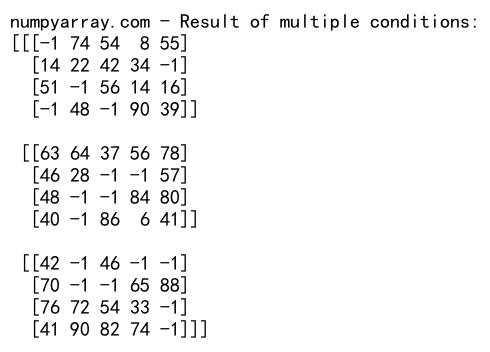
在这个例子中,我们组合了多个条件:元素大于30且小于70,或者是偶数。满足这些条件的元素被保留,其他元素被替换为-1。
2.5 使用自定义函数
where函数的强大之处还在于它可以与自定义函数结合使用,实现更复杂的操作。
import numpy as np

def custom_function(x):
    return x**2 if x > 0 else -x

# 创建一个3D数组
arr = np.random.randint(-10, 10, size=(3, 3, 3))

# 使用自定义函数
result = np.where(arr > 0, custom_function(arr), arr)
print("numpyarray.com - Result with custom function:")
print(result)
这个例子展示了如何将where函数与自定义函数结合使用。我们定义了一个函数,对正数进行平方,对负数取绝对值。然后,我们将这个函数应用到3D数组中的正数元素上。
3. where函数在数据分析中的应用
3.1 数据清洗
在数据分析中,where函数常用于数据清洗,例如处理异常值或缺失值。
import numpy as np

# 创建一个包含异常值的3D数组
arr = np.random.randint(0, 100, size=(3, 4, 5))
arr[1, 2, 3] = 1000  # 插入一个异常值

# 将异常值(大于100)替换为平均值
mean_value = np.mean(arr[arr <= 100])
cleaned_arr = np.where(arr > 100, mean_value, arr)
print("numpyarray.com - Cleaned array:")
print(cleaned_arr)
Output:
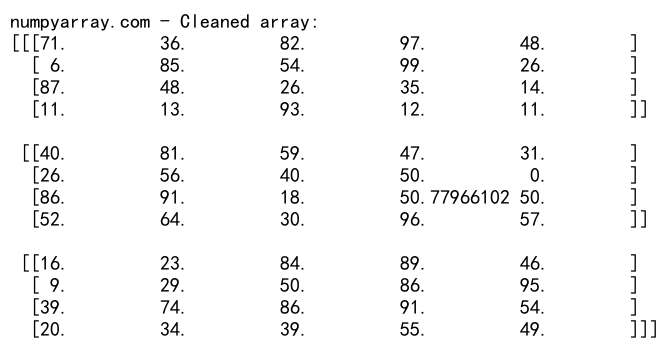
这个例子展示了如何使用where函数来清理3D数组中的异常值。我们将大于100的值视为异常值,并将其替换为非异常值的平均值。
3.2 数据转换
where函数也可以用于数据转换,例如将连续数据离散化。
import numpy as np

# 创建一个3D数组
arr = np.random.uniform(0, 1, size=(3, 4, 5))

# 将连续数据离散化为三类
result = np.where(arr < 0.33, 0, np.where(arr < 0.67, 1, 2))
print("numpyarray.com - Discretized array:")
print(result)
Output:
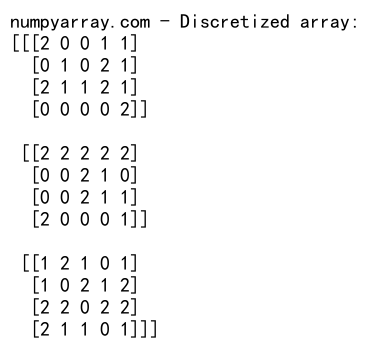
这个例子展示了如何使用where函数将连续的3D数组数据离散化为三个类别。我们将0-0.33的值映射为0,0.33-0.67的值映射为1,0.67-1的值映射为2。
3.3 特征工程
在机器学习的特征工程中,where函数可以用来创建新的特征。
import numpy as np

# 创建一个表示温度的3D数组(假设单位是摄氏度)
temperatures = np.random.uniform(-10, 40, size=(3, 4, 5))

# 创建一个新特征:温度类别
temp_categories = np.where(temperatures < 0, 'Cold',
                           np.where(temperatures < 20, 'Mild', 'Hot'))
print("numpyarray.com - Temperature categories:")
print(temp_categories)
Output:
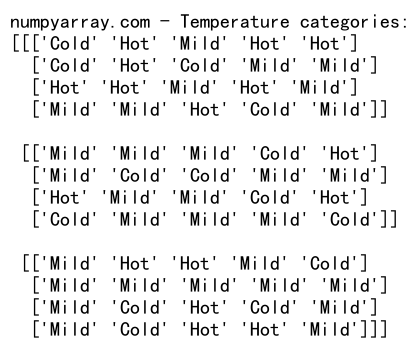
这个例子展示了如何使用where函数来创建一个新的特征。我们将温度数据转换为温度类别:小于0度为”Cold”,0-20度为”Mild”,大于20度为”Hot”。
4. where函数的性能优化
4.1 避免循环
使用where函数可以避免显式的循环,从而提高代码的执行效率。
import numpy as np

# 创建一个大的3D数组
arr = np.random.randint(0, 100, size=(100, 100, 100))

# 使用where函数替代循环
result = np.where(arr > 50, arr * 2, arr / 2)
print("numpyarray.com - Result without loops:")
print(result.shape)
Output:

这个例子展示了如何使用where函数来避免显式循环。我们创建了一个大的3D数组,然后使用where函数对所有元素进行条件操作,而不需要使用循环。
4.2 内存效率
where函数可以通过就地修改数组来提高内存效率。
import numpy as np

# 创建一个3D数组
arr = np.random.randint(0, 100, size=(50, 50, 50))

# 就地修改数组
np.where(arr > 50, 100, arr, out=arr)
print("numpyarray.com - In-place modified array:")
print(arr.shape)
这个例子展示了如何使用where函数的out参数来就地修改数组,避免创建新的数组,从而提高内存效率。
5. where函数的高级技巧
5.1 多维条件
where函数可以处理多维条件,这在处理复杂的3D数据时非常有用。
import numpy as np

# 创建两个3D数组
arr1 = np.random.randint(0, 100, size=(3, 4, 5))
arr2 = np.random.randint(0, 100, size=(3, 4, 5))

# 使用多维条件
condition = (arr1 > arr2) & (arr1 > 50)
result = np.where(condition, arr1, arr2)
print("numpyarray.com - Result of multi-dimensional condition:")
print(result.shape)
Output:

这个例子展示了如何使用多维条件。我们创建了两个3D数组,然后使用一个复合条件来选择元素:当arr1的元素大于arr2的对应元素且大于50时,选择arr1的元素,否则选择arr2的元素。
5.2 结合其他NumPy函数
where函数可以与其他NumPy函数结合使用,实现更复杂的操作。
import numpy as np

# 创建一个3D数组
arr = np.random.randint(-10, 10, size=(3, 4, 5))

# 结合其他NumPy函数
result = np.where(np.abs(arr) > 5, np.sign(arr) * np.square(arr), arr)
print("numpyarray.com - Result combined with other NumPy functions:")
print(result.shape)
Output:

这个例子展示了如何将where函数与其他NumPy函数(如abs、sign和square)结合使用。我们对绝对值大于5的元素进行平方,并保留其原始符号。
5.3 处理NaN值
在实际数据分析中,经常需要处理包含NaN(Not a Number)值的数组。where函数可以很方便地处理这种情况。
import numpy as np

# 创建一个包含NaN的3D数组
arr = np.random.rand(3, 4, 5)
arr[np.random.choice([True, False], size=arr.shape)] = np.nan

# 替换NaN值
result = np.where(np.isnan(arr), 0, arr)
print("numpyarray.com - Array with NaN values replaced:")
print(result.shape)
Output:

这个例子展示了如何使用where函数来处理包含NaN值的3D数组。我们首先创建了一个随机的3D数组,然后随机地将一些元素设置为NaN。最后,我们使用where函数将所有NaN值替换为0。
6. 实际应用案例
6.1 图像处理
在图像处理中,where函数可以用于图像分割或颜色调整。
import numpy as np

# 创建一个模拟RGB图像的3D数组
image = np.random.randint(0, 256, size=(100, 100, 3))

# 将亮度大于128的像素变为白色,其他变为黑色
threshold = 128
binary_image = np.where(np.mean(image, axis=2) > threshold, 255, 0)
print("numpyarray.com - Binary image shape:")
print(binary_image.shape)
Output:
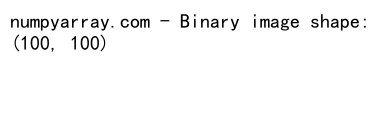
这个例子展示了如何使用where函数进行简单的图像二值化处理。我们首先创建了一个模拟的RGB图像,然后根据像素的平均亮度将其转换为二值图像。
6.2 金融数据分析
在金融数据分析中,where函数可以用于处理时间序列数据。
import numpy as np

# 创建一个模拟股票价格的3D数组(多只股票,多天,开高低收)
stock_prices = np.random.uniform(10, 100, size=(5, 30, 4))

# 计算每只股票每天的涨跌幅
daily_returns = np.where(stock_prices[:, 1:, 3] > stock_prices[:, :-1, 3],
                         (stock_prices[:, 1:, 3] - stock_prices[:, :-1, 3]) / stock_prices[:, :-1, 3],
                         (stock_prices[:, 1:, 3] - stock_prices[:, :-1, 3]) / stock_prices[:, :-1, 3])
print("numpyarray.com - Daily returns shape:")
print(daily_returns.shape)
Output:
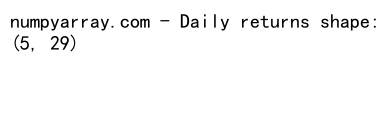
这个例子展示了如何使用where函数来计算股票的日收益率。我们创建了一个3D数组来模拟多只股票多天的价格数据(开盘价、最高价、最低价、收盘价),然后使用where函数计算每天的涨跌幅。
6.3 气象数据分析
在气象数据分析中,where函数可以用于处理大量的多维数据。
import numpy as np

# 创建一个模拟气温数据的3D数组(经度、纬度、时间)
temperatures = np.random.uniform(-10, 40, size=(180, 90, 365))

# 计算极端温度事件的发生次数
extreme_hot = np.where(temperatures > 35, 1, 0)
extreme_cold = np.where(temperatures < -5, 1, 0)
extreme_events = np.sum(extreme_hot + extreme_cold, axis=2)
print("numpyarray.com - Extreme events count shape:")
print(extreme_events.shape)
Output:

这个例子展示了如何使用where函数来分析气象数据。我们创建了一个3D数组来模拟一年内不同地理位置的气温数据,然后使用where函数来识别极端温度事件(高于35度或低于-5度),并计算每个位置发生极端事件的总次数。
7. 注意事项和最佳实践
7.1 内存使用
当处理大型3D数组时,要注意where函数可能会创建新的数组,这可能会导致内存使用量增加。在这种情况下,可以考虑使用where函数的out参数来就地修改数组。
import numpy as np

# 创建一个大的3D数组
arr = np.random.randint(0, 100, size=(1000, 1000, 10))

# 使用out参数就地修改数组
np.where(arr > 50, 100, arr, out=arr)
print("numpyarray.com - In-place modified array shape:")
print(arr.shape)
这个例子展示了如何使用where函数的out参数来就地修改大型3D数组,避免创建新的数组,从而节省内存。
7.2 性能考虑
对于非常大的3D数组,where函数的执行可能会比较慢。在这种情况下,可以考虑使用NumPy的布尔索引或其他优化技术。
import numpy as np

# 创建一个大的3D数组
arr = np.random.randint(0, 100, size=(1000, 1000, 10))

# 使用布尔索引
mask = arr > 50
arr[mask] = 100
print("numpyarray.com - Array modified with boolean indexing:")
print(arr.shape)
Output:

这个例子展示了如何使用布尔索引来替代where函数,这在处理大型3D数组时可能会更快。
7.3 可读性和维护性
虽然where函数非常强大,但过度使用嵌套的where函数可能会降低代码的可读性。在复杂的条件下,考虑将逻辑拆分为多个步骤或使用辅助函数。
import numpy as np

def classify_temperature(temp):
    if temp < 0:
        return 'Cold'
    elif temp < 20:
        return 'Mild'
    else:
        return 'Hot'

# 创建一个3D温度数组
temperatures = np.random.uniform(-10, 40, size=(3, 4, 5))

# 使用numpy的vectorize函数将自定义函数应用到数组
vfunc = np.vectorize(classify_temperature)
result = vfunc(temperatures)
print("numpyarray.com - Classified temperatures:")
print(result.shape)
Output:

这个例子展示了如何使用自定义函数和NumPy的vectorize函数来替代复杂的嵌套where函数,提高代码的可读性和维护性。
8. 总结
NumPy的where函数是一个强大而灵活的工具,特别适合处理3D数组。它可以用于条件筛选、元素替换、数据清洗、特征工程等多种场景。通过本文的详细介绍和丰富的示例,我们深入探讨了where函数在3D数组中的应用,包括基本用法、高级技巧、性能优化以及实际应用案例。
在使用where函数时,需要注意内存使用和性能问题,特别是在处理大型3D数组时。同时,为了保持代码的可读性和维护性,应当合理使用where函数,必要时将复杂逻辑拆分或使用辅助函数。
掌握where函数的使用技巧,将极大地提高您在处理多维数组数据时的效率和灵活性。无论是在科学计算、数据分析还是机器学习领域,where函数都是一个不可或缺的工具。通过不断实践和探索,您将能够更好地利用这个强大的函数来解决各种复杂的数据处理问题。
 极客笔记
极客笔记