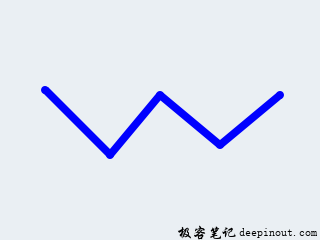
线(lv_line)Line对象能够在一组点之间绘制直线。
零件和样式
生产线只有一个主要部分,称为 LV_LABEL_PART_MAIN 。它使用所有线型属性。
用法
设置点
这些点必须存储在 lv_point_t 数组中,并通过 lv_line_set_points(lines, point_array, point_cnt) 函数传递给对象。
自动大小
可以根据其点自动设置线对象的大小。可以使用 lv_line_set_auto_size(line, true) 函数启用它。如果启用,则在设置点后,将根据点之间的最大x和y坐标更改对象的宽度和高度。默认情况下,自动尺寸已启用。
倒y
通过默认,y==0点位于对象的顶部。在某些情况下可能是直觉的,因此可以使用 lv_line_set_y_invert(line, true) 反转y坐标。在这种情况下,y == 0将是对象的底部。默认情况下,禁用y反转。
事件
仅支持 通用事件 。
了解有关 事件 的更多内容。
按键处理
对象类型不处理任何键。
了解有关 按键 的更多内容。
范例
简单线

简单线
上述效果的示例代码:
#include "../../../lv_examples.h"
#if LV_USE_LINE

void lv_ex_line_1(void)
{
    /*Create an array for the points of the line*/
    static lv_point_t line_points[] = { {5, 5}, {70, 70}, {120, 10}, {180, 60}, {240, 10} };

    /*Create style*/
    static lv_style_t style_line;
    lv_style_init(&style_line);
    lv_style_set_line_width(&style_line, LV_STATE_DEFAULT, 8);
    lv_style_set_line_color(&style_line, LV_STATE_DEFAULT, LV_COLOR_BLUE);
    lv_style_set_line_rounded(&style_line, LV_STATE_DEFAULT, true);

    /*Create a line and apply the new style*/
    lv_obj_t * line1;
    line1 = lv_line_create(lv_scr_act(), NULL);
    lv_line_set_points(line1, line_points, 5);     /*Set the points*/
    lv_obj_add_style(line1, LV_LINE_PART_MAIN, &style_line);     /*Set the points*/
    lv_obj_align(line1, NULL, LV_ALIGN_CENTER, 0, 0);
}

#endif
 极客笔记
极客笔记