Python 使用Pillow生成方形或圆形缩略图
缩略图在各种应用中常用于以紧凑且视觉上吸引人的方式展示照片。它们使用户能够快速轻松地浏览大量照片,因为它们是紧凑的、压缩的图像,忠实地呈现原始图像。
Python在图像处理和处理方面非常受欢迎。一个众所周知的用于处理图像的Python库是Python Imaging Library(PIL),现在称为Pillow,它提供了大量的工具来执行各种图像处理操作,如裁剪、调整大小和应用滤镜。
方法
- 生成方形缩略图
-
生成圆形缩略图
-
使用ImageOps.fit()生成圆形缩略图
先决条件
在继续之前,我们需要安装一些Python库,我们将使用以下命令安装Pillow和NumPy库:
pip install pillow
pip install numpy
在查看生成正方形或圆形缩略图的方法之前,首先需要知道如何在Python中使用Pillow库打开缩略图。让我们来看一个例子:
示例
# importing the required libraries
from PIL import Image

# opening the image
image=Image.open('spiderman.jpg')

# resize image
img.thumbnail((width, height))

# save thumbnail image
img.save('thumbnail_image.jpg')

# showing the image using show() function
image.show()
输出
我们使用上面的代码成功地打开了缩略图图像。
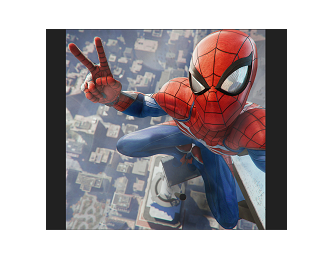
方法1:生成一个正方形缩略图
步骤
- 从Pillow库中导入所需模块:Image。
-
使用Image.open()方法加载原始图像。
-
使用size属性确定原始图像的尺寸。
-
通过将宽度除以高度,确定原始图像的宽高比。
-
将较小的那个宽度或高度作为正方形的边长,确定缩略图图像的尺寸。
-
计算要裁剪的原始图像区域的尺寸。如果原始图像的宽高比大于1(即宽度大于高度),则裁剪图像的顶部和底部,使其具有与缩略图的宽度相同的高度。如果宽高比小于1(即高度大于宽度),则裁剪图像的两侧,使其具有与缩略图的高度相同的宽度。
-
使用crop()方法裁剪原始图像的一部分。
-
使用thumbnail()方法将裁剪后的图像调整为所需的尺寸。
-
使用save()方法保存正方形缩略图像。
步骤1:- 从PIL(Python Imaging Library)包中导入Image模块。
from PIL import Image
步骤2:- 打开原始图像文件。
img = Image.open('spiderman.jpg')
步骤3:调整图像大小,同时保持纵横比。
img.thumbnail((2000, 2000))
步骤4:确定调整大小后的图像尺寸。
width, height = img.size
步骤5:计算裁剪区域的坐标以实现正方形形状,同时保留原始图像的中心。如果原始图像的宽度大于其高度,则裁剪图像的左侧和右侧。否则,裁剪图像的顶部和底部。crop()方法接受要裁剪的区域的左侧、顶部、右侧和底部坐标,因此我们可以计算出这些值。
if width > height:
   left = (width - height) / 2
   right = (width + height) / 2
   top = 0
   bottom = height
else:
   left = 0
   right = width
   top = (height - width) / 2
   bottom = (height + width) / 2
步骤6:使用上述计算得到的坐标裁剪图像,使其达到正方形形状。
img = img.crop((left, top, right, bottom))
步骤7:将正方形缩略图保存到文件中。
img.save('square_thumbnail.jpg')
步骤8:使用show()方法显示图像。
img.show()
示例
# importing the required libraries
from PIL import Image

# open image file
img = Image.open('spiderman.jpg')

# resize image
img.thumbnail((2000, 2000))

# crop image to square shape
width, height = img.size
if width > height:
   left = (width - height) / 2
   right = (width + height) / 2
   top = 0
   bottom = height
else:
   left = 0
   right = width
   top = (height - width) / 2
   bottom = (height + width) / 2
img = img.crop((left, top, right, bottom))

# save square thumbnail image
img.save('square_thumbnail.jpg')

# showing the image using show() function
img.show()
输出

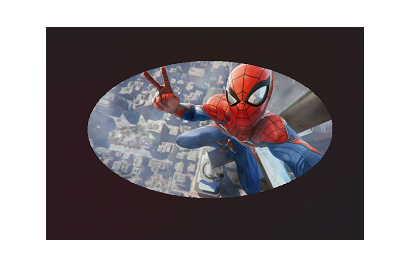
方法2- 生成圆形缩略图
在这个方法中,我们将学习如何创建一个圆形缩略图,我们可以先调整原始图像的大小,然后创建一个与缩略图大小相同的圆形掩膜,并将调整后的图像粘贴到掩膜上。为此,我们将使用以下算法:
- 从Pillow库导入必要的模块: Image 和 ImageDraw 。
-
使用 Image.open() 方法加载原始图像。
-
使用size属性确定原始图像的尺寸。
-
使用 ImageDraw.Draw() 方法从掩膜图像创建一个新的对象。
-
使用 draw.ellipse() 方法在掩膜图像上绘制一个椭圆。将图像居中放置在椭圆的中心。
-
使用 Image.new() 方法创建一个具有透明背景的与原始图像尺寸相同的新图像。
-
使用 paste() 方法将原始图像粘贴到新图像上,给新图像添加圆形边缘。
-
使用 save() 方法保存正方形缩略图。
步骤1:从Pillow库中导入必要的模块:Image和ImageDraw。
from PIL import Image, ImageDraw
步骤2:使用open()方法打开图像,并将其保存到一个变量中。
img = Image.open('spiderman.jpg')
步骤3:使用thumbnail()方法调整图片的大小。
img.thumbnail((2000, 2000))
步骤4:使用 Image.new() 方法创建一张与原始图片具有相同尺寸的新的灰度图片。
mask = Image.new('L', img.size, 0)
步骤5:- 使用 ImageDraw.Draw() 方法从掩码图像创建一个新的对象。
draw = ImageDraw.Draw(mask)
步骤6:使用draw.ellipse()方法在掩模图像上绘制一个椭圆。椭圆应位于图像的中心位置。
draw.ellipse((0, 0, img.size[0], img.size[1]), fill=255)
步骤7:使用Image.new()方法从原始图像生成新图像。
result = Image.new('RGBA', img.size, (255, 255, 255, 0))
步骤8:使用paste()方法将原始图像粘贴到新图像上。使用mask参数作为透明遮罩,使图像的边缘呈圆形。
result.paste(img, (0, 0), mask)
步骤9:使用save()方法将生成的图片保存为PNG文件。
result.save('circular_thumbnail.png')
步骤10:使用show()方法显示结果图像。
result.show()
示例
# importing the required libraries
from PIL import Image, ImageDraw

# open image file
img = Image.open('sipderman.jpg')

# resize image
img.thumbnail((2000, 2000))

# create circular mask
mask = Image.new('L', img.size, 0)
draw = ImageDraw.Draw(mask)
draw.ellipse((0, 0, img.size[0], img.size[1]), fill=255)

# apply mask to image
result = Image.new('RGBA', img.size, (255, 255, 255, 0))
result.paste(img, (0, 0), mask)

# save circular thumbnail image
result.save('circular_thumbnail.png')

# showing the image using show() function
result.show()
输出

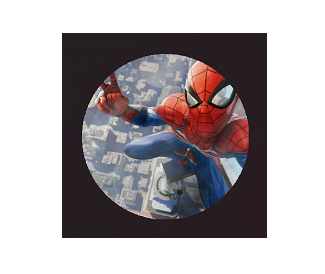
方法3:使用ImageOps.fit()生成圆形缩略图
在这个方法中,我们将学习如何使用ImageOps创建一个圆形缩略图。为此,我们将使用以下算法:
- 从Pillow库中导入必要的模块:Image、ImageOps和ImageDraw。
-
使用Image.open()方法加载原始图像。
-
使用ImageOps.fit()方法调整图像到所需的大小。
-
使用Image.new()方法创建一个新的图像作为圆形蒙版。将新图像的模式设置为’L’,即灰度。
-
创建一个新的ImageDraw.Draw()对象,并使用draw.ellipse()方法在圆形蒙版上绘制椭圆。
-
使用img.putalpha()方法将圆形蒙版应用于调整大小后的图像。该方法将图像的alpha通道设置为蒙版图像,使椭圆外的所有像素完全透明。
-
使用save()方法保存正方形缩略图。
步骤1:导入必要的库
from PIL import Image, ImageOps, ImageDraw
步骤2:- 从文件路径中打开图像文件
img = Image.open('spiderman.jpg')
步骤3:使用ImageOps.fit()方法调整图像大小。
img = ImageOps.fit(img, (300, 300))
步骤4:创建一个圆形的遮罩,大小由你选择,并填充黑色
mask = Image.new('L', (300, 300), 0)
步骤5:- 为遮罩创建一个绘制对象,并绘制一个白色的椭圆来填充圆形
draw = ImageDraw.Draw(mask)
draw.ellipse((0, 0, 300, 300), fill=255)
步骤6:使用putalpha()方法将掩膜应用于原始图像,根据掩膜设定每个像素的alpha通道。
img.putalpha(mask)
步骤7:使用save()方法将生成的图像保存为PNG文件。
img.save('circular_thumbnail.png')
步骤8:使用show()方法显示结果图像。
img.show()
示例
# importing the required libraries
from PIL import Image, ImageOps, ImageDraw

# open image file
img = Image.open('spiderman.jpg')

# resize image to a square
img = ImageOps.fit(img, (300, 300))

# create circular mask
mask = Image.new('L', (300, 300), 0)
draw = ImageDraw.Draw(mask)
draw.ellipse((0, 0, 300, 300), fill=255)

# apply mask to image
img.putalpha(mask)

# save circular thumbnail image
img.save('circular_thumbnail.png')

# showing the image using show() function
img.show()
输出

结论
在本文中,我们介绍了使用 Pillow 创建正方形或圆形缩略图的三种不同方法。每种策略都有优缺点,最佳策略将取决于您的应用程序的特定需求。通过使用这些策略,您可以快速为您的网络应用程序、社交网络平台和相册创建视觉上吸引人的缩略图照片。
 极客笔记
极客笔记