使用Python创建和更新PowerPoint演示文稿
在以下教程中,我们将了解如何使用Python编程语言创建和更新PowerPoint演示文稿。为了完成任务,我们将使用 python-pptx 库。
那么,让我们开始吧。
了解python-pptx库
python-pptx 是一个用于创建和编辑PowerPoint (.pptx)文件的Python库。此库不兼容Microsoft Office 2003及更早版本。我们可以使用此库插入形状、段落、文本和幻灯片,并进行许多其他活动。
一个典型的用法是根据数据库内容生成定制的PowerPoint演示文稿,用户可以通过在Web应用程序中点击链接进行下载。一些开发人员利用此库自动化生成工程状态报告的演示文稿,并根据工作管理系统中保存的信息进行生成。我们还可以使用它批量更新演示文稿库或自动化生成一个或两个幻灯片,如果手动完成将会很繁琐。
python-pptx库的一些特点
python-pptx库具有以下特点,还有很多功能在路线图上:
- 此库可以往返任何Open XML演示文稿(.pptx文件),包括其所有元素。
- 此库还可以添加幻灯片。
- 此库还可以填充文本占位符。例如,可以创建一个带有项目符号的幻灯片。
- 此库可以向幻灯片插入文本框,并帮助操作文本字体大小和加粗。
- 我们可以使用它向幻灯片添加表格。
- 此库允许我们向幻灯片插入自动形状(例如,多边形、流程图形等等)。
- 我们甚至可以添加和操作柱状图、折线图和饼图。
- 使用此库,我们还可以访问和更改核心文档属性,如标题和主题。
如何安装python-pptx库
为了安装Python模块,我们需要一个名为 pip 的框架,用于管理从可信公共存储库安装所需模块的软件包。安装了 pip 之后,可以使用以下命令从Windows命令提示符(CMD)或终端安装 python-pptx 模块:
语法:
$ pip install python-pptx
验证安装
安装模块后,我们可以通过创建一个空的Python程序文件并编写以下 import 语句来验证它:
文件:verify.py
import python-pptx
现在,保存上述文件,并在终端中使用以下命令执行它:
语法:
$ python verify.py
如果上述的Python程序文件没有返回任何错误,那么模块已经正确安装。然而,在引发异常的情况下,尝试重新安装模块,并且推荐参考模块的官方文档。
现在让我们通过示例来了解python-pptx库的工作原理。
创建一个带有标题和副标题的新的PowerPoint文件
我们可以使用pptx库的Presentation类创建一个新的PowerPoint文件。然后,我们可以使用slide_layouts属性创建一个幻灯片布局,并使用add_slide()方法创建一个幻灯片对象添加到演示文件中。
我们可以使用title和placeholder属性,并在text属性下指定文本来为幻灯片添加标题和副标题。
让我们考虑以下代码片段来演示相同的内容:
示例:
# importing the Presentation class from the pptx library
from pptx import Presentation

# creating the object of the Presentation class
myPPT = Presentation()

# creating the slide layout
firstLayout = myPPT.slide_layouts[0]

# creating the slide object to add in PPT file
mySlide = myPPT.slides.add_slide(firstLayout)

# adding the title in the slide
myTitle = mySlide.shapes.title
# adding the subtitle in the slide
mySubtitle = mySlide.shapes.placeholders[1]

# inserting text in the title and subtitle
myTitle.text = "My First Presentation"
mySubtitle.text = "Using the python-pptx library"

# saving the PPT file
myPPT.save('myPPT.pptx')
输出:

说明:
在上面的代码片段中,我们从pptx库中导入了Presentation类。然后我们创建了Presentation类的一个对象。然后我们使用slide_layouts[n]属性创建了第一张幻灯片的布局,其中n是PPT文件中幻灯片的索引。然后我们使用add_slide()方法创建了一个幻灯片对象以添加到PPT文件中。然后我们使用title和placeholders[n]属性在幻灯片中添加了标题和副标题。最后,我们使用text属性添加了标题和副标题的文本,并保存了PPT文件。
创建一个项目符号幻灯片
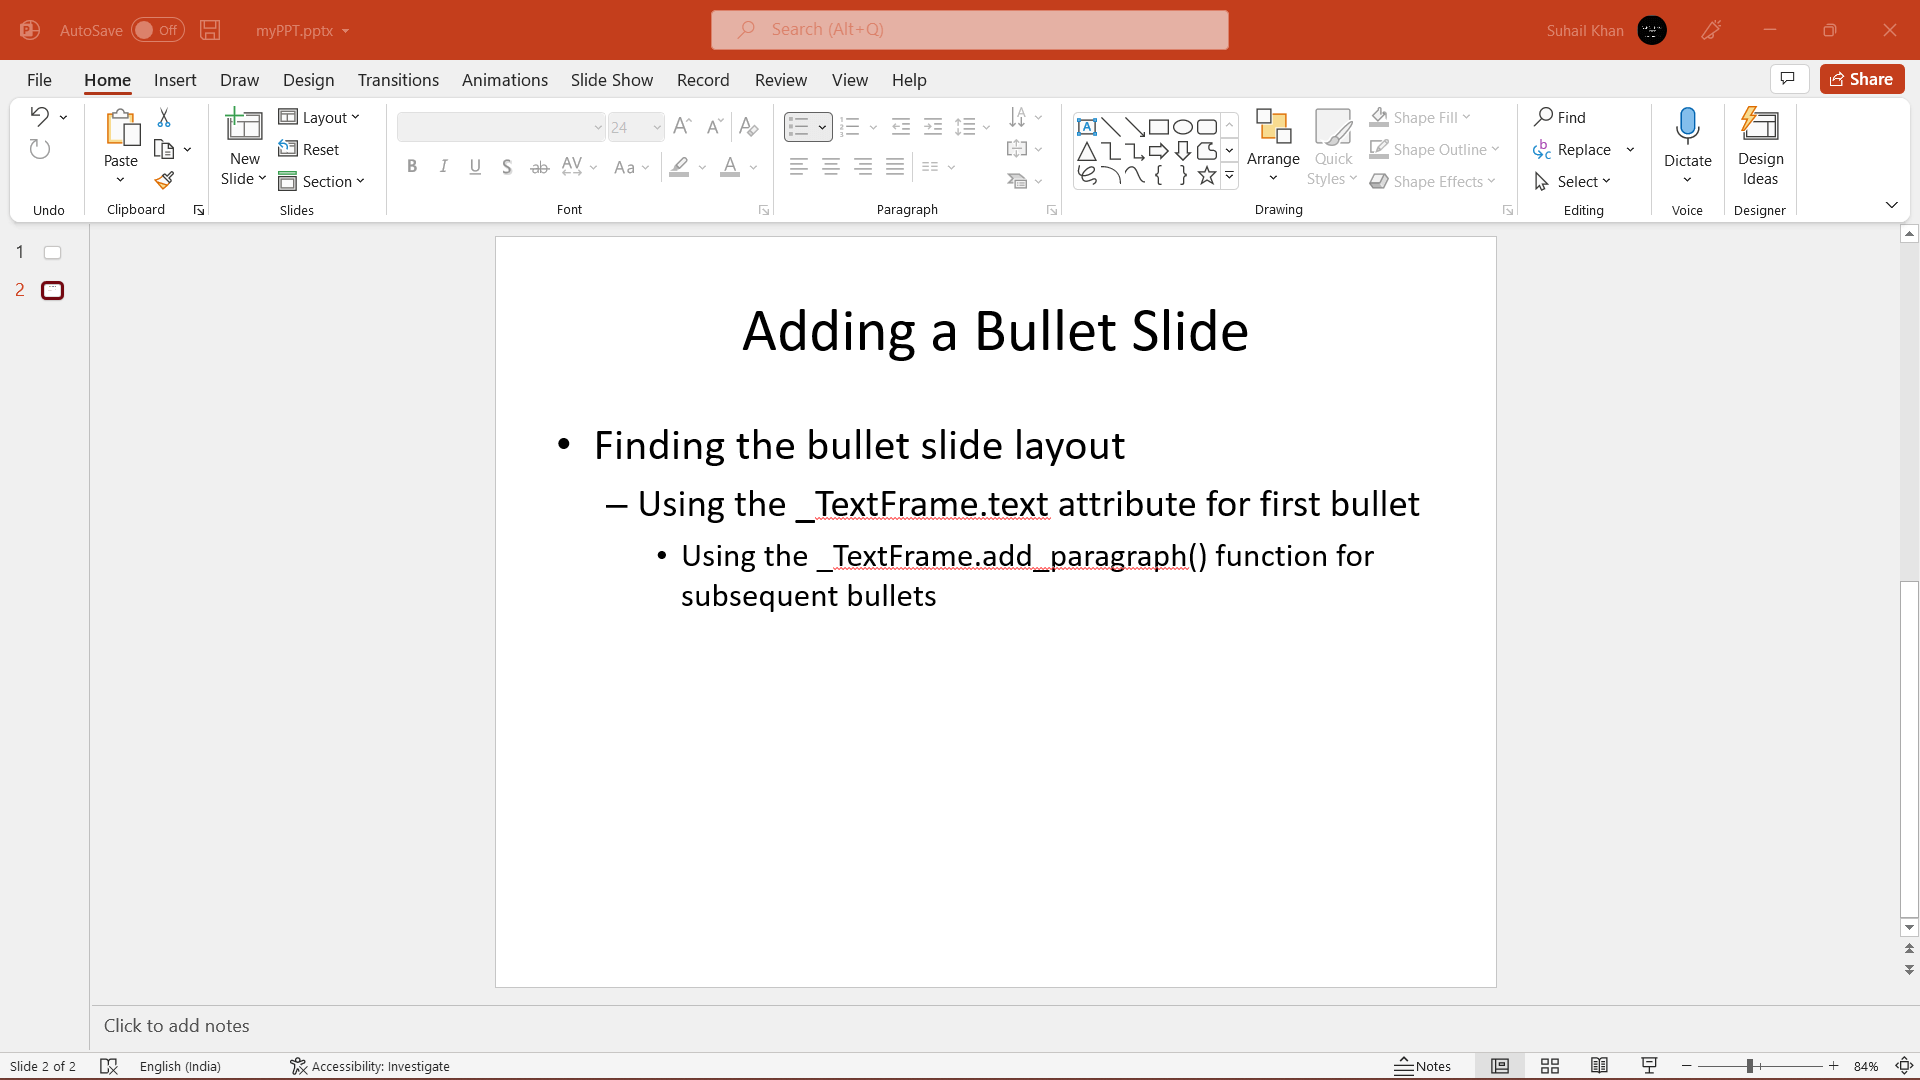
我们也可以使用python-pptx库的Presentation类创建一个项目符号幻灯片。
让我们看下面的示例来演示相同的情况:
示例:
# importing the Presentation class from the pptx library
from pptx import Presentation

# creating the object of the Presentation class
myPPT = Presentation()

# creating the slide layout
bulletLayout = myPPT.slide_layouts[1]

# creating a slide object to add in PPT file
secondSlide = myPPT.slides.add_slide(bulletLayout)
# accessing the attributes of shapes
myShapes = secondSlide.shapes

# adding the title and subtitle to the slide
titleShape = myShapes.title
bodyShape = myShapes.placeholders[1]

# adding the text to the title
titleShape.text = 'Adding a Bullet Slide'

# using the text_frame attribute
tFrame = bodyShape.text_frame
tFrame.text = 'Finding the bullet slide layout'

# using the add_paragraph() function
para = tFrame.add_paragraph()
para.text = 'Using the _TextFrame.text attribute for first bullet'
# specifying the level
para.level = 1

# using the add_paragraph() function
para = tFrame.add_paragraph()
para.text = 'Using the _TextFrame.add_paragraph() function for subsequent bullets'
# specifying the level
para.level = 2

# saving the PPT file
myPPT.save('myPPT.pptx')
输出:

解释:
在上面的代码片段中,我们从pptx库中导入了Presentation类。然后我们创建了Presentation类的一个对象。然后我们使用slide_layouts[n]属性为第一个幻灯片创建了布局,其中n是PPT文件中幻灯片的索引。然后我们使用add_slide()方法创建一个幻灯片对象并添加到PPT文件中。然后我们使用title和placeholders[n]属性为幻灯片添加了标题和副标题。然后我们使用text属性给标题和副标题添加了文本。然后我们使用text_frame属性为幻灯片添加了文本框。然后我们使用add_paragraph()方法向文本框中插入了一个新段落,并通过level属性指定了段落的级别。最后,我们保存了PPT文件。
并非所有的形状都可以包含文本,但是那些可以包含文本的形状至少有一个段落,即使该段落为空,形状内也没有可见文本。_BaseShape.has_text_frame属性可以判断一个形状是否可以包含文本(所有形状都是_BaseShape类的子类)。当_BaseShape.has_text_frame的值为True时,_BaseShape.text_frame.paragraphs[0]返回第一个段落。我们可以使用text_frame.paragraphs[0].text属性设置第一个段落的文本。作为一种快捷方式,该库提供了一些可写属性(例如_BaseShape.text和_TextFrame.text)来完成同样的事情。注意,这两个调用会在设置文本之前删除形状的所有段落,除了第一个段落。
在PowerPoint演示文稿中添加文本框
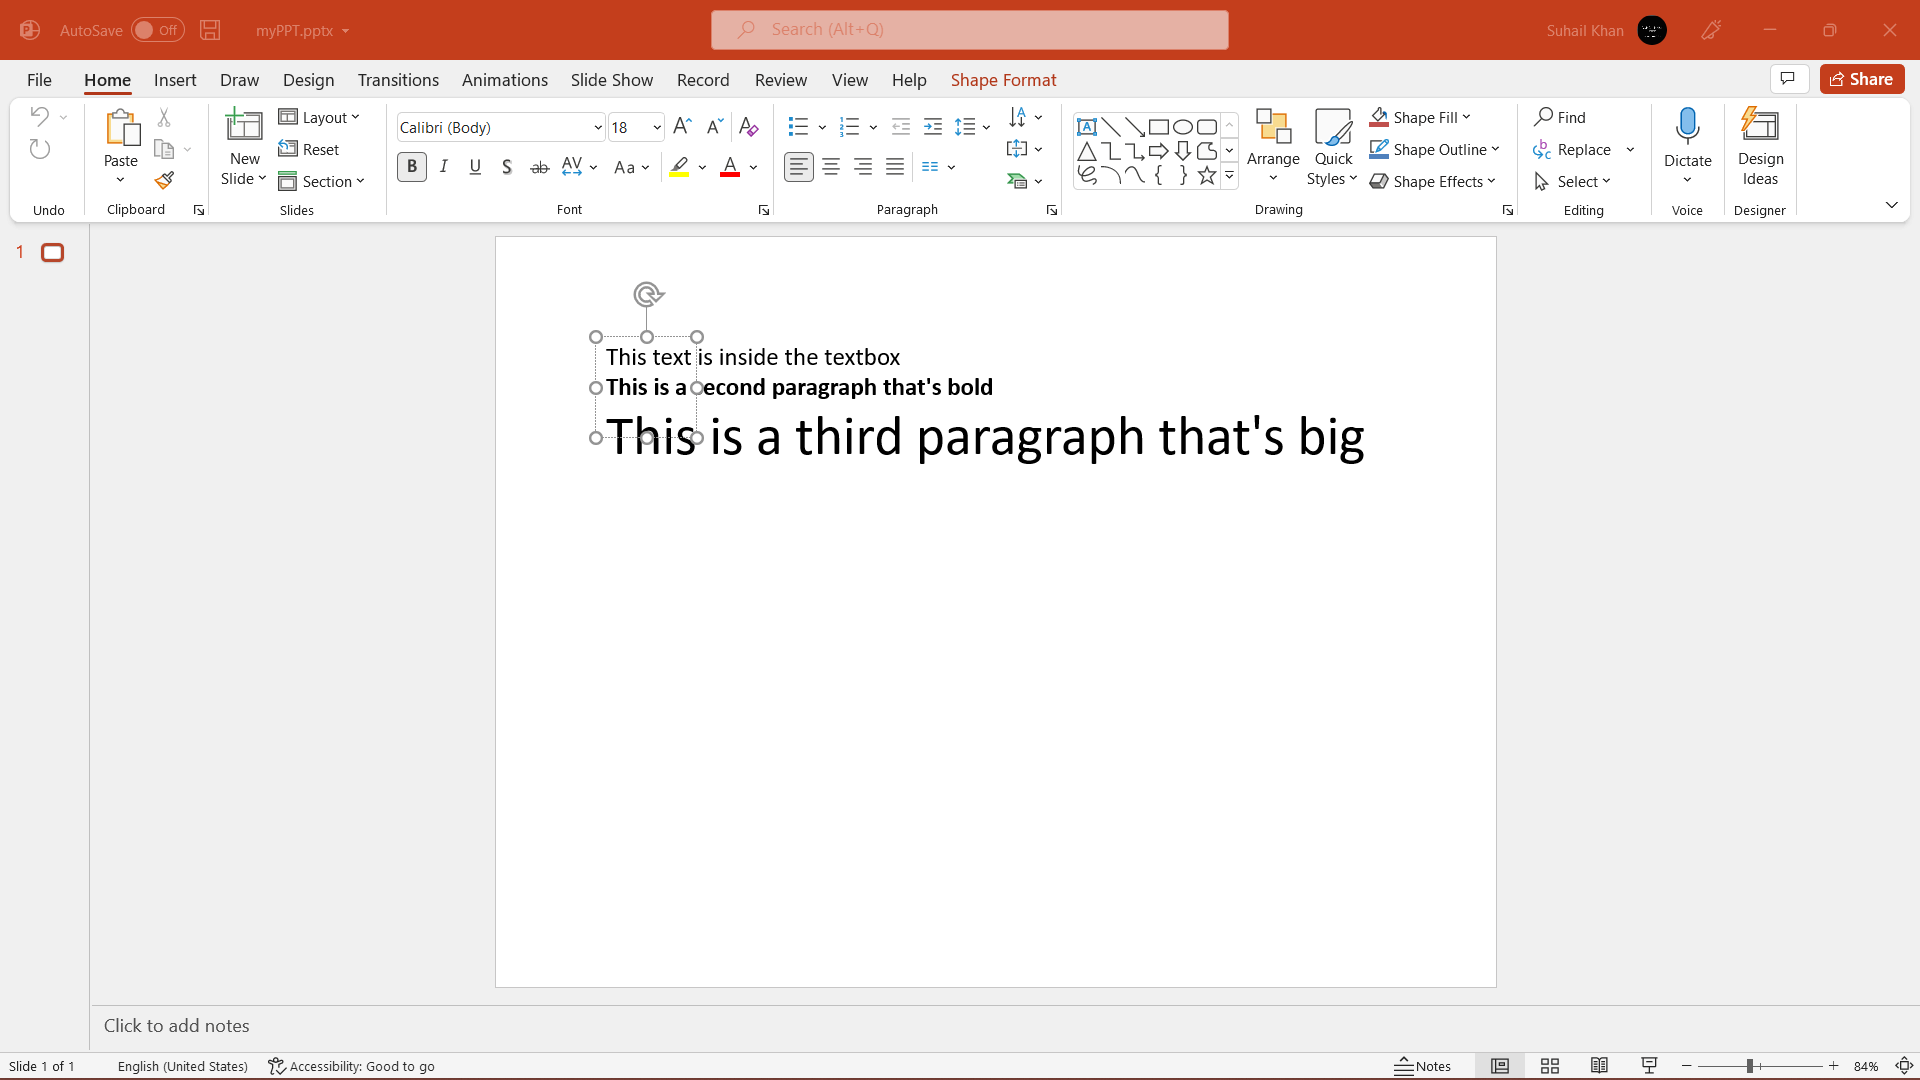
我们还可以使用add_textbox()方法在幻灯片中添加文本框。该方法接受名为left、top、width、height的多个参数。
让我们考虑以下示例来演示相同的内容:
示例:
# importing the Presentation class from the pptx library
from pptx import Presentation
# importing Inches and Pt from the util class of the pptx library
from pptx.util import Inches, Pt

# creating an object of Presentation class
myPPT = Presentation()

# creating the slide layout and adding a new slide
slideLayout = myPPT.slide_layouts[6]
mySlide = myPPT.slides.add_slide(slideLayout)

# specifying the values of the parameters for the add_textbox() method
left = top = width = height = Inches(1)
# using the add_textbox() method
textBox = mySlide.shapes.add_textbox(left, top, width, height)
# creating a text frame
textFrame = textBox.text_frame

# inserting text to the text frame
textFrame.text = "This text is inside the textbox"

# adding paragraph to the text frame
para = textFrame.add_paragraph()
para.text = "This is a second paragraph that's bold"
# making the paragraph bold
para.font.bold = True

# adding another paragraph to the text frame
para = textFrame.add_paragraph()
para.text = "This is a third paragraph that's big"
# specifying the font size of the paragraph
para.font.size = Pt(40)

# saving the PPT file
myPPT.save('myPPT.pptx')
输出:

解释:
在上面的代码片段中,我们从库中导入所需的内容并创建了一个幻灯片。然后,我们指定了参数的值 add_textbox() 方法,并使用它创建了一个文本框。然后,我们创建了一个文本框架。我们向文本框架添加了一些段落,并包含了一些独特的属性,比如使段落加粗和增大字体大小。最后,我们保存了演示文件。
将图像添加到PowerPoint文件中
我们可以使用 add_picture() 方法将图像插入到PowerPoint演示文件中。
让我们考虑以下示例来演示相同的问题:
实例:
# importing the Presentation class from the pptx library
from pptx import Presentation
# importing Inches from the util class of the pptx library
from pptx.util import Inches

# defining the path of the image file
imgPath = "opmImage.jpg"

# creating an object of Presentation class
myPPT = Presentation()

# creating the slide layout and adding a new slide
slideLayout = myPPT.slide_layouts[6]
mySlide = myPPT.slides.add_slide(slideLayout)

# specifying the values of the parameters for the add_picture() method
left = top = Inches(1)
# using the add_picture() method
myImage = mySlide.shapes.add_picture(imgPath, left, top)

# saving the PPT file
myPPT.save('myPPT.pptx')
输出:

解释:
在上述的代码片段中,我们导入了库中所需的内容并定义了图像文件的路径。然后,我们实例化了 Presentation 类,并创建了幻灯片的布局。一旦我们完成了幻灯片对象的创建,我们就定义了以英寸为单位的左侧和顶部的测量值。然后,我们使用了 add_picture() 方法,该方法接受多个参数,包括图像文件路径、左侧和顶部的值。最后,我们保存了演示文稿。
向PowerPoint文件添加表格
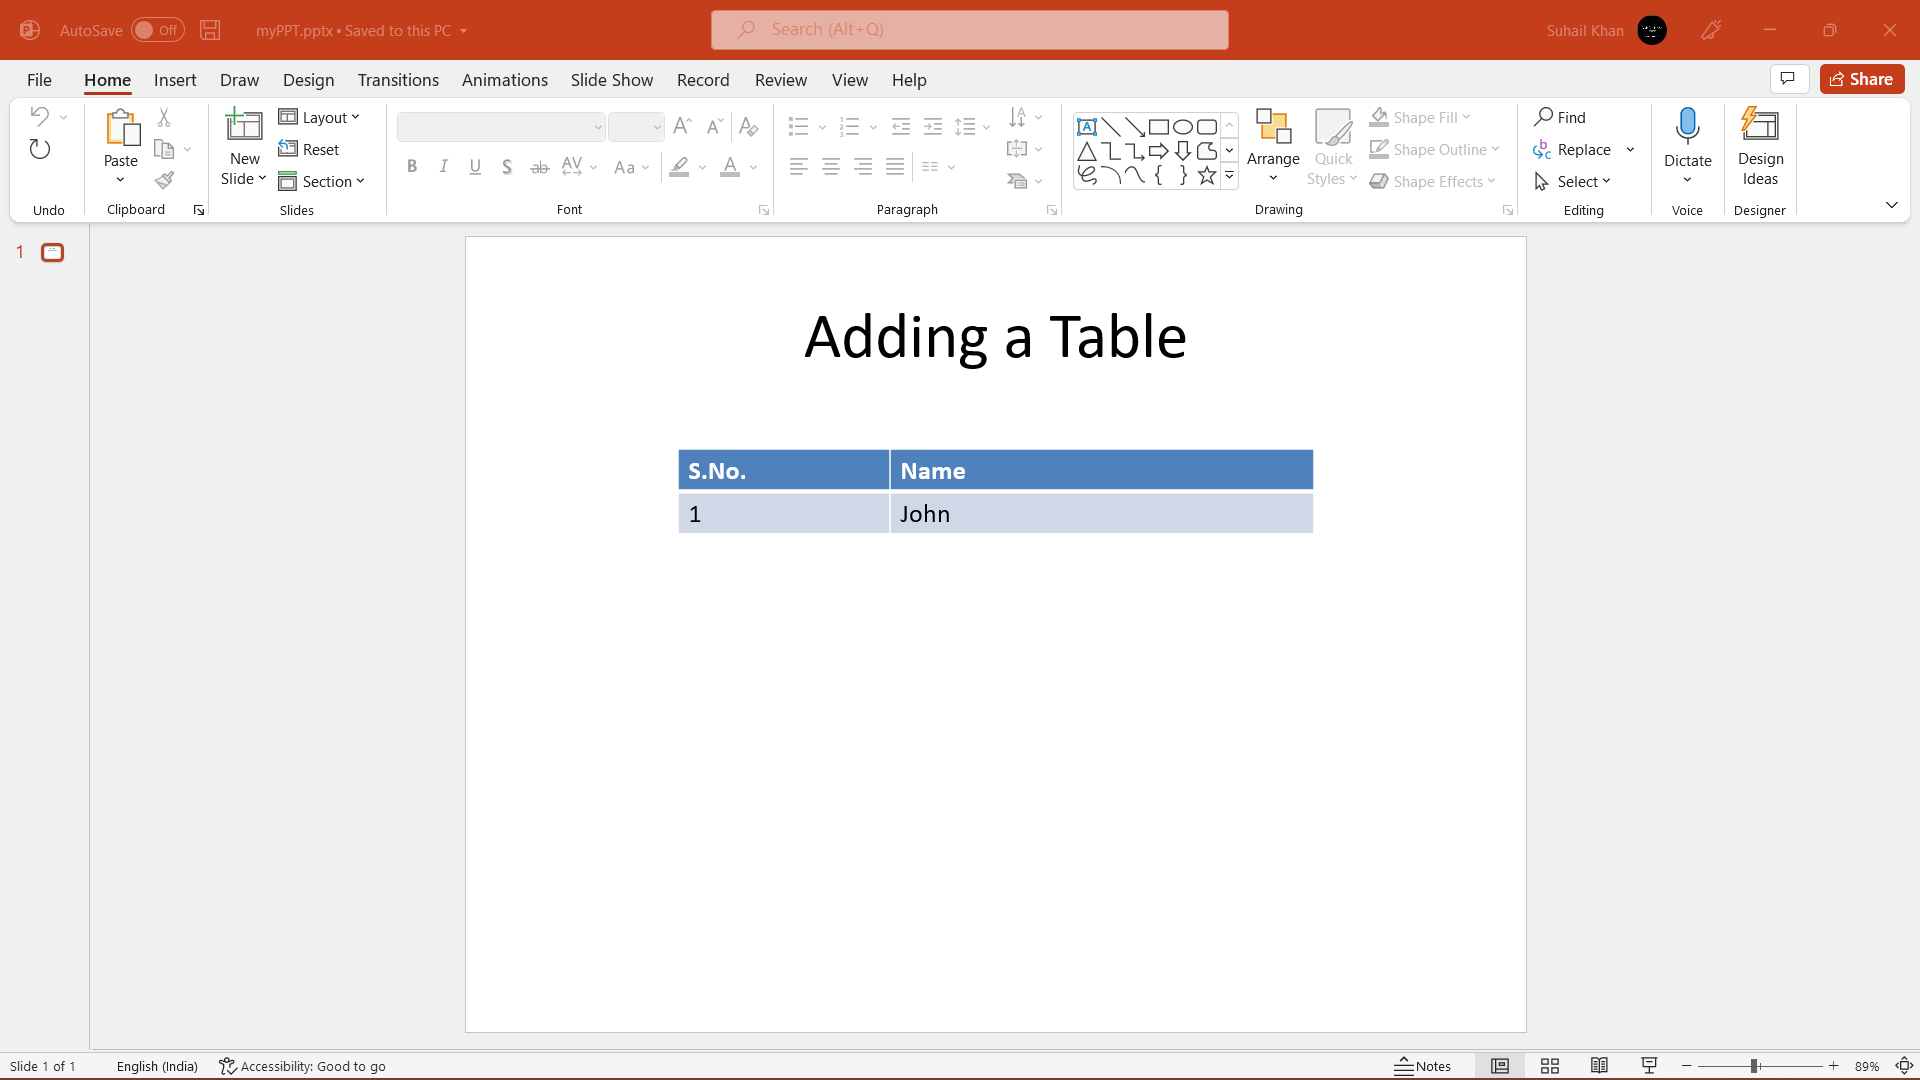
python-pptx 库的 Presentation 类还提供了一个名为 add_table() 的方法,允许我们向PowerPoint文件中添加表格。
让我们考虑下面的代码片段,演示了同样的功能:
示例:
# importing the required things from the library
from pptx import Presentation
from pptx.util import Inches

# creating the slide
myPPT = Presentation()
slideLayout = myPPT.slide_layouts[5]
mySlide = myPPT.slides.add_slide(slideLayout)
shapes = mySlide.shapes
shapes.title.text = 'Adding a Table'

# specifying the rows, columns, and other measurements
rows = cols = 2
left = top = Inches(2.0)
width = Inches(6.0)
height = Inches(0.8)

# using the add_table() method
myTable = shapes.add_table(rows, cols, left, top, width, height).table

# setting column widths
myTable.columns[0].width = Inches(2.0)
myTable.columns[1].width = Inches(4.0)

# writing column headings
myTable.cell(0, 0).text = 'S.No.'
myTable.cell(0, 1).text = 'Name'

# writing body cells
myTable.cell(1, 0).text = '1'
myTable.cell(1, 1).text = 'John'

# saving the PPT file
myPPT.save('myPPT.pptx')
输出:

说明:
在以上代码片段中,我们从库中导入了所需的内容并实例化了Presentation类。然后我们创建了幻灯片的布局和一个幻灯片对象。然后我们添加了幻灯片的标题。接着,我们指定了行和列以及左侧、顶部、宽度和高度的度量。我们将这些值用作add_table()方法的参数。然后我们设置了列宽、单元格的标题和正文。最后,我们保存了幻灯片文件。
在PowerPoint文件中添加形状
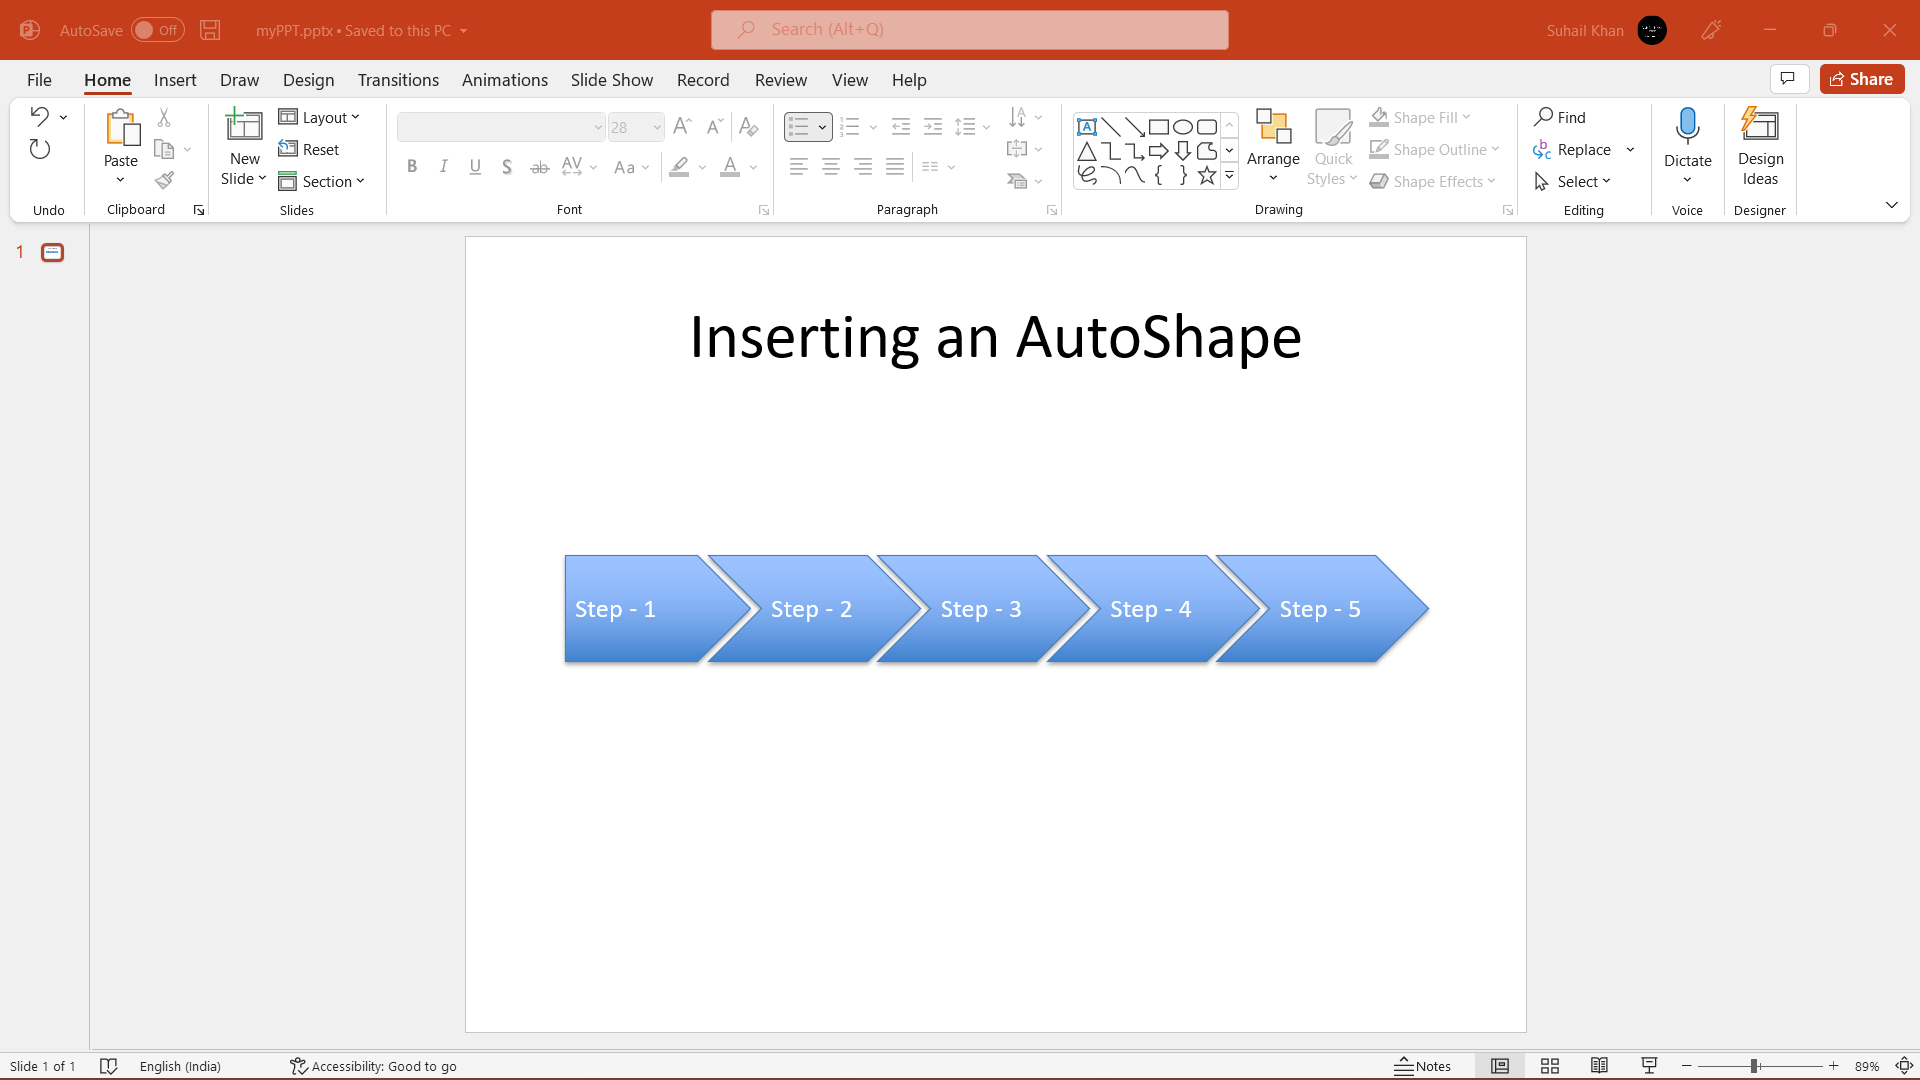
我们可以使用add_shape()方法来向PowerPoint演示文稿中添加形状。
让我们来看一下以下示例,演示相同的内容:
示例:
# importing the required things from the pptx library
from pptx import Presentation
from pptx.enum.shapes import MSO_SHAPE
from pptx.util import Inches

# creating a slide
myPPT = Presentation()
slideLayout = myPPT.slide_layouts[3]
mySlide = myPPT.slides.add_slide(slideLayout)
myShapes = mySlide.shapes
myShapes.title.text = 'Inserting an AutoShape'

# specifying the measurements
left = Inches(0.93)  # 0.93" centers this overall set of shapes
top = Inches(3.0)
width = Inches(1.75)
height = Inches(1.0)

# creating a shape
myShape = myShapes.add_shape(MSO_SHAPE.PENTAGON, left, top, width, height)
myShape.text = 'Step - 1'

# changing some values
left = left + width - Inches(0.4)
width = Inches(2.0)  # chevrons need more width for visual balance

# using the for-loop
for n in range(2, 6):
    # adding some more shapes
    myShape = myShapes.add_shape(MSO_SHAPE.CHEVRON, left, top, width, height)
    myShape.text = 'Step - %d' % n
    left = left + width - Inches(0.4)

# saving the presentation
myPPT.save('myPPT.pptx')
输出:

解释:
在上面的代码片段中,我们从库中导入了所需的内容,并实例化了 Presentation 类。然后我们创建了幻灯片的布局和幻灯片对象。我们随后添加了标题到幻灯片。然后我们定义了左边、顶部、宽度和高度的测量,并使用了 add_shape() 方法。该方法定义了代表可用自动形状(例如 MSO_SHAPE.PENTAGON, MSO_SHAPE.ROUNDED_RECT, MSO_SHAPE.CHEVRON 等等)以及测量作为参数的常量。然后我们向图像添加了一些文本。稍后,我们改变了左边和宽度的值,并使用 for 循环来创建更多的形状并向它们添加文本。最后,我们保存了PPT文件。
 极客笔记
极客笔记