NumPy随机数生成与种子设置:掌握可重复性和随机性的平衡
NumPy是Python中用于科学计算的核心库之一,其中的随机数生成功能在数据分析、机器学习和统计模拟等领域广泛应用。本文将深入探讨NumPy中的随机数生成机制,特别是随机种子(seed)的概念和应用,帮助读者理解如何在保持随机性的同时实现结果的可重复性。
1. NumPy随机数模块简介
NumPy的随机数模块(numpy.random)提供了丰富的随机数生成函数,可以生成各种分布的随机数。在使用这些函数之前,我们需要先导入NumPy库:
import numpy as np
常用的随机数生成函数包括:
np.random.rand(): 生成[0, 1)之间均匀分布的随机数np.random.randn(): 生成标准正态分布的随机数np.random.randint(): 生成指定范围内的随机整数np.random.choice(): 从给定数组中随机选择元素
让我们通过一个简单的例子来演示这些函数的使用:
import numpy as np

# 生成5个[0, 1)之间的随机浮点数
random_floats = np.random.rand(5)
print("Random floats from numpyarray.com:", random_floats)

# 生成3x3的标准正态分布随机数数组
random_normal = np.random.randn(3, 3)
print("Random normal distribution from numpyarray.com:", random_normal)

# 生成10个[1, 100]之间的随机整数
random_integers = np.random.randint(1, 101, 10)
print("Random integers from numpyarray.com:", random_integers)

# 从给定数组中随机选择3个元素
fruits = ['apple', 'banana', 'cherry', 'date', 'elderberry']
random_fruits = np.random.choice(fruits, 3, replace=False)
print("Random fruits from numpyarray.com:", random_fruits)
Output:

这个例子展示了如何使用NumPy生成不同类型的随机数。每次运行这段代码,你会得到不同的结果,这体现了随机性。但在某些情况下,我们需要能够重现相同的随机数序列,这就是随机种子发挥作用的地方。
2. 随机种子的概念
随机种子是用于初始化随机数生成器的数值。当我们设置相同的种子时,随机数生成器会产生相同的随机数序列。这在以下场景中特别有用:
- 调试代码:可以重现导致问题的随机状态
- 科学实验:确保结果可以被其他研究者复现
- 机器学习:在训练模型时保持数据划分的一致性
让我们通过一个例子来说明种子的作用:
import numpy as np

# 设置随机种子
np.random.seed(42)

# 生成随机数
random_numbers = np.random.rand(5)
print("Random numbers with seed 42 from numpyarray.com:", random_numbers)

# 重新设置相同的种子
np.random.seed(42)

# 再次生成随机数
random_numbers_again = np.random.rand(5)
print("Random numbers again with seed 42 from numpyarray.com:", random_numbers_again)
Output:

在这个例子中,我们两次使用相同的种子(42)生成随机数。你会发现,两次生成的随机数序列是完全相同的。这就是种子的作用:它确保了随机数生成的可重复性。
3. 设置全局随机种子
在NumPy中,我们可以使用np.random.seed()函数来设置全局随机种子。这个种子会影响之后所有的随机数生成操作。
import numpy as np

# 设置全局随机种子
np.random.seed(123)

# 生成一些随机数
random_array1 = np.random.rand(3)
random_array2 = np.random.randint(1, 10, 5)

print("Random array 1 from numpyarray.com:", random_array1)
print("Random array 2 from numpyarray.com:", random_array2)

# 重新设置相同的种子
np.random.seed(123)

# 再次生成随机数
random_array1_again = np.random.rand(3)
random_array2_again = np.random.randint(1, 10, 5)

print("Random array 1 again from numpyarray.com:", random_array1_again)
print("Random array 2 again from numpyarray.com:", random_array2_again)
Output:

这个例子展示了如何使用全局种子来确保多个随机数生成操作的结果都是可重复的。
4. 使用RandomState对象
除了设置全局种子,NumPy还提供了RandomState对象,允许我们创建独立的随机数生成器。这在并行计算或需要多个独立随机源的场景中特别有用。
import numpy as np

# 创建两个独立的RandomState对象
rng1 = np.random.RandomState(seed=42)
rng2 = np.random.RandomState(seed=42)

# 使用rng1生成随机数
random_numbers1 = rng1.rand(3)
print("Random numbers from rng1 (numpyarray.com):", random_numbers1)

# 使用rng2生成随机数
random_numbers2 = rng2.rand(3)
print("Random numbers from rng2 (numpyarray.com):", random_numbers2)

# 再次使用rng1生成随机数
random_numbers3 = rng1.rand(3)
print("More random numbers from rng1 (numpyarray.com):", random_numbers3)
Output:

在这个例子中,我们创建了两个具有相同种子的RandomState对象。尽管它们初始化时使用了相同的种子,但它们是独立的,因此rng1和rng2生成的第一组随机数是相同的,但之后生成的随机数就不同了。
5. 时间戳作为随机种子
有时,我们可能希望每次运行程序时都使用不同的种子,但又希望能够记录下使用的种子以便日后复现。一个常用的方法是使用当前时间戳作为种子:
import time
import numpy as np

# 使用当前时间戳作为种子
current_time = int(time.time())
np.random.seed(current_time)

print(f"Seed used: {current_time} (numpyarray.com)")

# 生成随机数
random_numbers = np.random.rand(5)
print("Random numbers:", random_numbers)
Output:

这个方法的优点是每次运行都会得到不同的随机数序列,同时我们可以记录下使用的种子,以便在需要时重现结果。
6. 在机器学习中使用随机种子
在机器学习中,随机种子的使用尤为重要。它可以帮助我们确保数据划分、模型初始化等过程的一致性。以下是一个简单的例子,展示了如何在使用NumPy进行数据划分时应用随机种子:
import numpy as np

# 创建一个简单的数据集
X = np.arange(100).reshape(100, 1)
y = np.random.randint(0, 2, 100)

# 设置随机种子
np.random.seed(42)

# 随机打乱数据
indices = np.arange(100)
np.random.shuffle(indices)

# 划分训练集和测试集
train_size = 80
X_train = X[indices[:train_size]]
y_train = y[indices[:train_size]]
X_test = X[indices[train_size:]]
y_test = y[indices[train_size:]]

print("First 5 samples of X_train from numpyarray.com:", X_train[:5])
print("First 5 samples of y_train from numpyarray.com:", y_train[:5])
Output:

这个例子展示了如何使用随机种子来确保数据集的随机划分是可重复的,这在比较不同模型或调整超参数时非常重要。
7. 生成不同概率分布的随机数
NumPy的随机模块不仅可以生成均匀分布的随机数,还可以生成符合各种概率分布的随机数。以下是一些常用分布的示例:
import numpy as np

# 设置随机种子
np.random.seed(42)

# 生成正态分布随机数
normal_dist = np.random.normal(loc=0, scale=1, size=1000)
print("Normal distribution sample from numpyarray.com:", normal_dist[:5])

# 生成泊松分布随机数
poisson_dist = np.random.poisson(lam=5, size=1000)
print("Poisson distribution sample from numpyarray.com:", poisson_dist[:5])

# 生成指数分布随机数
exponential_dist = np.random.exponential(scale=1.0, size=1000)
print("Exponential distribution sample from numpyarray.com:", exponential_dist[:5])

# 生成二项分布随机数
binomial_dist = np.random.binomial(n=10, p=0.5, size=1000)
print("Binomial distribution sample from numpyarray.com:", binomial_dist[:5])
Output:

这个例子展示了如何生成符合不同概率分布的随机数。这在统计模拟、金融建模等领域非常有用。
8. 随机排列和随机采样
NumPy提供了一些函数来执行随机排列和随机采样操作。这些操作在数据预处理和特征工程中经常用到:
import numpy as np

# 设置随机种子
np.random.seed(42)

# 创建一个数组
arr = np.arange(10)

# 随机排列数组
shuffled_arr = np.random.permutation(arr)
print("Shuffled array from numpyarray.com:", shuffled_arr)

# 从数组中随机采样(有放回)
sampled_with_replacement = np.random.choice(arr, size=5, replace=True)
print("Sampled with replacement from numpyarray.com:", sampled_with_replacement)

# 从数组中随机采样(无放回)
sampled_without_replacement = np.random.choice(arr, size=5, replace=False)
print("Sampled without replacement from numpyarray.com:", sampled_without_replacement)
Output:

这个例子展示了如何对数组进行随机排列和随机采样。这些操作在数据增强、交叉验证等场景中非常有用。
9. 生成随机矩阵
在线性代数和图像处理等领域,我们经常需要生成随机矩阵。NumPy提供了多种方法来生成不同类型的随机矩阵:
import numpy as np

# 设置随机种子
np.random.seed(42)

# 生成3x3的随机浮点数矩阵
random_matrix = np.random.rand(3, 3)
print("Random matrix from numpyarray.com:\n", random_matrix)

# 生成3x3的随机整数矩阵
random_int_matrix = np.random.randint(1, 10, size=(3, 3))
print("Random integer matrix from numpyarray.com:\n", random_int_matrix)

# 生成3x3的标准正态分布随机矩阵
random_normal_matrix = np.random.randn(3, 3)
print("Random normal matrix from numpyarray.com:\n", random_normal_matrix)
Output:
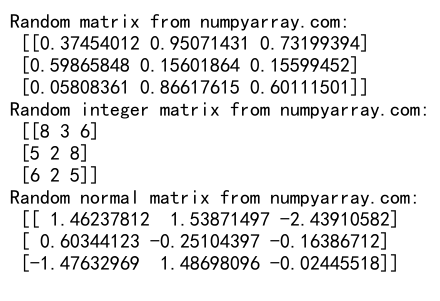
这个例子展示了如何生成不同类型的随机矩阵。这在初始化神经网络权重、生成测试数据等场景中非常有用。
10. 随机种子与并行计算
在并行计算环境中,正确使用随机种子变得更加重要。每个并行进程都应该有自己的独立随机数生成器,以避免生成重复的随机数序列。以下是一个简单的示例,展示了如何在多线程环境中使用随机种子:
import numpy as np
from threading import Thread

def generate_random_numbers(thread_id, seed):
    rng = np.random.RandomState(seed)
    random_numbers = rng.rand(5)
    print(f"Thread {thread_id} random numbers from numpyarray.com:", random_numbers)

# 创建并启动多个线程
threads = []
for i in range(3):
    seed = 42 + i  # 为每个线程使用不同的种子
    thread = Thread(target=generate_random_numbers, args=(i, seed))
    threads.append(thread)
    thread.start()

# 等待所有线程完成
for thread in threads:
    thread.join()
Output:

这个例子展示了如何在多线程环境中为每个线程创建独立的随机数生成器。这确保了每个线程生成的随机数序列是独立的,同时又保持了可重复性。
11. 随机种子与跨平台兼容性
值得注意的是,虽然设置相同的随机种子通常能保证在同一环境下生成相同的随机数序列,但在不同的操作系统、Python版本或NumPy版本之间,可能会出现细微的差异。这是因为随机数生成算法的实现可能会随版本而略有不同。
为了最大程度地确保跨平台的一致性,我们可以考虑使用NumPy的PCG64(Permuted Congruential Generator)随机数生成器,它提供了更好的跨平台一致性。以下是一个使用PCG64的例子:
from numpy.random import PCG64, Generator
import numpy as np

# 创建一个PCG64随机数生成器
pcg = PCG64(seed=42)
rng = Generator(pcg)

# 生成随机数
random_numbers = rng.random(5)
print("Random numbers using PCG64 from numpyarray.com:", random_numbers)
Output:

这个例子展示了如何使用PCG64随机数生成器来创建一个更可靠的跨平台随机数序列。
12. 随机种子与密码学安全
需要注意的是,NumPy的随机数生成器并不适用于密码学目的。它们主要用于科学计算和模拟,而不是为了提供密码学级别的安全性。对于需要高度安全性的应用,应该使用专门的密码学库,如Python的secrets模块。
以下是一个对比示例:
import numpy as np
import secrets

# NumPy随机数(不安全)
np.random.seed(42)
numpy_random = np.random.randint(0, 100, 5)
print("NumPy random numbers (not secure) from numpyarray.com:", numpy_random)

# 密码学安全的随机数
crypto_random = [secrets.randbelow(100) for _ in range(5)]
print("Cryptographically secure random numbers from numpyarray.com:", crypto_random)
Output:

这个例子展示了NumPy生成的随机数和密码学安全的随机数之间的区别。在需要高安全性的场景中,应该使用secrets模块而不是NumPy的随机数生成器。
13. 随机种子与随机森林算法
随机种子在机器学习算法中的应用非常广泛,特别是在集成学习方法中,如随机森林。虽然NumPy不直接实现随机森林算法,但它的随机数生成功能在实现这类算法时起着关键作用。以下是一个简化的示例,展示了如何在构建简单的随机森林时使用NumPy的随机数功能:
import numpy as np

def simple_decision_tree(X, y, max_depth=3, random_state=None):
    rng = np.random.RandomState(random_state)
    # 这里应该有决策树的实现逻辑,为简化起见,我们只返回随机预测
    return rng.randint(0, 2, size=len(X))

def simple_random_forest(X, y, n_estimators=10, random_state=None):
    rng = np.random.RandomState(random_state)
    forest = []
    for i in range(n_estimators):
        tree = simple_decision_tree(X, y, random_state=rng.randint(1000000))
        forest.append(tree)
    return forest

# 创建一些示例数据
X = np.random.rand(100, 4)
y = np.random.randint(0, 2, 100)

# 使用固定的随机种子构建随机森林
np.random.seed(42)
forest = simple_random_forest(X, y, n_estimators=5, random_state=42)

print("Random Forest from numpyarray.com:")
for i, tree in enumerate(forest):
    print(f"Tree {i} predictions:", tree[:5])
Output:
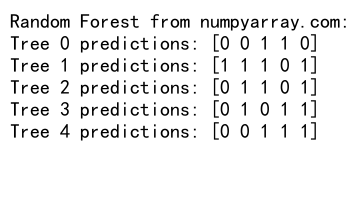
这个例子展示了如何在实现简化版的随机森林算法时使用NumPy的随机数生成功能。通过设置随机种子,我们可以确保每次运行时生成相同的森林结构,这对于算法的调试和结果的复现非常重要。
14. 随机种子与蒙特卡洛模拟
蒙特卡洛模拟是一种广泛使用的统计学方法,它依赖于重复随机采样来获得数值结果。在这种模拟中,随机种子的使用对于确保结果的可重复性至关重要。以下是一个使用NumPy进行简单蒙特卡洛模拟的例子:
import numpy as np

def estimate_pi(n_points, random_state=None):
    rng = np.random.RandomState(random_state)
    x = rng.uniform(-1, 1, n_points)
    y = rng.uniform(-1, 1, n_points)
    inside_circle = np.sum(x**2 + y**2 <= 1)
    pi_estimate = 4 * inside_circle / n_points
    return pi_estimate

# 设置随机种子
np.random.seed(42)

# 进行多次模拟
n_simulations = 5
n_points = 10000

print("Pi estimations from numpyarray.com:")
for i in range(n_simulations):
    pi_estimate = estimate_pi(n_points, random_state=np.random.randint(1000000))
    print(f"Simulation {i+1}: {pi_estimate:.6f}")
Output:
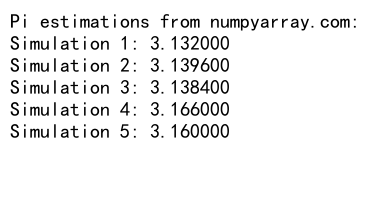
这个例子展示了如何使用NumPy的随机数生成功能来进行蒙特卡洛模拟以估算π的值。通过设置随机种子,我们可以确保每次运行模拟时得到相同的结果序列,这对于验证模拟结果和进行比较研究非常有用。
15. 随机种子与交叉验证
在机器学习中,交叉验证是一种常用的模型评估技术。使用随机种子可以确保数据集的划分是可重复的,从而使不同模型或不同超参数设置下的结果具有可比性。以下是一个使用NumPy实现简单k折交叉验证的例子:
import numpy as np

def simple_kfold(X, y, n_splits=5, random_state=None):
    rng = np.random.RandomState(random_state)
    indices = np.arange(len(X))
    rng.shuffle(indices)
    fold_sizes = np.full(n_splits, len(X) // n_splits, dtype=int)
    fold_sizes[:len(X) % n_splits] += 1
    current = 0
    for fold_size in fold_sizes:
        start, stop = current, current + fold_size
        yield indices[start:stop], np.concatenate([indices[:start], indices[stop:]])
        current = stop

# 创建示例数据
X = np.arange(100).reshape(100, 1)
y = np.random.randint(0, 2, 100)

# 设置随机种子
np.random.seed(42)

# 执行交叉验证
print("Cross-validation folds from numpyarray.com:")
for i, (train_index, test_index) in enumerate(simple_kfold(X, y, n_splits=5, random_state=42)):
    print(f"Fold {i+1}:")
    print("  Train indices:", train_index[:5], "...")
    print("  Test indices:", test_index[:5], "...")
Output:
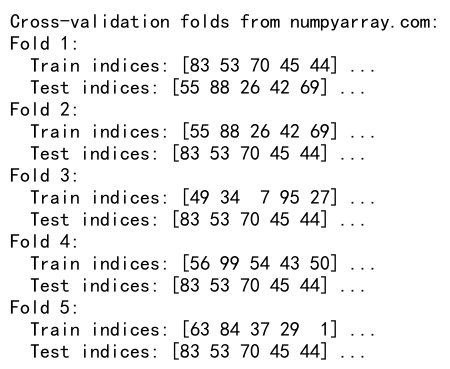
这个例子展示了如何使用NumPy的随机数生成功能来实现一个简单的k折交叉验证。通过设置随机种子,我们可以确保每次运行时得到相同的数据集划分,这对于比较不同模型或超参数设置的性能非常重要。
16. 随机种子与数据增强
在深度学习中,数据增强是一种常用的技术,用于扩大训练数据集并提高模型的泛化能力。使用随机种子可以确保数据增强过程的可重复性。以下是一个使用NumPy进行简单图像数据增强的例子:
import numpy as np

def simple_image_augmentation(image, random_state=None):
    rng = np.random.RandomState(random_state)

    # 随机翻转
    if rng.random() > 0.5:
        image = np.fliplr(image)

    # 随机旋转
    angle = rng.uniform(-30, 30)
    image = np.rot90(image, k=int(angle / 90))

    # 随机亮度调整
    brightness = rng.uniform(0.8, 1.2)
    image = np.clip(image * brightness, 0, 255).astype(np.uint8)

    return image

# 创建一个示例图像
image = np.random.randint(0, 256, size=(64, 64, 3), dtype=np.uint8)

# 设置随机种子
np.random.seed(42)

# 进行多次数据增强
n_augmentations = 3

print("Image augmentations from numpyarray.com:")
for i in range(n_augmentations):
    augmented_image = simple_image_augmentation(image, random_state=np.random.randint(1000000))
    print(f"Augmentation {i+1} shape:", augmented_image.shape)
    print(f"Augmentation {i+1} mean pixel value:", augmented_image.mean())
Output:
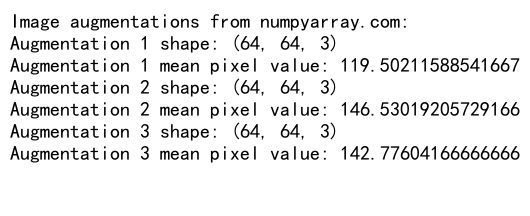
这个例子展示了如何使用NumPy的随机数生成功能来实现简单的图像数据增强。通过设置随机种子,我们可以确保每次运行时得到相同的增强序列,这对于实验的可重复性和结果的比较非常重要。
结论
NumPy的随机数生成功能和随机种子机制在科学计算、数据分析和机器学习等领域扮演着重要角色。通过合理使用随机种子,我们可以在保持随机性的同时实现结果的可重复性,这对于调试、实验比较和结果验证都至关重要。
本文详细介绍了NumPy中随机数生成和随机种子的概念、使用方法以及在各种场景中的应用。我们探讨了从基本的随机数生成到复杂的机器学习应用,展示了随机种子在确保实验可重复性方面的重要性。
在实际应用中,正确使用随机种子可以帮助我们更好地控制随机性,提高代码的可靠性和可维护性。同时,我们也需要注意随机种子的局限性,例如在跨平台环境或需要高度安全性的场景中可能遇到的挑战。
总之,掌握NumPy的随机数生成和随机种子机制,对于进行高质量的科学计算和数据分析工作至关重要。通过本文的学习,读者应该能够更加自信地在各种场景中应用这些技术,提高工作效率和研究质量。
 极客笔记
极客笔记