在Python中使用Gmail API
在本教程中,我们将学习如何在Python中使用Gmail API,还将学习如何使用Python中的Gmail API执行许多Gmail操作,如发送电子邮件、搜索电子邮件、删除电子邮件等等。为此,我们将学习在Python脚本中设置Gmail API。首先,让我们简要了解Gmail API及其基本介绍。
Gmail API
Gmail是当今世界上最受欢迎的邮件服务,并且几乎所有人和许多组织都在使用它。在过去的几年里,许多Gmail功能都通过使用人工智能进行了增强,包括在撰写邮件时提供建议以及安全功能(检测欺诈和垃圾邮件)。
Gmail API是基于RESTful APIs的API,让用户可以与我们的Gmail帐户进行交互,并且它可以帮助我们使用Python脚本来使用其功能。
在Python中使用Gmail API的先决条件
要在Python脚本中使用Gmail API,我们必须满足以下要求:
- 我们应该有一个高于或等于2.6的Python版本。
- 我们必须拥有启用了Gmail服务的Google帐户。
- 系统必须安装 BeautifulSoup 库(如果没有安装,则应在命令终端中使用’pip install bsp’语法安装到我们的设备中)。
- 我们应该对Google OAuth库和Google API客户端有基本了解。
所需库的安装:
在启用Gmail API以在我们的Python脚本中使用它们之前,让我们首先在系统中安装所需的预先要求库。要安装用于启用Gmail API的预先要求库,我们应该按照以下步骤进行:
步骤1: 打开系统的命令提示符终端,并确保我们的设备有活动的互联网连接。
步骤2: 在终端中输入以下命令:
pip install --upgrade google-api-python-client google-auth-httplib2 google-auth-oauthlib
现在,按Enter键开始安装库。
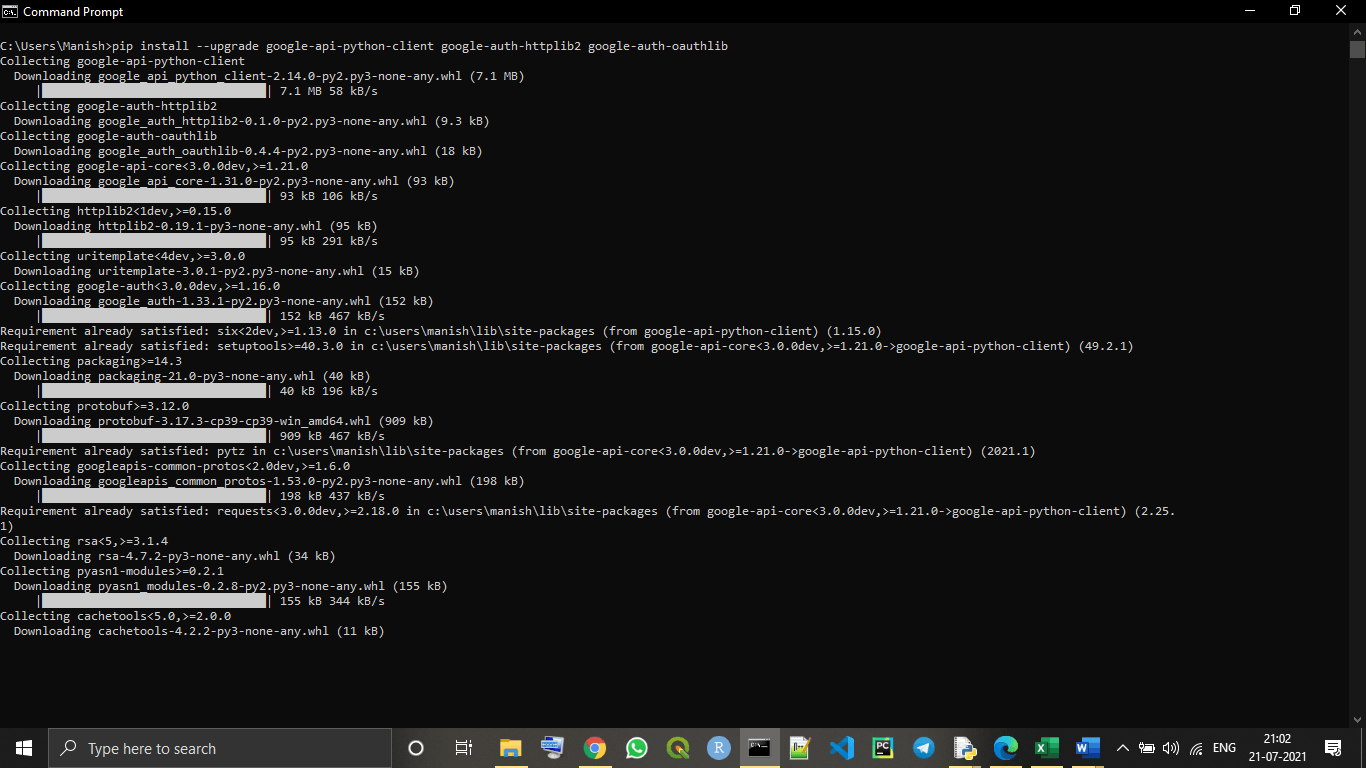
如我们所见,启用Gmail APIs所需的先决库已成功安装在我们的系统中。现在,我们可以继续进行本教程中的Gmail APIs启用部分。
在我们的设备上启用Gmail APIs
我们必须按照以下给出的步骤在我们的设备上启用Gmail API,以便我们可以在Python脚本中使用这些API:
步骤1:在Google Cloud控制台上创建新项目:
在这一步中,首先,我们需要使用我们的Google账号登录到Google云控制台 (https://console.cloud.google.com/?pli=1) ,然后我们要点击“新建项目”来创建一个新项目。
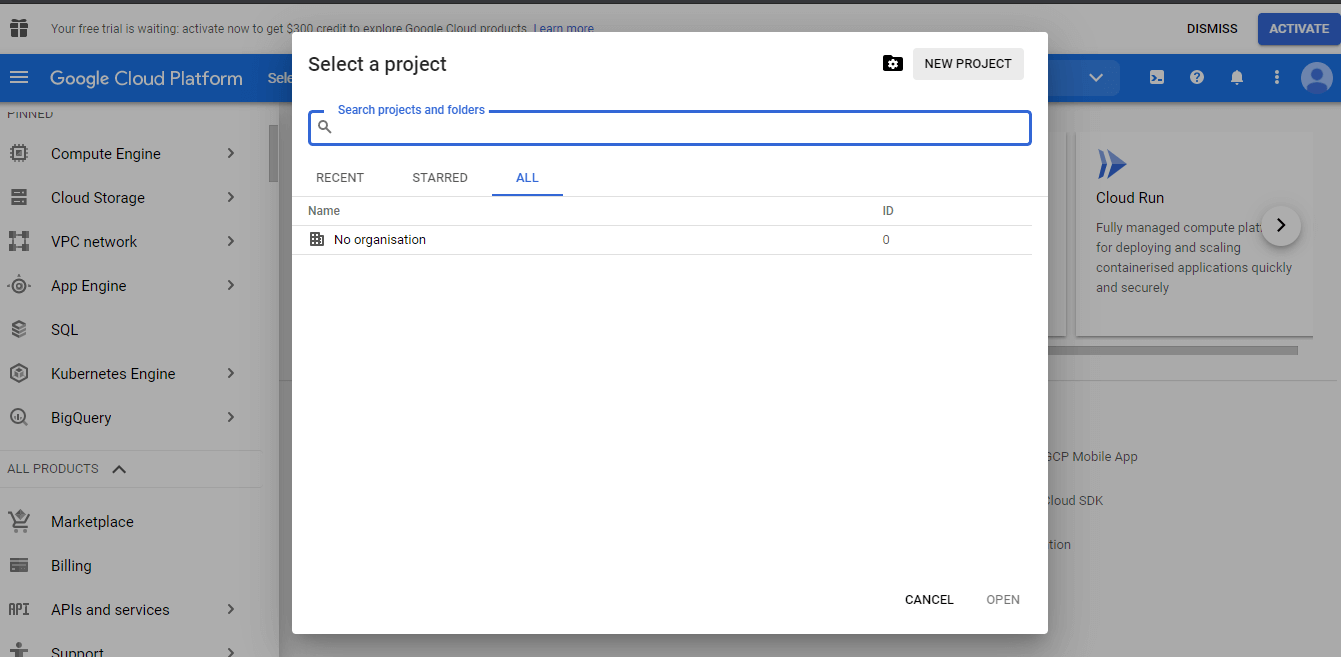
如果我们已经有一个现有的项目,那么我们也可以继续现有的项目。
步骤2: 现在,我们必须从我们创建的项目菜单中转到API和服务选项。
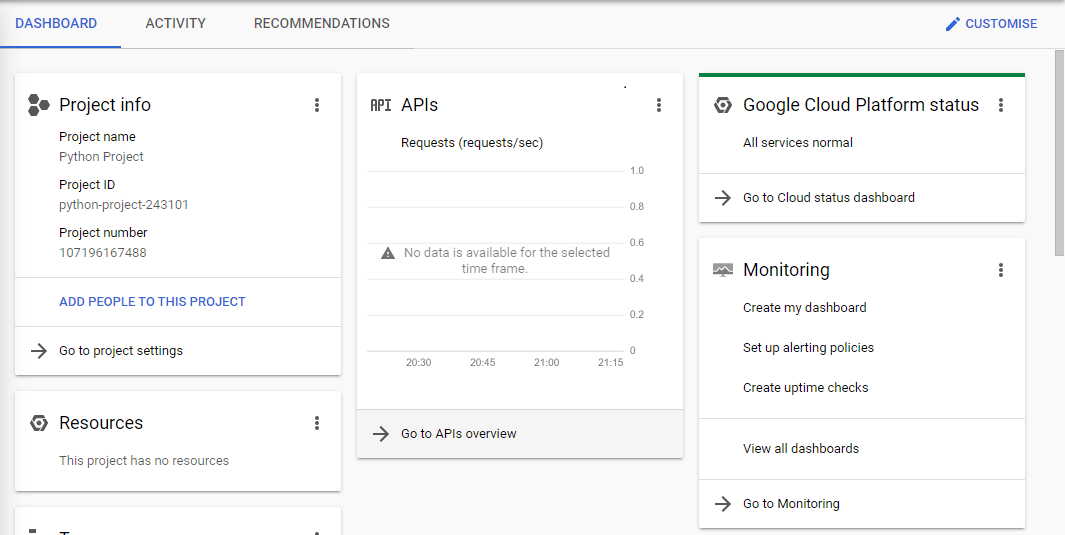
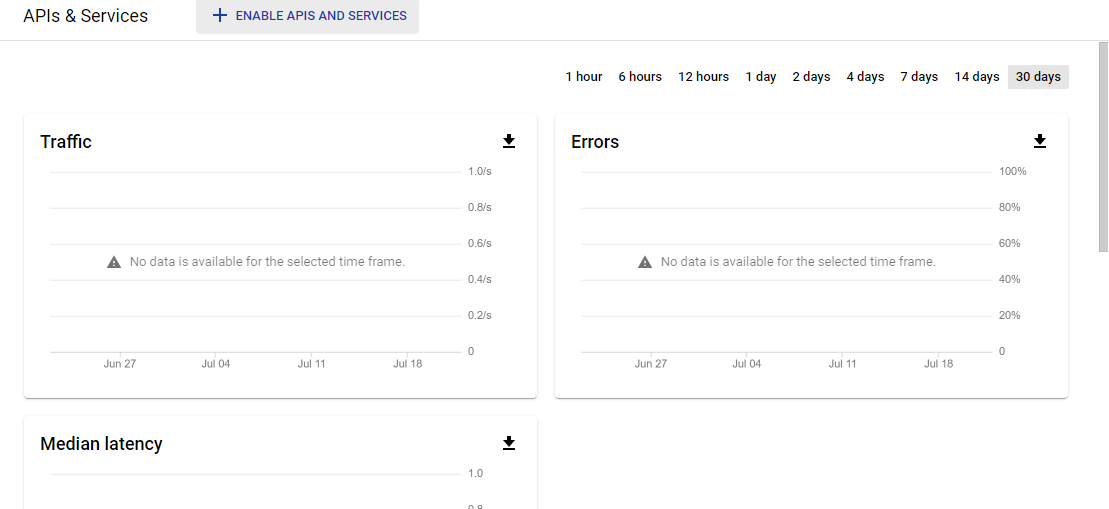
步骤3: 现在,我们可以看到选项“启用 Gmail API 和服务”,我们必须选择此选项来启用项目的 Gmail API。
步骤4: 配置同意屏幕:
现在,在这一步中,我们将通过在菜单中选择“OAuth同意屏幕”选项来配置我们创建的项目的同意屏幕。只有在同意屏幕尚未配置时才能看到此选项。
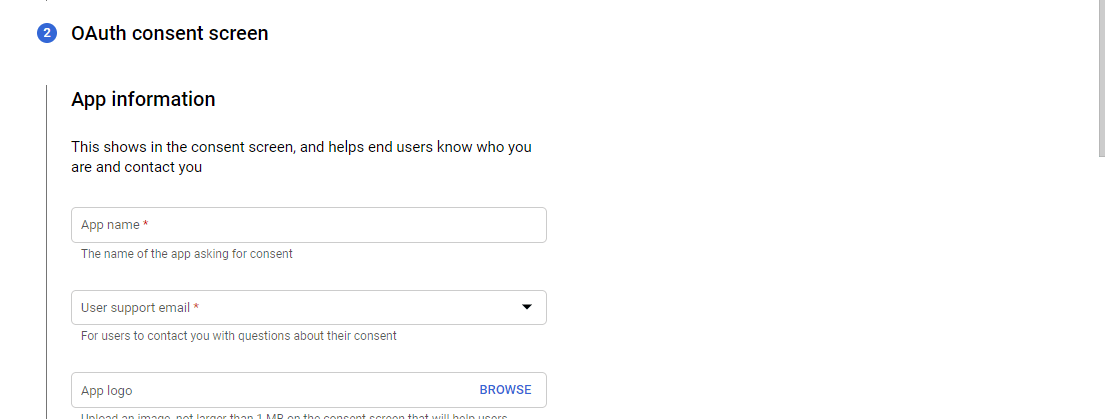
步骤5: 现在,我们需要输入我们选择的应用程序名称并保存项目。
步骤6: 现在,点击凭证选项并进入凭证。
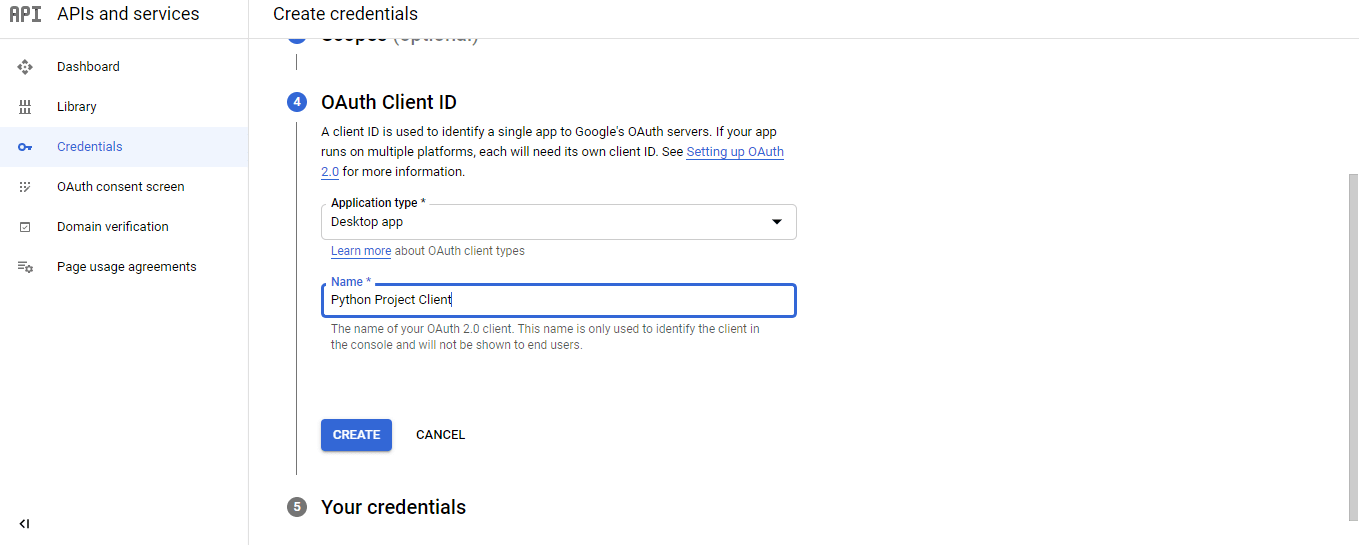
步骤7:创建OAuth客户端ID:
现在,我们点击“创建凭据”选项,进入OAuth客户端ID进行创建。
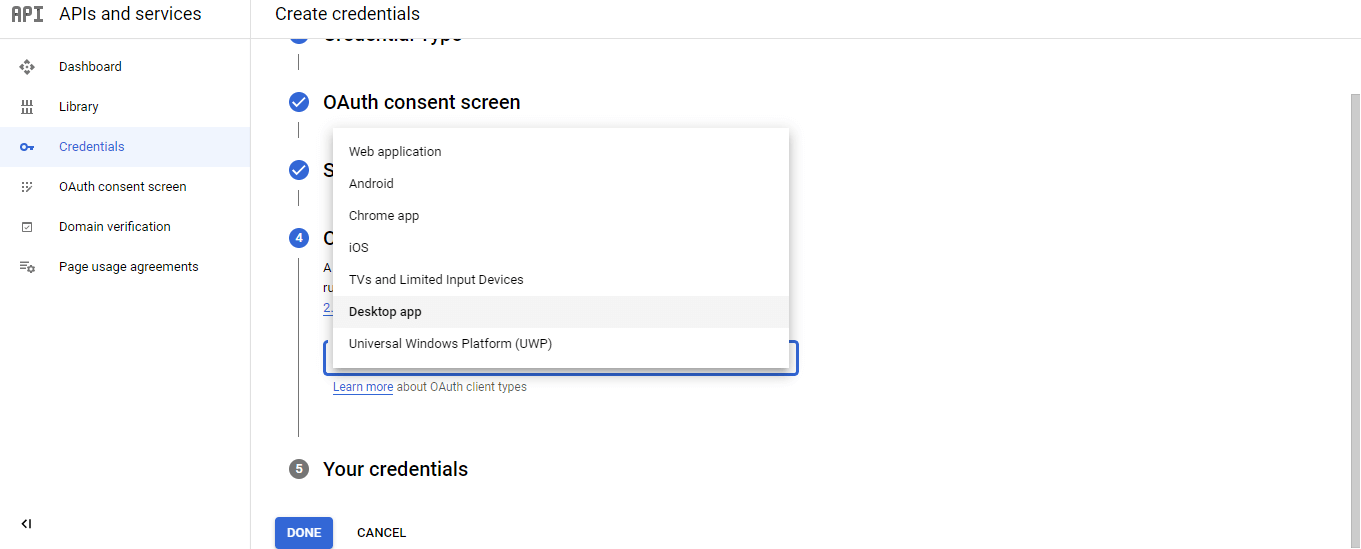
我们通过以下顺序的步骤来为项目创建一个新的OAuth客户端ID:
- 首先,我们选择项目的应用程序类型为桌面应用程序。
-
然后,我们输入应用程序名称(可以与上述步骤中设置的名称相同,也可以不同),然后点击创建按钮。
- 现在,我们的项目将创建OAuth客户端ID,我们将其下载并保存为’credentials.json’的名称和格式,以备将来参考。
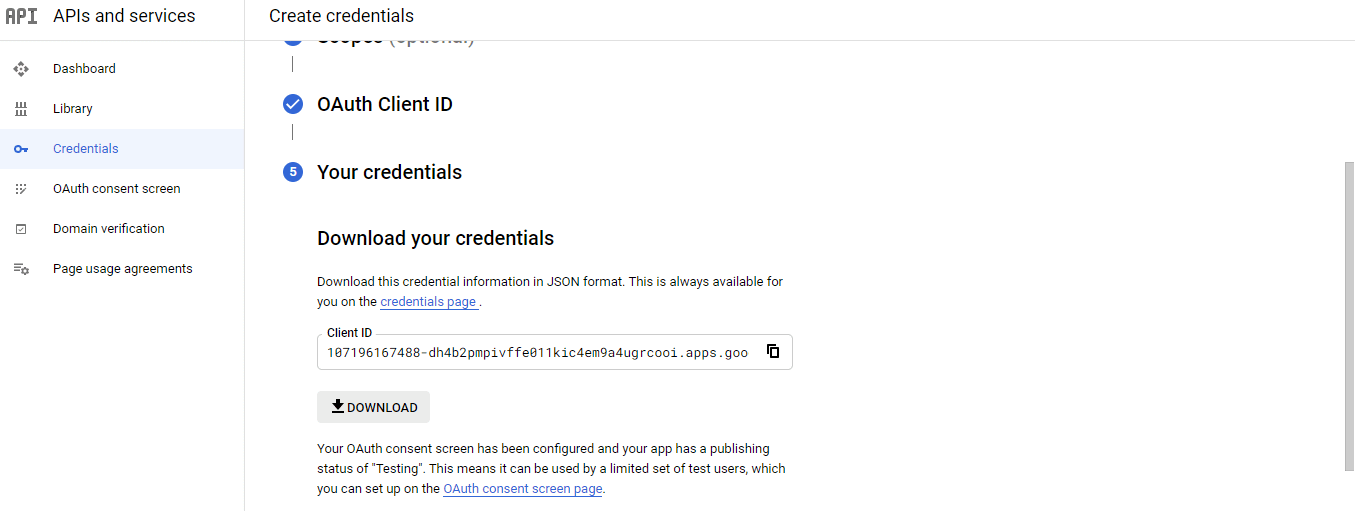
现在,我们已经完成了启用Gmail API的所有步骤,可以开始在我们的Python脚本中使用Gmail API了。
注意:我们必须保存客户端ID和密码,以便在将来的参考中使用。
导入必要的模块
现在,我们已经设置好了所有必要的API,并应继续导入所有必要的模块。让我们看看以下导入模块的示例。
示例
# Importing os and pickle module in program
import os
import pickle
# Creating utils for Gmail APIs
from googleapiclient.discovery import build
from google_auth_oauthlib.flow import InstalledAppFlow
from google.auth.transport.requests import Request
# Importing libraries for encoding/decoding messages in base64
from base64 import urlsafe_b64decode, urlsafe_b64encode
# Importing libraries for dealing with the attachment of MIME types in Gmail
from email.mime.text import MIMEText
from email.mime.multipart import MIMEMultipart
from email.mime.image import MIMEImage
from email.mime.audio import MIMEAudio
from email.mime.base import MIMEBase
from email.mime.multipart import MIMEMultipart
from mimetypes import guess_type as guess_mime_type

# Request all access from Gmail APIs and project
SCOPES = ['https://mail.google.com/']
OurEmailID = 'OurMail@gmail.com' # giving our Gmail Id

# using a default function to authenticate Gmail APIs
def authenticateGmailAPIs():
    creds = None
    # Authorizing the Gmail APIs with tokens of pickles
    if os.path.exists("token.pickle"): # using if else statement
        with open("token.pickle", "rb") as token:
            creds = pickle.load(token)
    # If there are no valid credentials available in device, we will let the user sign in manually
    if not creds or not creds.valid:
        if creds and creds.expired and creds.refresh_token:
            creds.refresh(Request())
        else:
            flow = InstalledAppFlow.from_client_secrets_file('client_secret_107196167488-dh4b2pmpivffe011kic4em9a4ugrcooi.apps.googleusercontent.com.json', SCOPES) # downloaded credential name
            creds = flow.run_local_server(port=0) # running credentials
        # Save the credentials for the next run
        with open("token.pickle", "wb") as token:
            pickle.dump(creds, token)
    return build('Gmail', 'v1', credentials=creds) # using Gmail to authenticate

# Get the Gmail API service by calling the function
service = authenticateGmailAPIs()
输出:
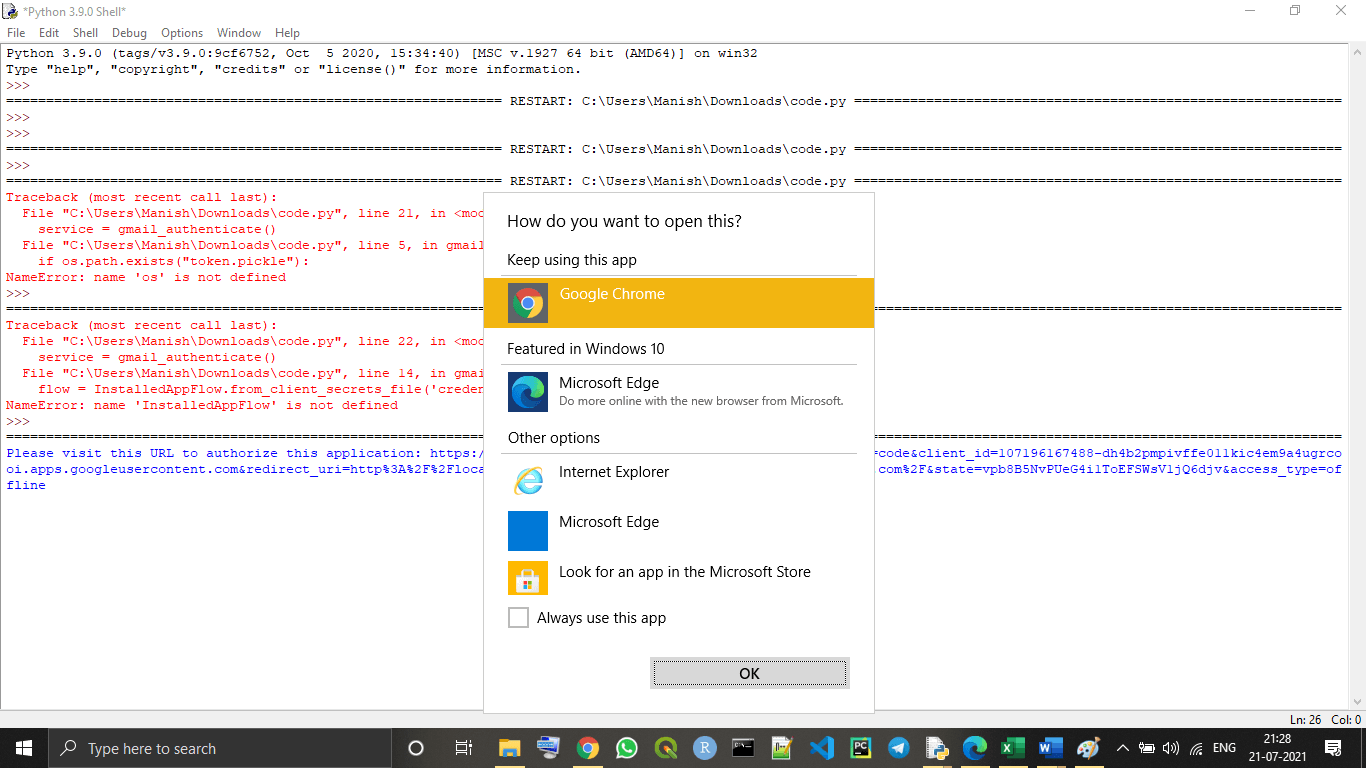
Please visit this URL to authorize this application: https://accounts.google.com/o/oauth2/auth?response_type=code&client_id=107196167488-dh4b2pmpivffe011kic4em9a4ugrcooi.apps.googleusercontent.com&redirect_uri=http%3A%2F%2Flocalhost%3A55991%2F&scope=https%3A%2F%2Fmail.google.com%2F&state=kfXlNyjvbKetyUK0op7OF9WY7shrKS&access_type=offline
说明 –
当我们运行上面给定的程序时,我们会看到选择浏览器的选项,正如我们可以在上面的图片中看到的那样,如果我们没有看到这样的选项,我们需要点击输出中给出的链接。然后,我们可以选择我们喜欢的浏览器或系统的默认浏览器来继续该过程。现在,当我们选择了浏览器,我们将被重定向到我们的浏览器中,可以看到以下选项卡在其中打开:
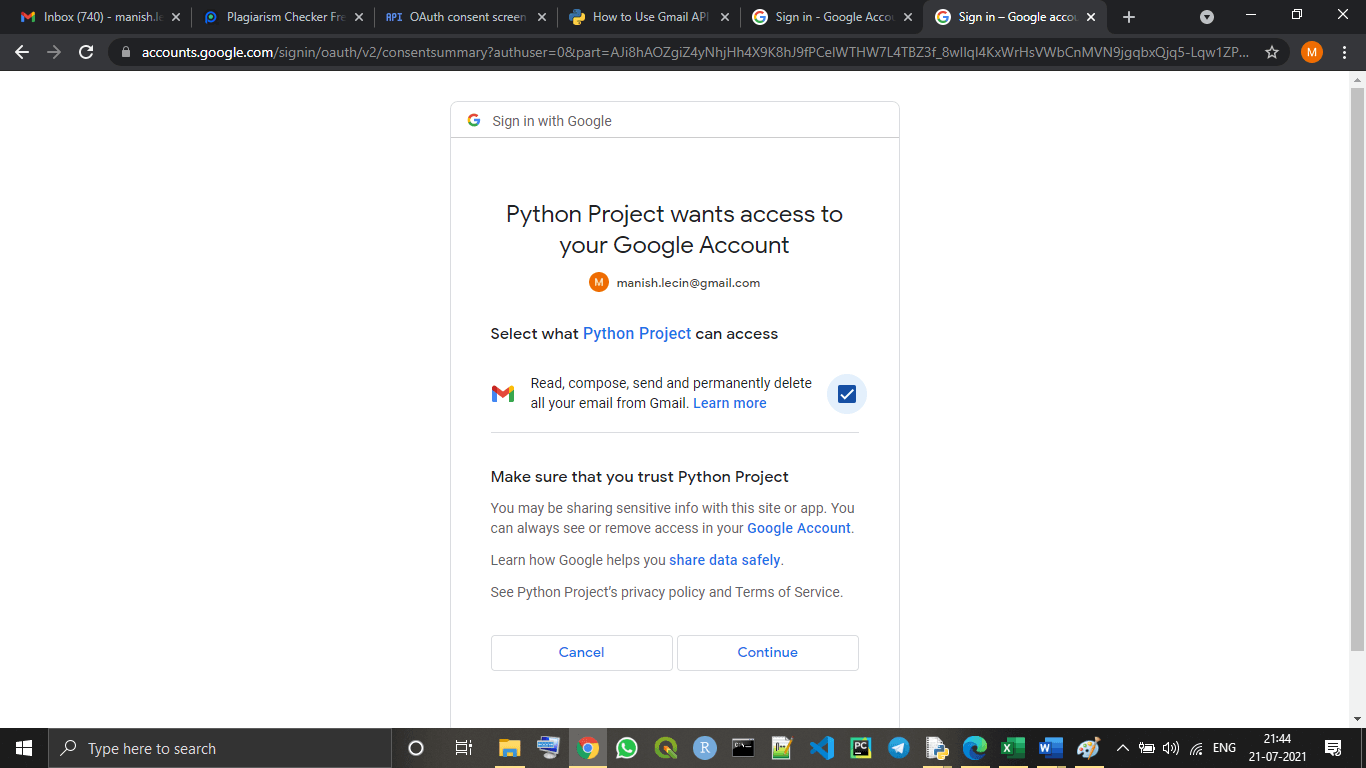
现在,我们在对话框中勾选复选框选项以授予所需的权限,然后,我们需要点击继续选项。点击继续后,我们可以看到以下窗口将在同一个选项卡中打开:
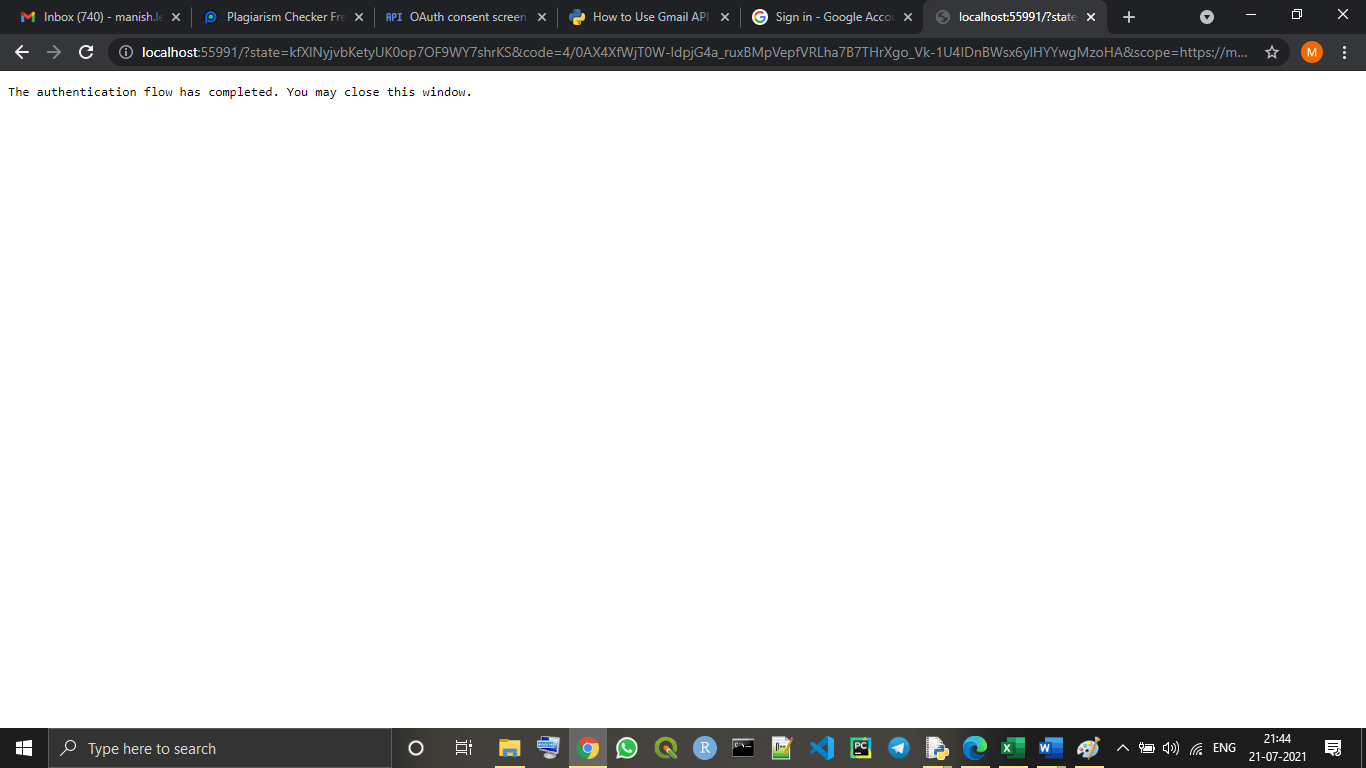
如窗口所示,启用Gmail API的身份验证部分已完成,并且我们已经将我们的Gmail帐户与我们创建的Gmail API项目进行了关联。
注意:当然,我们必须在上述程序中提供的“stash”位置上,放上我们可以连接到Gmail API并用于将来使用Gmail API工作的电子邮件。
使用Python进行Gmail API执行操作
现在,我们已经完全设置并启用了我们的Python脚本项目中的Gmail API。现在,我们可以使用Python程序从我们的Gmail帐户执行许多操作。
我们可以使用包含Gmail API的Python脚本执行以下Gmail操作:
- 发送电子邮件
- 搜索电子邮件
- 删除电子邮件或整个电子邮件历史记录
- 阅读电子邮件
- 标记为已读/未读等。
在本教程中,我们只会使用Gmail API在我们的Python程序中发送电子邮件,并学习编写代码来执行此操作。
发送电子邮件
我们可以通过编写Python程序并在其中使用启用的Gmail API来简单地编写和发送电子邮件。在这里,在本节中,我们将编写一个Python程序,通过运行该程序,我们可以从我们的Gmail帐户发送电子邮件。
请查看以下Python程序,以更好地理解:
示例
# importing os and pickle module in program
import os
import pickle
# Creating utils for Gmail APIs
from googleapiclient.discovery import build
from google_auth_oauthlib.flow import InstalledAppFlow
from google.auth.transport.requests import Request
# Importing libraries for encoding/decoding messages in base64
from base64 import urlsafe_b64decode, urlsafe_b64encode
# Importing libraries for dealing with the attachment of MIME types in Gmail
from email.mime.text import MIMEText
from email.mime.multipart import MIMEMultipart
from email.mime.image import MIMEImage
from email.mime.audio import MIMEAudio
from email.mime.base import MIMEBase
from email.mime.multipart import MIMEMultipart
from mimetypes import guess_type as guess_mime_type

# Request all access from Gmail APIs and project
SCOPES = ['https://mail.google.com/'] # providing the scope for Gmail APIs
OurEmailID = 'OurMail@gmail.com' # giving our Gmail Id

# using a default function to authenticate Gmail APIs
def authenticateGmailAPIs():
    creds = None
    # authorizing the Gmail APIs with tokens of pickles
    if os.path.exists("token.pickle"): # using if else statement
        with open("token.pickle", "rb") as token:
            creds = pickle.load(token)
    # if there are no valid credentials available in device, we will let the user sign in manually
    if not creds or not creds.valid:
        if creds and creds.expired and creds.refresh_token:
            creds.refresh(Request())
        else:
            flow = InstalledAppFlow.from_client_secrets_file('client_secret_107196167488-dh4b2pmpivffe011kic4em9a4ugrcooi.apps.googleusercontent.com.json', SCOPES) # downloaded credential name
            creds = flow.run_local_server(port=0) # running credentials
        # save the credentials for the next run
        with open("token.pickle", "wb") as token:
            pickle.dump(creds, token)
    return build('gmail', 'v1', credentials=creds) # using Gmail to authenticate

# Get the Gmail API service by calling the function
ServicesGA = authenticateGmailAPIs()

# Using a default funnction to add attachments in Mail
def AddAttachment(mail, NameofFile):
    content_type, encoding = guess_mime_type(NameofFile)
    if content_type is None or encoding is not None: # defining none file type attachment
        content_type = 'application/octet-stream'
    main_type, sub_type = content_type.split('/', 1)
    if main_type == 'text': # defining text file type attachment
        fp = open(NameofFile, 'rb') # opening file
        msg = MIMEText(fp.read().decode(), _subtype = sub_type)
        fp.close()
    elif main_type == 'image': # defining image file type attachment
        fp = open(NameofFile, 'rb')
        msg = MIMEImage(fp.read(), _subtype = sub_type)
        fp.close()
    elif main_type == 'audio': # defining audio file type attachment
        fp = open(NameofFile, 'rb')
        msg = MIMEAudio(fp.read(), _subtype = sub_type) # reading file
        fp.close()
    else:
        fp = open(NameofFile, 'rb')
        msg = MIMEBase(main_type, sub_type)
        msg.set_payload(fp.read())
        fp.close() # closing file
    NameofFile = os.path.basename(NameofFile)
    msg.add_header('Content-Disposition', 'attachment', NameofFile = NameofFile)
    mail.attach(msg) # composing the mail with given attachment

# Creating mail with a default function
def CreateMail(RecieverMail, SubofMail, BodyofMail, attachments=[]): # various import content of mail as function's parameter
    # Using if else to check if there is any attachment in mail or not
    if not attachments: # no attachment is given in the mail
        mail = MIMEText(BodyofMail) # Body of Mail
        mail['to'] = RecieverMail # mail ID of Reciever
        mail['from'] = OurEmailID # our mail ID
        mail['subject'] = SubofMail # Subject of Mail
    else: # attachment is given in the mail
        mail = MIMEMultipart()
        mail['to'] = RecieverMail
        mail['from'] = OurEmailID
        mail['subject'] = SubofMail
        mail.attach(MIMEText(BodyofMail))
        for NameofFile in attachments:
            AddAttachment(mail, NameofFile)
    return {'raw': urlsafe_b64encode(mail.as_bytes()).decode()}

# Creating a default function to send a mail
def SendMail(ServicesGA, RecieverMail, SubofMail, BodyofMail, attachments=[]):
    return ServicesGA.users().messages().send(
      userId = "me",
      body = CreateMail(RecieverMail, SubofMail, BodyofMail, attachments)
    ).execute() # Body of the mail with execute() function

# Sending an email by adding important content, i.e., Reciever's mail, Subject, Body, etc.
SendMail(ServicesGA, "Reciever@gmail.com", "Python Project i.e., This is the subject of Mail we are sendimg!",
            "Now, this is the body of the email we are writing and we can add only written text here!", ["test.txt", "client_secret_107196167488-dh4b2pmpivffe011kic4em9a4ugrcooi.apps.googleusercontent.com.json"]) # calling out default SendMail() function
输出:
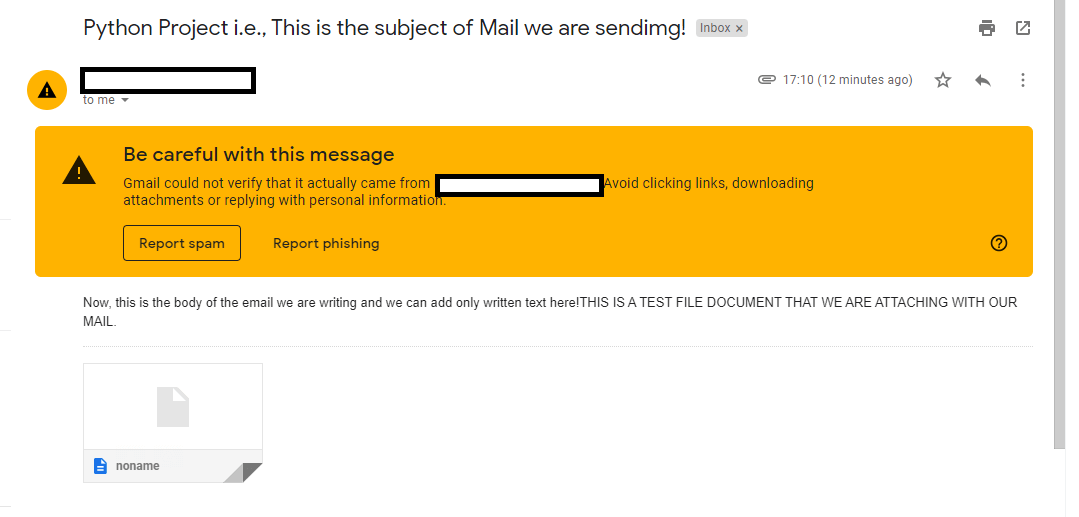
如果我们将自己的邮件放在收件人的位置,即 stash ,我们会发现当我们运行程序时,邮件实际上被发送到我们输入的收件人邮件地址,与上面的输出图像中所看到的一样。
结论
要在我们的Python脚本中使用Gmail API,或者仅仅在Python中使用它,首先我们必须启用它们,并在我们的Gmail帐户中创建一个Google云项目。
我们还可以在我们的Python程序中使用Gmail API执行许多其他操作,如读取、删除等,就像发送电子邮件一样。我们还可以通过运行启用了Gmail API的Python脚本(通过Gmail API项目进行身份验证)来修改许多事项到我们的Gmail帐户中。
 极客笔记
极客笔记