Django中的天气应用程序|按城市获取天气报告
在本教程中,我们将使用Django创建一个天气应用程序;该应用程序将显示搜索城市的天气情况。这是一个简单的Django项目,可以帮助初学者了解Django的基本概念。我们还将使用天气API来获取数据。
在继续本教程之前,请确保您已安装了Python和Django。如果尚未安装Django,可以使用pip命令进行安装。我们建议首先创建虚拟环境,然后再安装Django。
先决条件
安装Django
首先,打开IDE的终端并创建虚拟环境。这里我们使用的是Visual Studio。可以使用以下方式创建虚拟环境。
- 使用 pipenv shell 命令
- 使用 venv
我们使用 pipenv shell 命令创建虚拟环境。
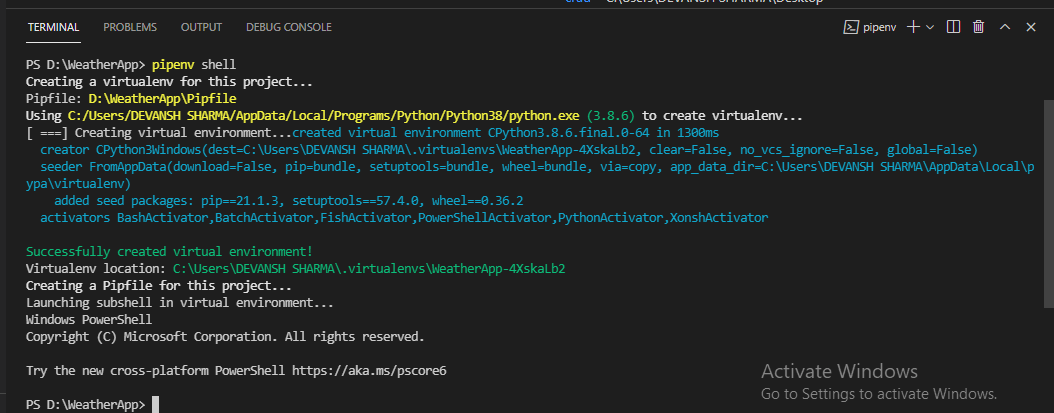
使用此命令,我们不需要激活虚拟环境。它会自动激活。现在,我们将使用pip命令安装Django。
pip install django

检查django是否已安装,请键入django-admin -version并按回车。

这表示我们已经安装了最新版本的Django。
创建项目和应用程序
一个Django项目可以由多个应用程序组成。在这里,我们使用以下命令创建一个项目。
django-admin startproject project_name
我们创建了一个名为 WeatherProject 的项目,现在我们将使用 python manage.py startapp MyWeatherApp 来创建应用程序。
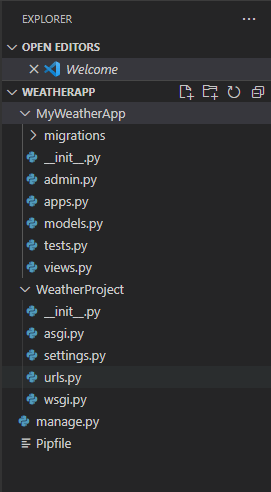
注意 – 在运行创建项目命令时,我们在项目名称后使用了.(点)。它在目录中创建了一个单独的项目。我们不需要跳转到项目中来访问manage.py文件。
我们使用以下命令创建新的应用程序名 MyWeatherApp 。
python manage.py startapp MyWeatherAPP
这个名称没有包含在项目中,所以要考虑这个应用程序,我们必须在INSTALLED_APP中添加它的名称。因此,打开settings.py文件并添加新创建的应用程序。
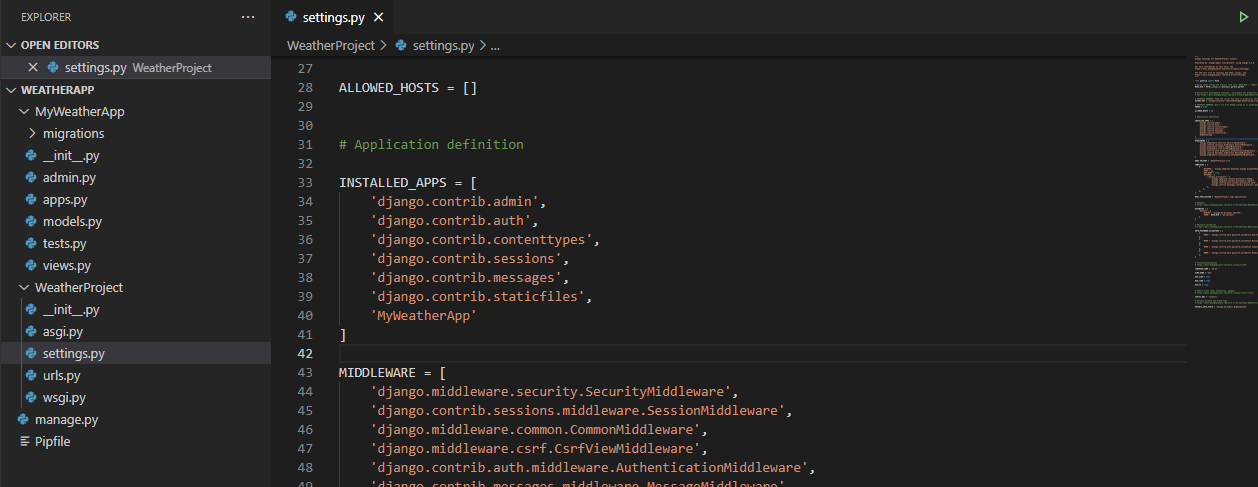
在这一点上,我们距离创建我们的应用程序只有一步之遥。使用以下命令运行服务器。
python manage.py runserver

点击给定的链接,将显示Django应用程序环境。
登录到管理面板
接下来,我们将登录到内置的Django仪表板。要这样做,我们需要迁移我们的数据库,这意味着Django将创建默认应用程序所需的预定义表。
在终端中输入以下命令并按回车键。
python manage.py migrate
这将创建 SQLite数据库 为我们的项目。它是django提供的默认数据库,并已向数据库中添加了几个表。
在管理员面板中将有一个用户表,它将存储我们应用程序中的用户。
要登录到管理员面板,我们需要使用以下命令创建管理员。
python manage.py createsuperuser
运行这个命令后,它会要求用户提供用户名、电子邮件地址和密码等信息。完成后,重新启动服务器。

python manage.py runserver
打开给定的链接,并访问http://127.0.0.1:8000/admin页面,因为在urls.py中已经设置了admin。
添加模板和视图
现在,我们将添加模板来创建我们应用程序的布局。模板是一个HTML文件,允许我们添加Jinja语法来使模板动态化。在Weather项目目录中创建一个名为template的新文件夹。
<!DOCTYPE html>
<html lang="en">
{% load static %}

<head>
  <meta charset="UTF-8" />
  <meta name="viewport" content="width=device-width, initial-scale=1.0" />
  <link rel="stylesheet" href="https://cdnjs.cloudflare.com/ajax/libs/bootswatch/4.5.3/cerulean/bootstrap.min.css"
    integrity="sha512-dQLT/B7byn2LjN/DN4zeBKpwGV6qbidV0XiMRWQOL7TGrV7FkZFldkGG+DGMU+CQnMTcRZlUI7GMWt1j6akNew=="
    crossorigin="anonymous" />
  <title>Weather App </title>
</head>

<body>

  <br /><br /> <br>
  <div id="jumbotron" class="jumbotron" style="text-align: center; margin-top:-50px">
    <h1 class="display-4">Weather Desktop App </h1>
    <h5>Using Python Language and Django Framework</h5>
  </div>

  <nav class="navbar navbar-expand-lg navbar-dark bg-primary">
    <form method="post" class="col-md"">
      {% csrf_token %}
      <div class=" input-group">

      <input type="text" class="form-control" name="city" placeholder="Choose Your City">
      <div class="input-group-btn">
        <button type="submit" class="btn btn-primary">Search</button>
      </div>
      </div>
      <form>
  </nav>
  <br> <br>
  <div class="row">
  {% if country_code and coordinate and temp and pressure and humidity %}
                <div class="col d-flex justify-content-center" ">
        <div class=" card text-white bg-light mb-6">
        <div class=" card-body">
        <h4><span class="badge badge-primary">City :</span> </h4>
            <h4><span class="badge badge-primary">Country Code :</span> </h4>
            <h4><span class="badge badge-primary">Coordinates [X,Y] :</span> </h4>
            <h4><span class="badge badge-primary">Temperature :</span> {{temp}}</h4>
            <h4><span class="badge badge-primary">Pressure :</span> </h4>
            <h4><span class="badge badge-primary">Humidity : </span> </h4>
        </div>
        {% endif %}
 </div>
</body>

</html>
我们已经创建了 index.html 文件。现在我们将从天气API中获取数据并渲染到模板中,但现在我们将创建 VIEW 并映射到URL。在 view.py 中添加以下函数。
View.py
from django.shortcuts import render

# Create your views here.

def home(request):
    return render(request, 'index.html')
urls.py
from django.urls import path
from .views import home
urlpatterns = [
    path('', home, name = 'home')
]
Django将匹配没有终点的URL并将其路由到我们创建的视图函数。
使用天气API
要获取实时天气报告,我们需要注册 Open Weather Map API 。它将返回我们输入到应用程序的任何城市的实时天气。
访问该网站并创建一个帐户,然后转到其控制面板上的API密钥。

注意 – API密钥应保密,以防止其被其他方使用。
添加城市,城市天气,导入请求模块。
Views.py
import json
from django.shortcuts import render
import urllib.request
import json

# Create your views here.

def home(request):
    if request.method == 'POST':
        # Get the city name from the user api = http://api.openweathermap.org/data/2.5/weather
        city = request.POST.get('city', 'True')

        # retreive the information using api
        source = urllib.request.urlopen('http://api.openweathermap.org/data/2.5/weather?q=' + city + '&units=imperial&appid=164fec96a27b97680ee442e489ce3f06').read()

        # convert json data file into python dictionary
        list_of_data = json.loads(source)

        # create dictionary and convert value in string
        context = {
            'city': city,
            "country_code": str(list_of_data['sys']['country']),
            "coordinate": str(list_of_data['coord']['lon']) + ' '
                            + str(list_of_data['coord']['lat']),
            "temp": str(list_of_data['main']['temp']) + 'k',
            "pressure": str(list_of_data['main']['pressure']),
            "humidity": str(list_of_data['main']['humidity']),
        }
    else:
        context = {}

    # send dictionary to the index.html
    return render(request, 'index.html', context)
说明 –
在上述视图中,我们检查方法是否为POST,然后从表单中获取城市名称。然后我们使用 urllib.request.urlopen() 读取特定城市的数据。我们将source变量传递给 json.loads() 将数据转换为Python字典。
通过这样做,我们可以轻松访问所需的数据并保存到上下文字典中。当用户输入城市时,将显示我们在上下文字典中存储的所有属性。
注意 – API需要一段时间才能激活。如果尚未激活,请稍后再试。
现在我们将对html文件进行更改。
<div class="row">
        {% if country_code and coordinate and temp and pressure and humidity %}
        <div class="col d-flex justify-content-center" ">
        <div class=" card text-white bg-light mb-6">
        <div class=" card-body">
        <h4><span class="badge badge-primary">City :</span> {{city}}</h4>
            <h4><span class="badge badge-primary">Country Code :</span> {{country_code}}</h4>
            <h4><span class="badge badge-primary">Coordinates [X,Y] :</span> {{coordinate}}</h4>
            <h4><span class="badge badge-primary">Temperature :</span> {{temp}}</h4>
            <h4><span class="badge badge-primary">Pressure :</span> {{pressure}} </h4>
            <h4><span class="badge badge-primary">Humidity : </span> {{humidity}}</h4>
        </div>
        {% endif %}
 </div>
现在我们运行服务器并点击给定的链接。它将如下所示。
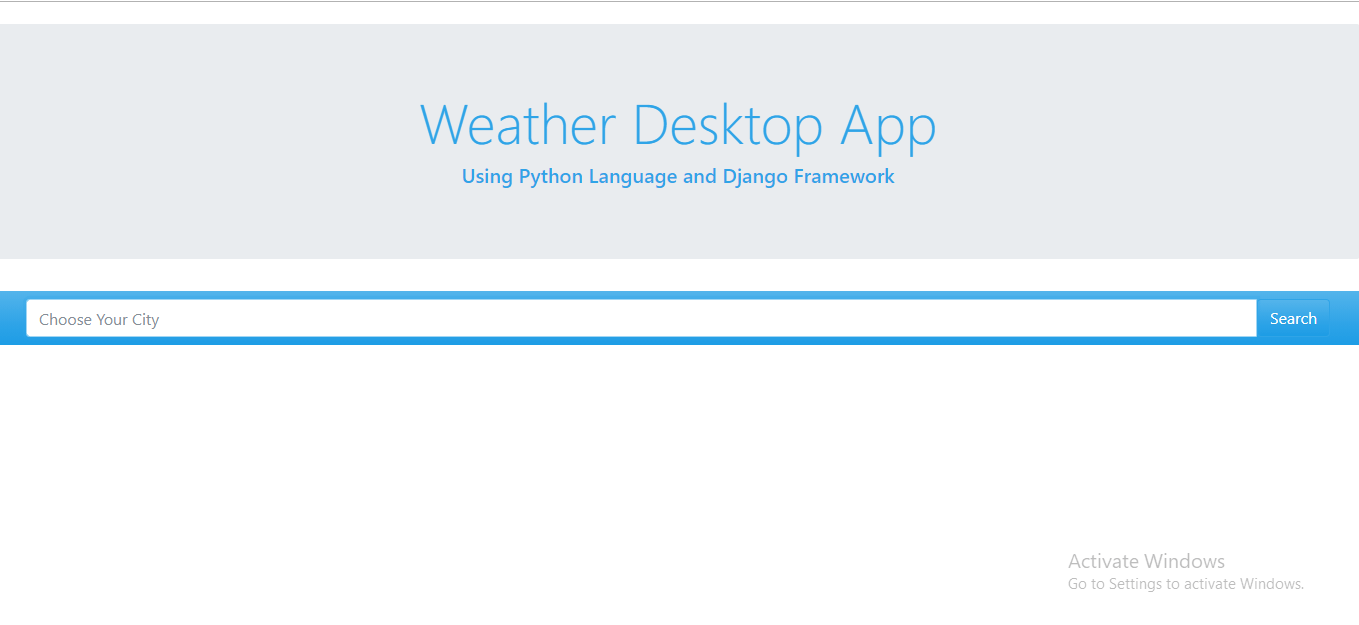
在搜索框中输入城市名称,点击搜索按钮获取天气数据。我们输入 诺伊达 并获取天气数据。
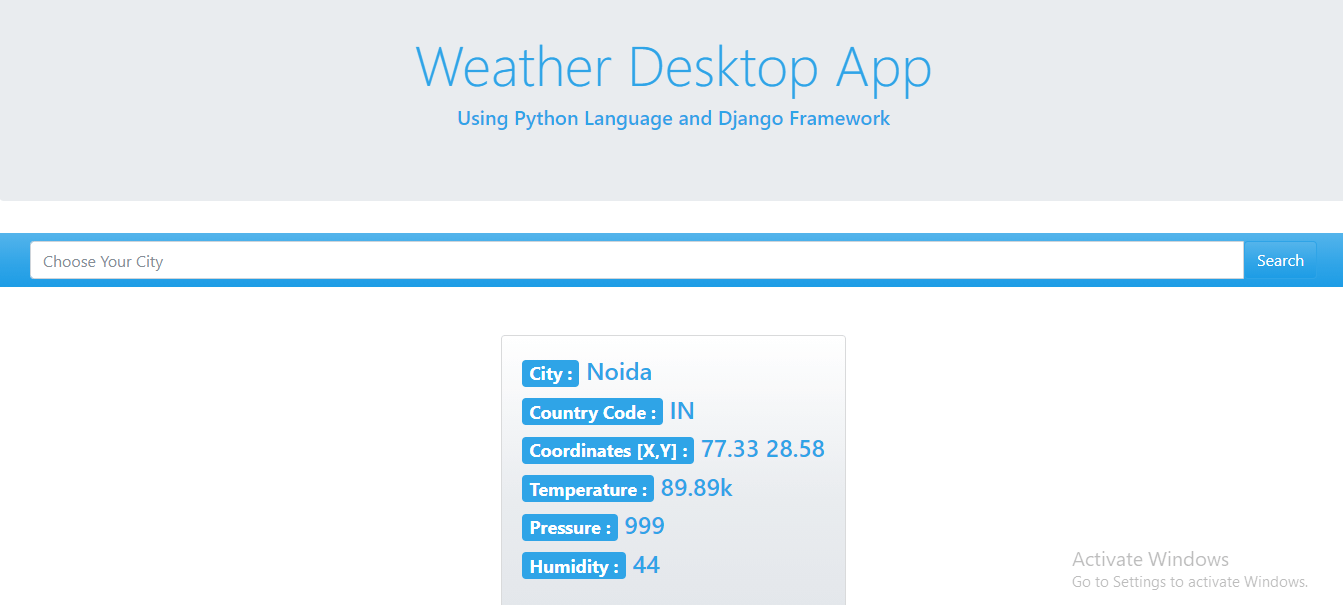
正如我们在上面的快照中所看到的,我们已经成功使用Django框架创建了一个天气应用。到目前为止,我们已经学习了一些命令,创建了虚拟环境,最重要的是学习了API。我们还讨论了调用API并获取不同的天气字段,例如国家代码、湿度、温度等。
您可以通过使用bootstrap类和HTML来使这个项目的UI更加吸引人。
 极客笔记
极客笔记