Matplotlib散点图标记样式的全面指南
参考:matplotlib scatter marker styles
matplotlib scatter marker styles
Matplotlib是Python中最流行的数据可视化库之一,它提供了丰富的绘图功能,其中散点图(scatter plot)是一种常用的图表类型。在绘制散点图时,标记(marker)的样式对于数据的呈现和区分至关重要。本文将深入探讨Matplotlib中散点图的标记样式,包括各种内置标记、自定义标记、标记大小、颜色、透明度等方面的设置,以及如何在实际应用中灵活运用这些特性。
1. Matplotlib散点图基础
在开始探讨标记样式之前,我们先来回顾一下Matplotlib中绘制散点图的基本方法。散点图通常用于展示两个变量之间的关系,每个点代表一对数据。
1.1 基本散点图
让我们从一个简单的散点图开始:
import matplotlib.pyplot as plt
import numpy as np

# 生成示例数据
np.random.seed(42)
x = np.random.rand(50)
y = np.random.rand(50)

# 创建散点图
plt.figure(figsize=(8, 6))
plt.scatter(x, y)
plt.title('Basic Scatter Plot - how2matplotlib.com')
plt.xlabel('X-axis')
plt.ylabel('Y-axis')
plt.grid(True)
plt.show()

print("Scatter plot has been displayed.")
Output:
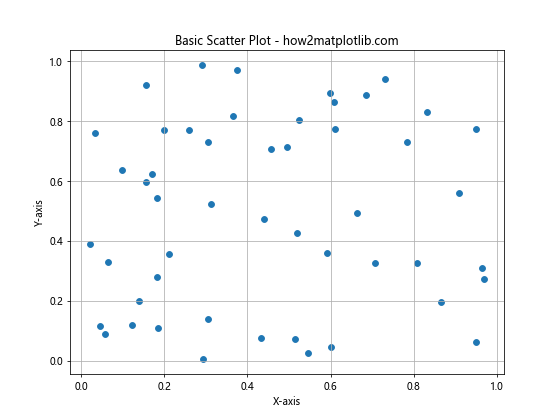
这个示例创建了一个基本的散点图。plt.scatter()函数是绘制散点图的核心,它接受x和y坐标作为输入。figsize参数设置图形的大小,title、xlabel和ylabel分别设置图表标题和坐标轴标签。grid函数添加网格线以提高可读性。
1.2 散点图中的标记
标记是散点图中表示数据点的符号。Matplotlib提供了多种内置标记样式,可以通过marker参数来指定:
import matplotlib.pyplot as plt
import numpy as np

# 生成示例数据
np.random.seed(42)
x = np.random.rand(50)
y = np.random.rand(50)

# 创建散点图,使用不同的标记
plt.figure(figsize=(10, 8))
markers = ['o', 's', '^', 'D', 'v', '<', '>', 'p', '*', 'h', 'H', '+', 'x']
colors = plt.cm.rainbow(np.linspace(0, 1, len(markers)))

for i, marker in enumerate(markers):
    plt.scatter(x[i::len(markers)], y[i::len(markers)],
                marker=marker, c=[colors[i]], label=f'Marker: {marker}')

plt.title('Scatter Plot with Different Markers - how2matplotlib.com')
plt.xlabel('X-axis')
plt.ylabel('Y-axis')
plt.legend(ncol=2)
plt.grid(True)
plt.show()

print("Scatter plot with different markers has been displayed.")
Output:
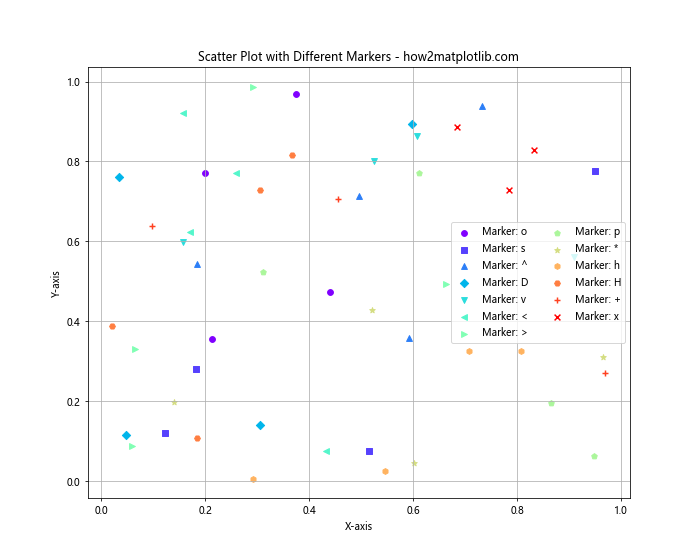
这个示例展示了多种内置标记样式。我们使用循环来创建多个散点集,每个集合使用不同的标记和颜色。label参数用于为每种标记创建图例条目,legend函数则显示图例。
2. 内置标记样式详解
Matplotlib提供了丰富的内置标记样式,可以满足大多数绘图需求。让我们详细探讨这些标记样式及其用法。
2.1 点状标记
点状标记是最常用的标记类型,包括圆点、方点等:
import matplotlib.pyplot as plt
import numpy as np

# 生成示例数据
np.random.seed(42)
x = np.random.rand(20)
y = np.random.rand(20)

# 创建散点图,使用点状标记
plt.figure(figsize=(12, 8))
point_markers = ['.', ',', 'o', 'v', '^', '<', '>', '1', '2', '3', '4', 's', 'p', '*', 'h', 'H', '+', 'x', 'D', 'd']

for i, marker in enumerate(point_markers):
    plt.scatter(x[i], y[i], marker=marker, s=100, label=f'{marker}')

plt.title('Point-like Markers - how2matplotlib.com')
plt.xlabel('X-axis')
plt.ylabel('Y-axis')
plt.legend(ncol=4, loc='upper center', bbox_to_anchor=(0.5, -0.1))
plt.tight_layout()
plt.grid(True)
plt.show()

print("Scatter plot with point-like markers has been displayed.")
Output:
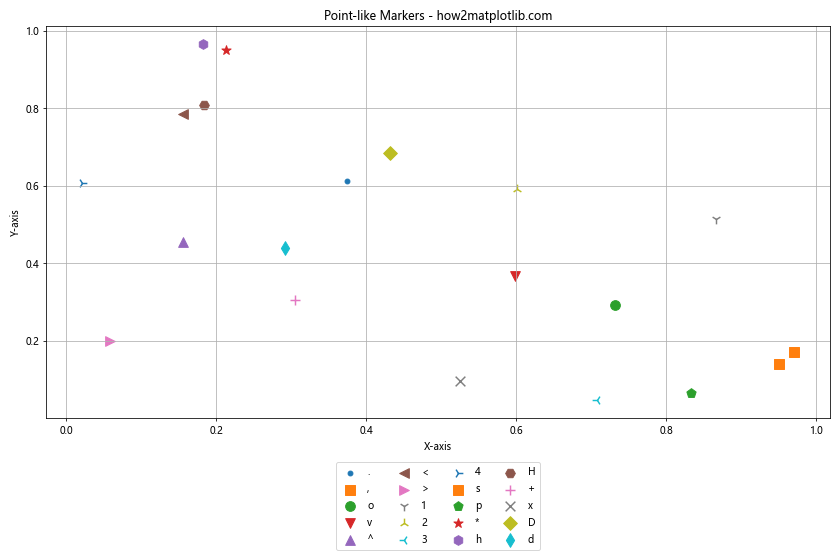
这个示例展示了各种点状标记。s参数用于设置标记的大小。我们使用legend函数创建图例,ncol参数设置图例的列数,loc和bbox_to_anchor参数用于调整图例的位置。
2.2 线状标记
线状标记包括各种线条和箭头:
import matplotlib.pyplot as plt
import numpy as np

# 生成示例数据
np.random.seed(42)
x = np.random.rand(10)
y = np.random.rand(10)

# 创建散点图,使用线状标记
plt.figure(figsize=(10, 6))
line_markers = ['|', '_', '-', '+', 'x', '4', '3', '2', '1', None]

for i, marker in enumerate(line_markers):
    plt.scatter(x[i], y[i], marker=marker, s=200, label=f'{marker if marker else "None"}')

plt.title('Line-like Markers - how2matplotlib.com')
plt.xlabel('X-axis')
plt.ylabel('Y-axis')
plt.legend(ncol=5, loc='upper center', bbox_to_anchor=(0.5, -0.15))
plt.tight_layout()
plt.grid(True)
plt.show()

print("Scatter plot with line-like markers has been displayed.")
这个示例展示了各种线状标记。注意,当marker=None时,不会显示任何标记。
2.3 填充标记
填充标记是指可以填充颜色的闭合形状标记:
import matplotlib.pyplot as plt
import numpy as np

# 生成示例数据
np.random.seed(42)
x = np.random.rand(12)
y = np.random.rand(12)

# 创建散点图,使用填充标记
plt.figure(figsize=(10, 6))
filled_markers = ['o', 's', 'p', '*', 'h', 'H', 'D', 'd', 'v', '^', '<', '>']

for i, marker in enumerate(filled_markers):
    plt.scatter(x[i], y[i], marker=marker, s=200, label=marker)

plt.title('Filled Markers - how2matplotlib.com')
plt.xlabel('X-axis')
plt.ylabel('Y-axis')
plt.legend(ncol=4, loc='upper center', bbox_to_anchor=(0.5, -0.15))
plt.tight_layout()
plt.grid(True)
plt.show()

print("Scatter plot with filled markers has been displayed.")
Output:
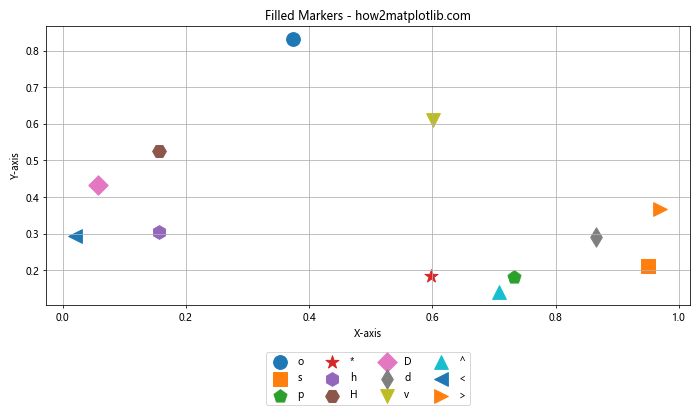
这个示例展示了各种可填充的标记。这些标记可以通过设置facecolor和edgecolor参数来自定义填充颜色和边框颜色。
3. 自定义标记样式
除了使用内置标记,Matplotlib还允许用户创建自定义标记。这为数据可视化提供了更大的灵活性。
3.1 使用路径创建自定义标记
我们可以使用路径来定义自定义标记的形状:
import matplotlib.pyplot as plt
import numpy as np
from matplotlib.path import Path

# 定义自定义标记
verts = [
    (0., -1.),  # 左下
    (0.5, 0.),  # 中上
    (1., -1.),  # 右下
    (0., 0.),   # 中心
    (0., -1.),  # 回到起点
]
codes = [Path.MOVETO,
         Path.LINETO,
         Path.LINETO,
         Path.LINETO,
         Path.CLOSEPOLY,
]
path = Path(verts, codes)

# 生成示例数据
np.random.seed(42)
x = np.random.rand(20)
y = np.random.rand(20)

# 创建散点图,使用自定义标记
plt.figure(figsize=(8, 6))
plt.scatter(x, y, s=300, marker=path, c='blue', alpha=0.6, edgecolors='black')
plt.title('Custom Marker using Path - how2matplotlib.com')
plt.xlabel('X-axis')
plt.ylabel('Y-axis')
plt.grid(True)
plt.show()

print("Scatter plot with custom marker has been displayed.")
Output:
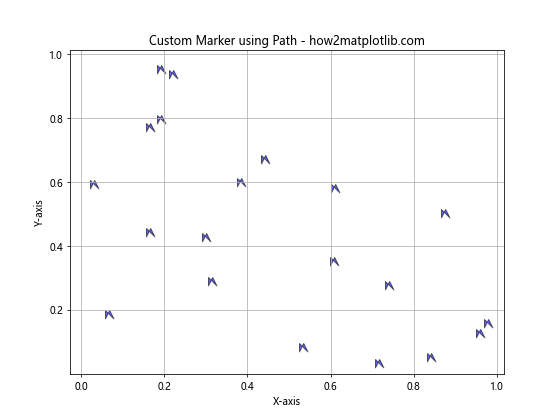
这个示例创建了一个自定义的三角形标记。verts定义了标记的顶点,codes定义了如何连接这些顶点。Path对象将这些信息组合成一个可用作标记的路径。
3.2 使用Unicode字符作为标记
Unicode字符也可以用作标记,这为创建独特的标记提供了另一种方法:
import matplotlib.pyplot as plt
import numpy as np

# 生成示例数据
np.random.seed(42)
x = np.random.rand(5)
y = np.random.rand(5)

# 创建散点图,使用Unicode字符作为标记
plt.figure(figsize=(8, 6))
unicode_markers = ['☺', '♥', '☼', '♫', '☾']

for i, marker in enumerate(unicode_markers):
    plt.scatter(x[i], y[i], s=500, marker=marker, label=f'Unicode: {marker}')

plt.title('Unicode Characters as Markers - how2matplotlib.com')
plt.xlabel('X-axis')
plt.ylabel('Y-axis')
plt.legend()
plt.grid(True)
plt.show()

print("Scatter plot with Unicode markers has been displayed.")
这个示例使用了几个Unicode字符作为散点图的标记。这种方法可以创建非常独特和有趣的标记。
4. 标记大小和颜色
标记的大小和颜色是散点图中另外两个重要的视觉元素,它们可以用来表示额外的数据维度。
4.1 调整标记大小
标记大小可以通过s参数来调整:
import matplotlib.pyplot as plt
import numpy as np

# 生成示例数据
np.random.seed(42)
x = np.random.rand(50)
y = np.random.rand(50)
sizes = np.random.rand(50) * 1000  # 随机生成大小

# 创建散点图,使用不同大小的标记
plt.figure(figsize=(10, 8))
scatter = plt.scatter(x, y, s=sizes, alpha=0.5)

plt.title('Scatter Plot with Variable Marker Sizes - how2matplotlib.com')
plt.xlabel('X-axis')
plt.ylabel('Y-axis')
plt.colorbar(scatter, label='Size')
plt.grid(True)
plt.show()

print("Scatter plot with variable marker sizes has been displayed.")
Output:
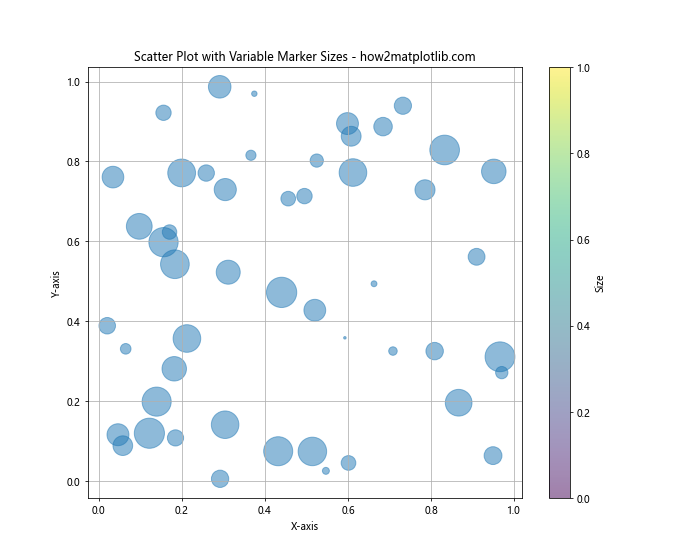
这个示例中,我们使用随机生成的数值来设置标记的大小。alpha参数用于设置标记的透明度,这在标记重叠时特别有用。colorbar函数添加了一个颜色条来显示大小的范围。
4.2 设置标记颜色
标记的颜色可以用来表示另一个数据维度:
import matplotlib.pyplot as plt
import numpy as np

# 生成示例数据
np.random.seed(42)
x = np.random.rand(100)
y = np.random.rand(100)
colors = np.random.rand(100)

# 创建散点图,使用不同颜色的标记
plt.figure(figsize=(10, 8))
scatter = plt.scatter(x, y, c=colors, s=100, cmap='viridis')

plt.title('Scatter Plot with Variable Marker Colors - how2matplotlib.com')
plt.xlabel('X-axis')
plt.ylabel('Y-axis')
plt.colorbar(scatter, label='Color Value')
plt.grid(True)
plt.show()

print("Scatter plot with variable marker colors has been displayed.")
Output:
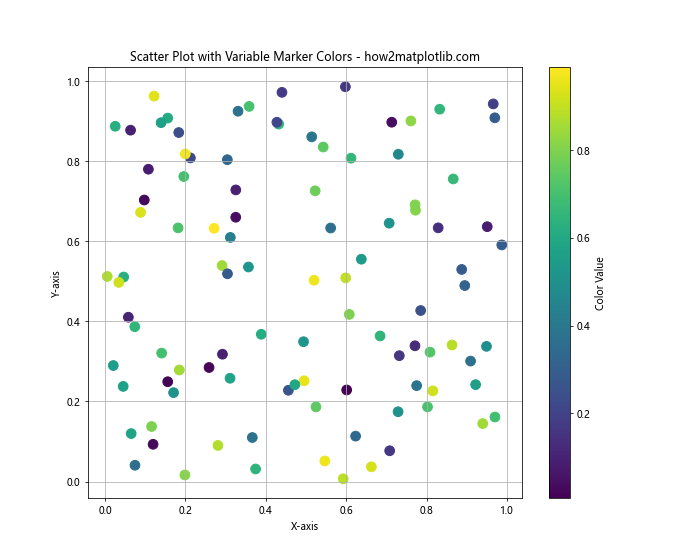
在这个示例中,我们使用c参数来设置标记的颜色,cmap参数指定了颜色映射。颜色条显示了颜色值的范围。
5. 标记边缘和填充
对于填充标记,我们可以分别控制边缘和填充的颜色和样式。
5.1 设置边缘颜色和宽度
import matplotlib.pyplot as plt
import numpy as np

# 生成示例数据
np.random.seed(42)
x = np.random.rand(50)
y = np.random.rand(50)

# 创建散点图,设置边缘颜色和宽度
plt.figure(figsize=(10, 8))
plt.scatter(x, y, s=200, c='skyblue', edgecolors='navy', linewidths=2)

plt.title('Scatter Plot with Custom Edge Colors and Widths - how2matplotlib.com')
plt.xlabel('X-axis')
plt.ylabel('Y-axis')
plt.grid(True)
plt.show()

print("Scatter plot with custom edge colors and widths has been displayed.")
Output:
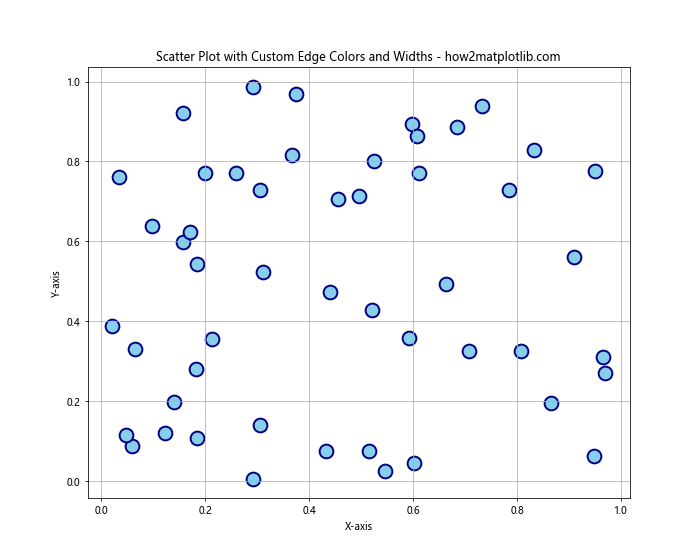
这个示例中,edgecolors参数设置了标记的边缘颜色,linewidths参数设置了边缘的宽度。
5.2 设置填充样式
我们可以使用hatch参数来设置填充样式:
import matplotlib.pyplot as plt
import numpy as np

# 生成示例数据
np.random.seed(42)
x = np.random.rand(25)
y = np.random.rand(25)

# 创建散点图,设置不同的填充样式

plt.figure(figsize=(12, 10))
hatch_patterns = ['/', '\\', '|', '-', '+', 'x', 'o', 'O', '.', '*']

for i, pattern in enumerate(hatch_patterns):
    plt.scatter(x[i::5], y[i::5], s=400, c='none', edgecolors='black',
                hatch=pattern, label=f'Hatch: {pattern}')

plt.title('Scatter Plot with Different Hatch Patterns - how2matplotlib.com')
plt.xlabel('X-axis')
plt.ylabel('Y-axis')
plt.legend(ncol=2)
plt.grid(True)
plt.show()

print("Scatter plot with different hatch patterns has been displayed.")
Output:
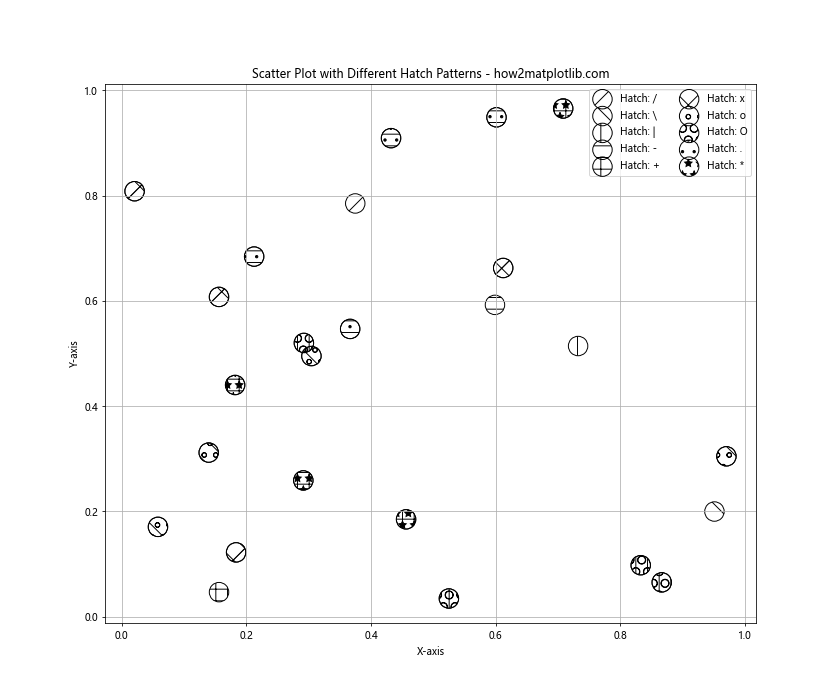
这个示例展示了不同的填充样式。hatch参数用于设置填充样式,c='none'使标记内部透明,只显示填充样式。
6. 多数据集散点图
在实际应用中,我们经常需要在同一张图上绘制多个数据集的散点图。这可以用来比较不同组的数据或展示数据的不同方面。
6.1 使用不同标记区分数据集
import matplotlib.pyplot as plt
import numpy as np

# 生成示例数据
np.random.seed(42)
x1 = np.random.rand(50)
y1 = np.random.rand(50)
x2 = np.random.rand(50) + 0.5
y2 = np.random.rand(50) + 0.5
x3 = np.random.rand(50) - 0.5
y3 = np.random.rand(50) - 0.5

# 创建多数据集散点图
plt.figure(figsize=(10, 8))
plt.scatter(x1, y1, s=100, c='red', marker='o', label='Dataset 1')
plt.scatter(x2, y2, s=100, c='blue', marker='^', label='Dataset 2')
plt.scatter(x3, y3, s=100, c='green', marker='s', label='Dataset 3')

plt.title('Multiple Datasets Scatter Plot - how2matplotlib.com')
plt.xlabel('X-axis')
plt.ylabel('Y-axis')
plt.legend()
plt.grid(True)
plt.show()

print("Multiple datasets scatter plot has been displayed.")
Output:
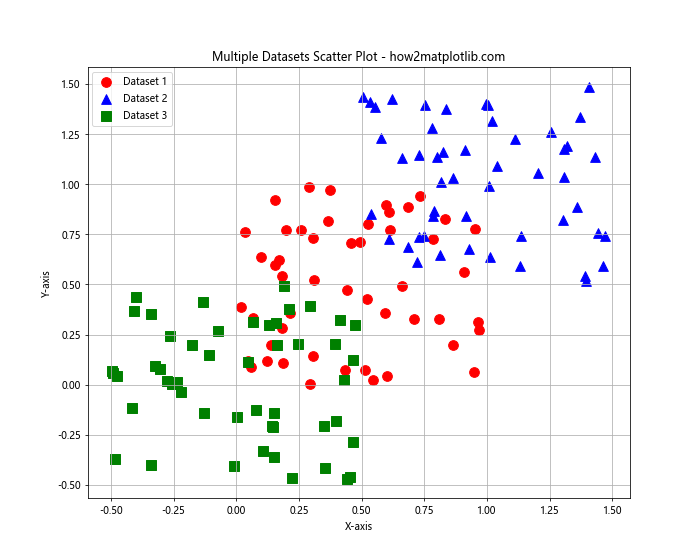
这个示例展示了如何在同一张图上绘制多个数据集的散点图。我们使用不同的颜色和标记来区分不同的数据集。
6.2 使用大小和颜色表示多维数据
import matplotlib.pyplot as plt
import numpy as np

# 生成示例数据
np.random.seed(42)
x = np.random.rand(100)
y = np.random.rand(100)
colors = np.random.rand(100)
sizes = np.random.randint(50, 500, 100)

# 创建多维数据散点图
plt.figure(figsize=(12, 10))
scatter = plt.scatter(x, y, c=colors, s=sizes, alpha=0.6, cmap='viridis')

plt.title('Multidimensional Data Scatter Plot - how2matplotlib.com')
plt.xlabel('X-axis')
plt.ylabel('Y-axis')
plt.colorbar(scatter, label='Color Dimension')
handles, labels = scatter.legend_elements(prop="sizes", alpha=0.6)
plt.legend(handles, labels, loc="upper right", title="Size")
plt.grid(True)
plt.show()

print("Multidimensional data scatter plot has been displayed.")
Output:
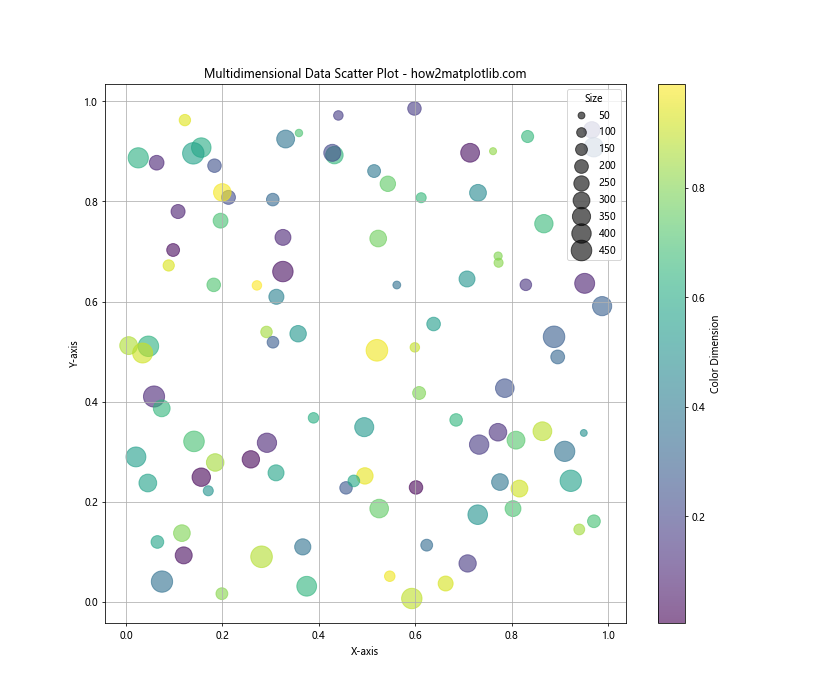
这个示例展示了如何使用标记的大小和颜色来表示额外的数据维度。颜色条显示了颜色维度的范围,而图例显示了大小的范围。
7. 标记的动态变化
在某些情况下,我们可能希望标记的属性随着数据的变化而动态变化。这可以通过设置标记的属性为数组来实现。
7.1 标记大小随数据变化
import matplotlib.pyplot as plt
import numpy as np

# 生成示例数据
np.random.seed(42)
x = np.linspace(0, 10, 100)
y = np.sin(x)
sizes = np.abs(y) * 200 + 50  # 大小随y值变化

# 创建动态大小的散点图
plt.figure(figsize=(12, 8))
plt.scatter(x, y, s=sizes, c='purple', alpha=0.6)

plt.title('Scatter Plot with Dynamic Marker Sizes - how2matplotlib.com')
plt.xlabel('X-axis')
plt.ylabel('Y-axis')
plt.grid(True)
plt.show()

print("Scatter plot with dynamic marker sizes has been displayed.")
Output:
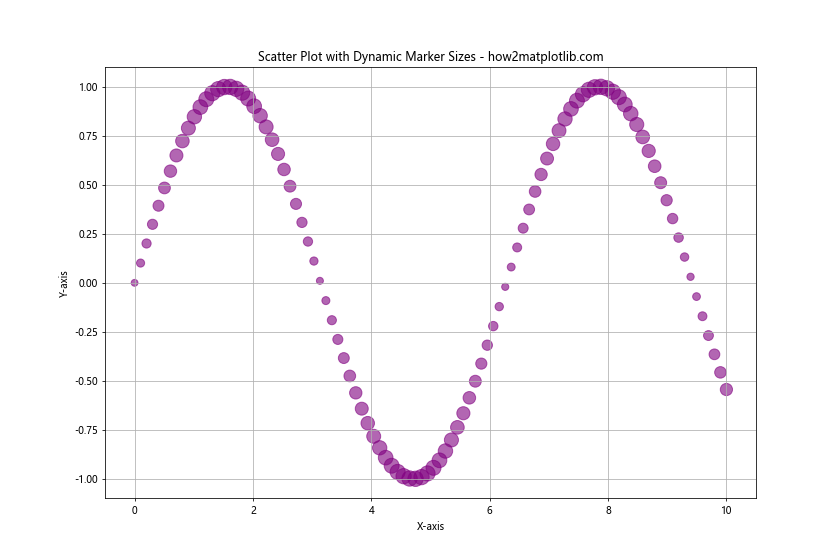
在这个示例中,标记的大小随y值的绝对值变化。这种技术可以用来强调某些数据点。
7.2 标记颜色随数据变化
import matplotlib.pyplot as plt
import numpy as np

# 生成示例数据
np.random.seed(42)
x = np.linspace(0, 10, 100)
y = np.sin(x)
colors = y  # 颜色随y值变化

# 创建动态颜色的散点图
plt.figure(figsize=(12, 8))
scatter = plt.scatter(x, y, s=100, c=colors, cmap='coolwarm')

plt.title('Scatter Plot with Dynamic Marker Colors - how2matplotlib.com')
plt.xlabel('X-axis')
plt.ylabel('Y-axis')
plt.colorbar(scatter, label='Y Value')
plt.grid(True)
plt.show()

print("Scatter plot with dynamic marker colors has been displayed.")
Output:

这个示例展示了如何让标记的颜色随y值变化。这种方法可以直观地显示数据的趋势或模式。
8. 3D散点图中的标记
Matplotlib也支持3D散点图,我们可以在三维空间中应用相同的标记样式技术。
8.1 基本3D散点图
import matplotlib.pyplot as plt
import numpy as np
from mpl_toolkits.mplot3d import Axes3D

# 生成示例数据
np.random.seed(42)
x = np.random.rand(100)
y = np.random.rand(100)
z = np.random.rand(100)

# 创建3D散点图
fig = plt.figure(figsize=(10, 8))
ax = fig.add_subplot(111, projection='3d')
ax.scatter(x, y, z, s=100, c='skyblue', edgecolors='navy')

ax.set_title('3D Scatter Plot - how2matplotlib.com')
ax.set_xlabel('X-axis')
ax.set_ylabel('Y-axis')
ax.set_zlabel('Z-axis')
plt.show()

print("3D scatter plot has been displayed.")
Output:
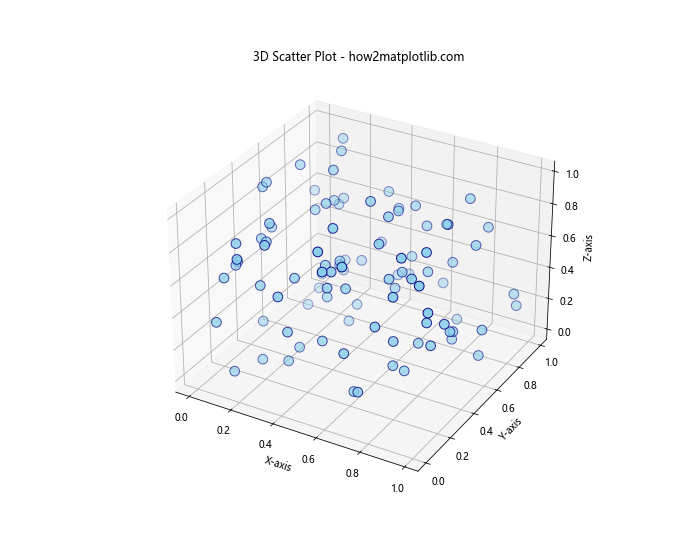
这个示例创建了一个基本的3D散点图。我们使用projection='3d'参数来创建3D坐标系。
8.2 3D散点图中的多数据集
import matplotlib.pyplot as plt
import numpy as np
from mpl_toolkits.mplot3d import Axes3D

# 生成示例数据
np.random.seed(42)
x1, y1, z1 = np.random.rand(3, 100)
x2, y2, z2 = np.random.rand(3, 100) + 0.5
x3, y3, z3 = np.random.rand(3, 100) - 0.5

# 创建3D散点图,包含多个数据集
fig = plt.figure(figsize=(12, 10))
ax = fig.add_subplot(111, projection='3d')

ax.scatter(x1, y1, z1, s=100, c='red', marker='o', label='Dataset 1')
ax.scatter(x2, y2, z2, s=100, c='blue', marker='^', label='Dataset 2')
ax.scatter(x3, y3, z3, s=100, c='green', marker='s', label='Dataset 3')

ax.set_title('3D Scatter Plot with Multiple Datasets - how2matplotlib.com')
ax.set_xlabel('X-axis')
ax.set_ylabel('Y-axis')
ax.set_zlabel('Z-axis')
ax.legend()
plt.show()

print("3D scatter plot with multiple datasets has been displayed.")
Output:
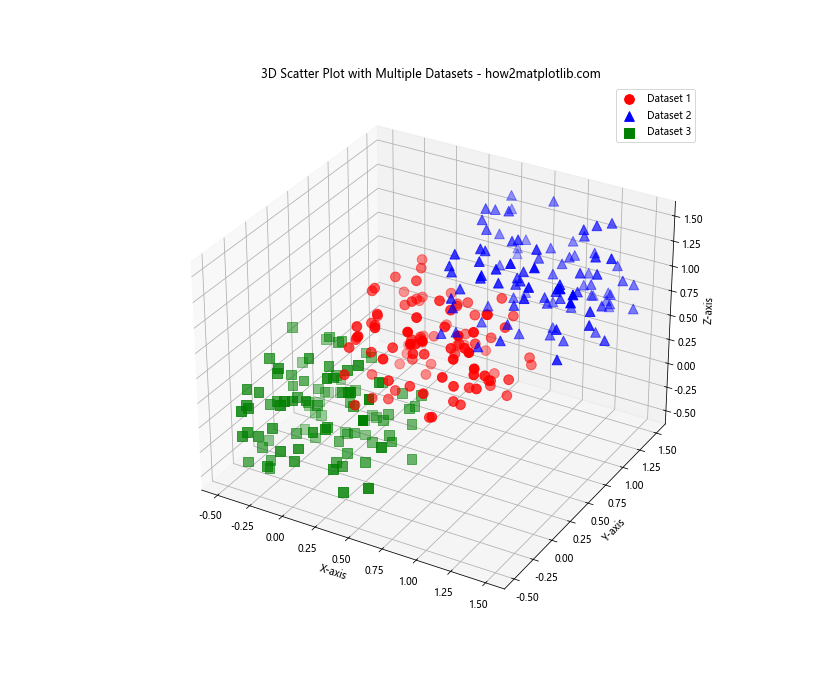
这个示例展示了如何在3D空间中绘制多个数据集的散点图,使用不同的颜色和标记来区分不同的数据集。
9. 标记样式在时间序列数据中的应用
散点图的标记样式在时间序列数据的可视化中也有重要应用。我们可以使用不同的标记来表示不同的时间点或事件。
9.1 使用标记突出关键时间点
import matplotlib.pyplot as plt
import numpy as np
import pandas as pd

# 生成示例时间序列数据
np.random.seed(42)
dates = pd.date_range(start='2023-01-01', end='2023-12-31', freq='D')
values = np.cumsum(np.random.randn(len(dates)))

# 创建时间序列图
plt.figure(figsize=(14, 8))
plt.plot(dates, values, color='blue', alpha=0.7)

# 突出显示特定日期
key_dates = ['2023-03-15', '2023-06-30', '2023-09-22', '2023-12-25']
key_values = [values[dates == date][0] for date in key_dates]

plt.scatter(key_dates, key_values, s=200, c='red', marker='*',
            label='Key Dates', zorder=5)

plt.title('Time Series with Highlighted Key Dates - how2matplotlib.com')
plt.xlabel('Date')
plt.ylabel('Value')
plt.legend()
plt.grid(True)
plt.xticks(rotation=45)
plt.tight_layout()
plt.show()

print("Time series plot with highlighted key dates has been displayed.")
Output:
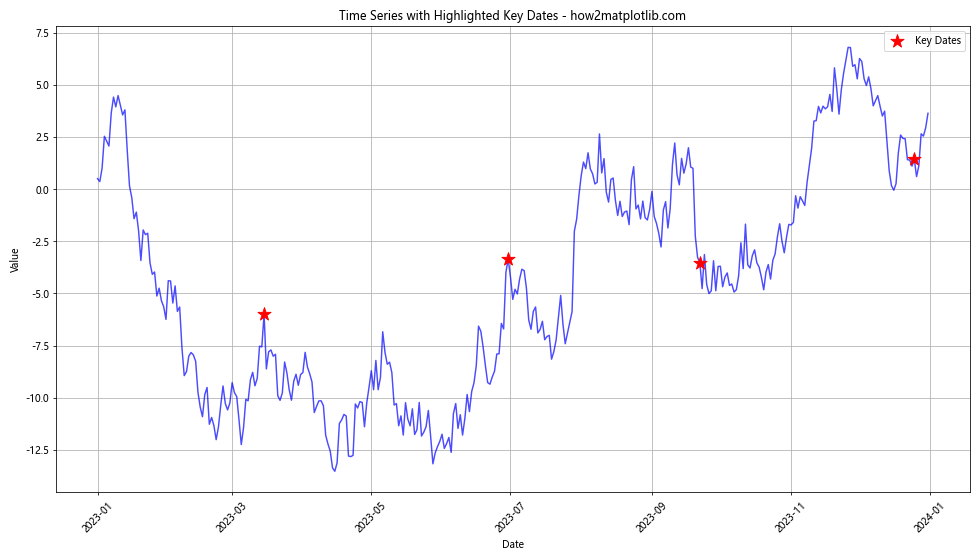
这个示例展示了如何在时间序列图中使用特殊标记来突出显示关键日期。zorder参数确保这些标记显示在其他元素之上。
9.2 使用不同标记表示不同类型的事件
import matplotlib.pyplot as plt
import numpy as np
import pandas as pd

# 生成示例时间序列数据
np.random.seed(42)
dates = pd.date_range(start='2023-01-01', end='2023-12-31', freq='D')
values = np.cumsum(np.random.randn(len(dates)))

# 创建时间序列图
plt.figure(figsize=(14, 8))
plt.plot(dates, values, color='gray', alpha=0.5)

# 定义不同类型的事件
event_types = ['Type A', 'Type B', 'Type C']
event_markers = ['o', 's', '^']
event_colors = ['red', 'blue', 'green']

for event_type, marker, color in zip(event_types, event_markers, event_colors):
    event_dates = np.random.choice(dates, 5)
    event_values = [values[dates == date][0] for date in event_dates]
    plt.scatter(event_dates, event_values, s=100, c=color, marker=marker,
                label=f'Event {event_type}', zorder=5)

plt.title('Time Series with Different Event Types - how2matplotlib.com')
plt.xlabel('Date')
plt.ylabel('Value')
plt.legend()
plt.grid(True)
plt.xticks(rotation=45)
plt.tight_layout()
plt.show()

print("Time series plot with different event types has been displayed.")
Output:
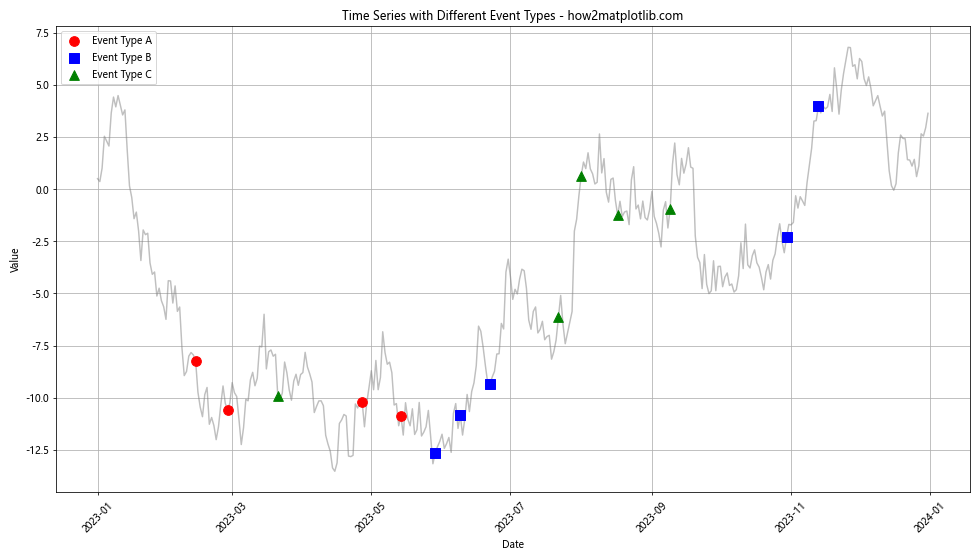
这个示例展示了如何使用不同的标记和颜色来表示时间序列中的不同类型事件。这种方法可以帮助观察者快速识别和区分不同类型的事件。
10. 高级标记技巧
在某些情况下,我们可能需要更高级的标记技巧来满足特定的可视化需求。以下是一些高级技巧的示例。
10.1 使用图像作为标记
我们可以使用自定义图像作为散点图的标记:
import matplotlib.pyplot as plt
import numpy as np
from matplotlib.offsetbox import OffsetImage, AnnotationBbox

# 生成示例数据
np.random.seed(42)
x = np.random.rand(10)
y = np.random.rand(10)

# 创建一个简单的图像作为标记
def create_circle_image(color):
    img = np.zeros((20, 20, 4))
    circle = plt.Circle((10, 10), 8)
    fig = plt.figure(figsize=(1, 1), dpi=20)
    ax = fig.add_subplot(111)
    ax.add_artist(circle)
    circle.set_facecolor(color)
    ax.axis('off')
    fig.canvas.draw()
    img = np.frombuffer(fig.canvas.tostring_argb(), dtype=np.uint8)
    img = img.reshape((20, 20, 4))
    plt.close(fig)
    return img

# 创建散点图,使用图像作为标记
plt.figure(figsize=(10, 8))

for xi, yi in zip(x, y):
    color = np.random.rand(3,)
    img = create_circle_image(color)
    im = OffsetImage(img, zoom=2)
    ab = AnnotationBbox(im, (xi, yi), frameon=False, pad=0)
    plt.gca().add_artist(ab)

plt.title('Scatter Plot with Image Markers - how2matplotlib.com')
plt.xlabel('X-axis')
plt.ylabel('Y-axis')
plt.xlim(0, 1)
plt.ylim(0, 1)
plt.grid(True)
plt.show()

print("Scatter plot with image markers has been displayed.")
Output:
这个示例展示了如何使用自定义图像作为散点图的标记。我们创建了一个简单的圆形图像,并使用AnnotationBbox将其添加到图表中。
10.2 动画散点图
我们可以创建动画散点图来展示数据的变化过程:
import matplotlib.pyplot as plt
import numpy as np
from matplotlib.animation import FuncAnimation

# 生成初始数据
np.random.seed(42)
num_points = 50
x = np.random.rand(num_points)
y = np.random.rand(num_points)
colors = np.random.rand(num_points)
sizes = np.random.randint(20, 200, num_points)

# 创建图形和散点图
fig, ax = plt.subplots(figsize=(10, 8))
scatter = ax.scatter(x, y, c=colors, s=sizes, alpha=0.6, cmap='viridis')

ax.set_xlim(0, 1)
ax.set_ylim(0, 1)
ax.set_title('Animated Scatter Plot - how2matplotlib.com')
ax.set_xlabel('X-axis')
ax.set_ylabel('Y-axis')

# 定义更新函数
def update(frame):
    global x, y, colors, sizes
    x += np.random.randn(num_points) * 0.01
    y += np.random.randn(num_points) * 0.01
    colors += np.random.randn(num_points) * 0.1
    sizes += np.random.randint(-10, 11, num_points)

    x = np.clip(x, 0, 1)
    y = np.clip(y, 0, 1)
    colors = np.clip(colors, 0, 1)
    sizes = np.clip(sizes, 20, 200)

    scatter.set_offsets(np.c_[x, y])
    scatter.set_array(colors)
    scatter.set_sizes(sizes)
    return scatter,

# 创建动画
anim = FuncAnimation(fig, update, frames=200, interval=50, blit=True)

plt.show()

print("Animated scatter plot has been displayed.")
Output:
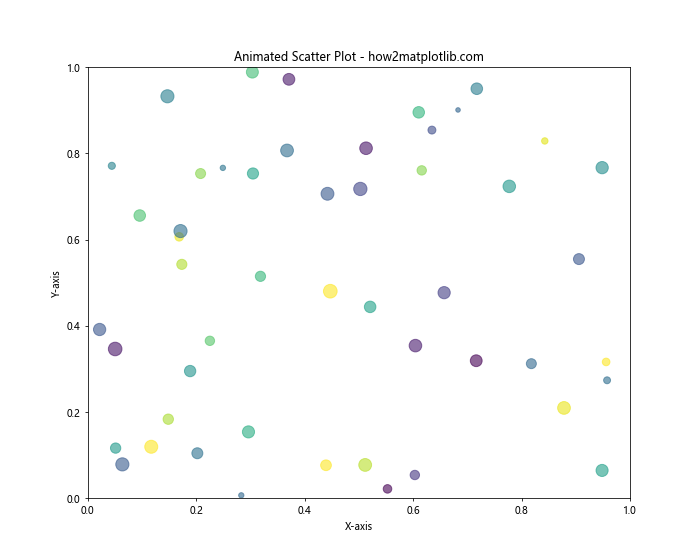
这个示例创建了一个动画散点图,其中点的位置、颜色和大小都在随时间变化。FuncAnimation函数用于创建动画,update函数定义了每一帧的更新逻辑。
11. 标记样式在数据分析中的应用
标记样式不仅可以美化图表,还可以在数据分析中发挥重要作用。以下是一些实际应用的例子。
11.1 聚类分析结果可视化
在聚类分析中,我们可以使用不同的标记来表示不同的聚类:
import matplotlib.pyplot as plt
import numpy as np
from sklearn.cluster import KMeans
from sklearn.datasets import make_blobs

# 生成示例数据
n_samples = 300
n_clusters = 4
X, y = make_blobs(n_samples=n_samples, centers=n_clusters, random_state=42)

# 进行K-means聚类
kmeans = KMeans(n_clusters=n_clusters, random_state=42)
y_pred = kmeans.fit_predict(X)

# 可视化聚类结果
plt.figure(figsize=(12, 10))
scatter = plt.scatter(X[:, 0], X[:, 1], c=y_pred, s=100, cmap='viridis',
                      marker='o', edgecolors='black', alpha=0.7)

# 绘制聚类中心
centers = kmeans.cluster_centers_
plt.scatter(centers[:, 0], centers[:, 1], c='red', s=300, marker='*',
            edgecolors='black', linewidths=2, label='Cluster Centers')

plt.title('K-means Clustering Visualization - how2matplotlib.com')
plt.xlabel('Feature 1')
plt.ylabel('Feature 2')
plt.legend()
plt.colorbar(scatter, label='Cluster')
plt.grid(True)
plt.show()

print("K-means clustering visualization has been displayed.")
Output:
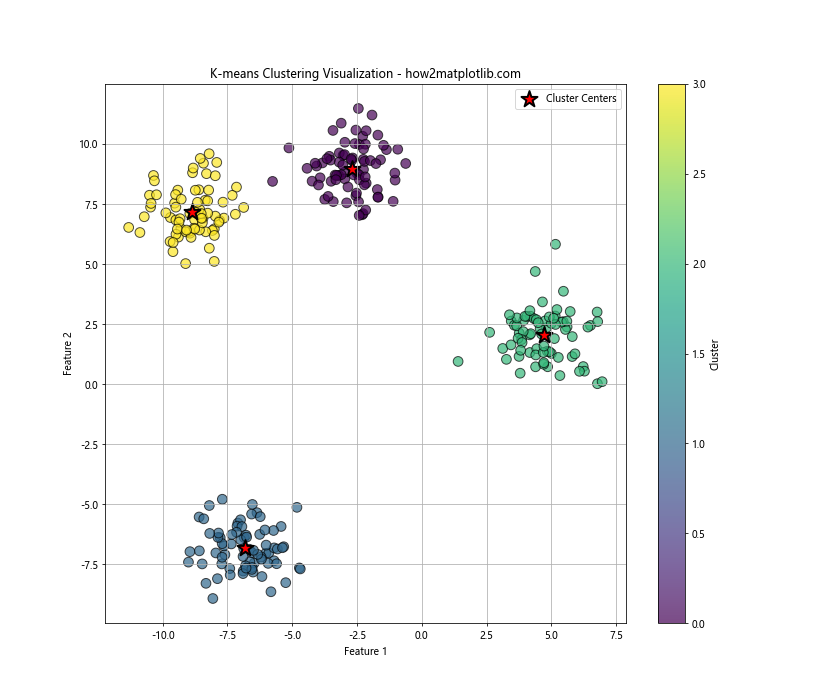
这个示例展示了如何使用散点图来可视化K-means聚类的结果。不同的颜色表示不同的聚类,而星形标记表示聚类中心。
11.2 异常检测结果可视化
在异常检测中,我们可以使用特殊的标记来突出显示异常点:
import matplotlib.pyplot as plt
import numpy as np
from sklearn.ensemble import IsolationForest

# 生成示例数据
np.random.seed(42)
X = np.random.randn(300, 2)
X_outliers = np.random.uniform(low=-4, high=4, size=(20, 2))
X = np.r_[X, X_outliers]

# 使用Isolation Forest进行异常检测
clf = IsolationForest(contamination=0.1, random_state=42)
y_pred = clf.fit_predict(X)

# 可视化异常检测结果
plt.figure(figsize=(12, 10))
normal = plt.scatter(X[y_pred == 1, 0], X[y_pred == 1, 1], c='blue', s=100,
                     marker='o', edgecolors='black', alpha=0.7, label='Normal')
anomaly = plt.scatter(X[y_pred == -1, 0], X[y_pred == -1, 1], c='red', s=150,
                      marker='s', edgecolors='black', alpha=0.7, label='Anomaly')

plt.title('Anomaly Detection Visualization - how2matplotlib.com')
plt.xlabel('Feature 1')
plt.ylabel('Feature 2')
plt.legend()
plt.grid(True)
plt.show()

print("Anomaly detection visualization has been displayed.")
Output:
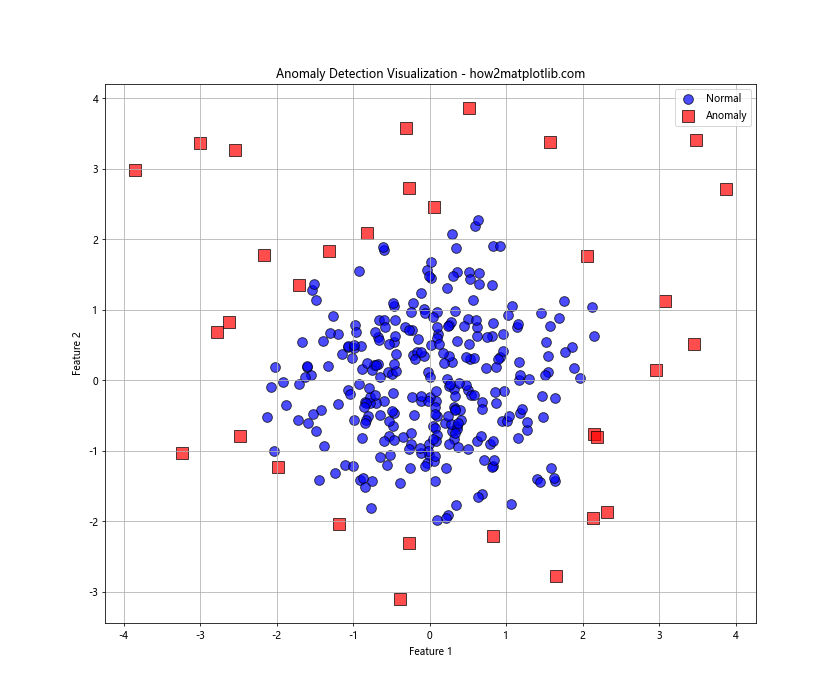
这个示例展示了如何使用不同的标记和颜色来可视化异常检测的结果。正常点用蓝色圆形表示,而异常点用红色方形表示。
12. 标记样式在科学可视化中的应用
在科学研究中,精确和清晰的数据可视化至关重要。标记样式可以帮助研究人员更好地展示和解释他们的发现。
12.1 天文数据可视化
在天文学研究中,我们可能需要可视化不同类型的天体:
import matplotlib.pyplot as plt
import numpy as np

# 生成示例数据
np.random.seed(42)
stars = np.random.rand(100, 2)
planets = np.random.rand(20, 2)
galaxies = np.random.rand(5, 2)

# 创建天文数据可视化
plt.figure(figsize=(12, 10))
plt.scatter(stars[:, 0], stars[:, 1], s=50, c='yellow', marker='*',
            edgecolors='orange', alpha=0.7, label='Stars')
plt.scatter(planets[:, 0], planets[:, 1], s=100, c='blue', marker='o',
            edgecolors='navy', alpha=0.7, label='Planets')
plt.scatter(galaxies[:, 0], galaxies[:, 1], s=300, c='purple', marker='D',
            edgecolors='black', alpha=0.7, label='Galaxies')

plt.title('Astronomical Objects Visualization - how2matplotlib.com')
plt.xlabel('Right Ascension')
plt.ylabel('Declination')
plt.legend()
plt.grid(True)
plt.show()

print("Astronomical objects visualization has been displayed.")
Output:
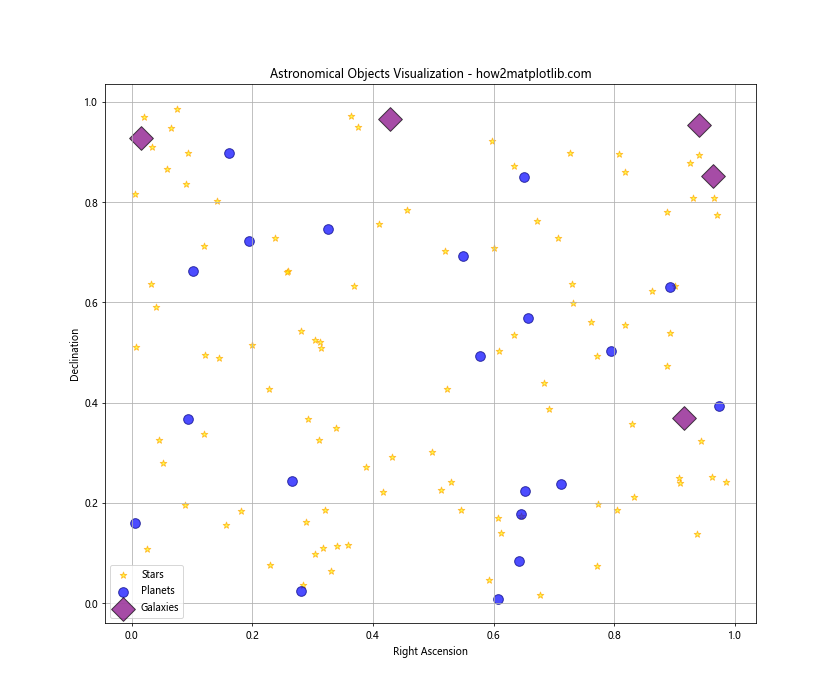
这个示例展示了如何使用不同的标记和颜色来表示不同类型的天体。星星用黄色星形标记表示,行星用蓝色圆形标记表示,而星系用紫色菱形标记表示。
12.2 地理数据可视化
在地理数据可视化中,我们可以使用不同的标记来表示不同类型的地理特征:
import matplotlib.pyplot as plt
import numpy as np

# 生成示例数据
np.random.seed(42)
cities = np.random.rand(10, 2)
mountains = np.random.rand(5, 2)
lakes = np.random.rand(3, 2)

# 创建地理数据可视化
plt.figure(figsize=(12, 10))
plt.scatter(cities[:, 0], cities[:, 1], s=200, c='red', marker='o',
            edgecolors='black', alpha=0.7, label='Cities')
plt.scatter(mountains[:, 0], mountains[:, 1], s=300, c='gray', marker='^',
            edgecolors='black', alpha=0.7, label='Mountains')
plt.scatter(lakes[:, 0], lakes[:, 1], s=400, c='blue', marker='s',
            edgecolors='black', alpha=0.7, label='Lakes')

for i, (x, y) in enumerate(cities):
    plt.annotate(f'City {i+1}', (x, y), xytext=(5, 5), textcoords='offset points')

plt.title('Geographical Features Visualization - how2matplotlib.com')
plt.xlabel('Longitude')
plt.ylabel('Latitude')
plt.legend()
plt.grid(True)
plt.show()

print("Geographical features visualization has been displayed.")
Output:
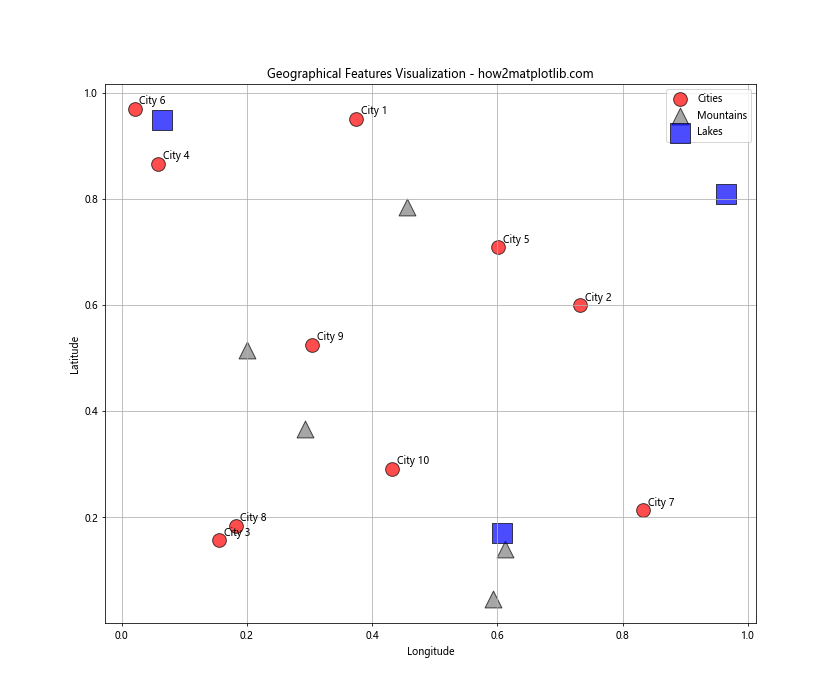
这个示例展示了如何使用不同的标记来表示不同的地理特征。城市用红色圆形表示,山脉用灰色三角形表示,湖泊用蓝色方形表示。我们还为城市添加了标签。
13. 标记样式在金融数据可视化中的应用
在金融数据分析中,清晰的数据可视化可以帮助分析师和投资者更好地理解市场趋势和模式。
13.1 股票价格和交易量可视化
import matplotlib.pyplot as plt
import numpy as np
import pandas as pd

# 生成示例数据
np.random.seed(42)
dates = pd.date_range(start='2023-01-01', end='2023-12-31', freq='B')
prices = np.cumsum(np.random.randn(len(dates))) + 100
volumes = np.random.randint(1000000, 10000000, len(dates))

# 创建股票价格和交易量可视化
fig, ax1 = plt.subplots(figsize=(14, 8))

# 绘制价格线
ax1.plot(dates, prices, color='blue', alpha=0.7)
ax1.set_xlabel('Date')
ax1.set_ylabel('Price', color='blue')
ax1.tick_params(axis='y', labelcolor='blue')

# 创建第二个y轴
ax2 = ax1.twinx()

# 绘制交易量柱状图
ax2.bar(dates, volumes, alpha=0.3, color='gray')
ax2.set_ylabel('Volume', color='gray')
ax2.tick_params(axis='y', labelcolor='gray')

# 标记重要日期
important_dates = ['2023-03-15', '2023-06-30', '2023-09-22', '2023-12-25']
for date in important_dates:
    if date in dates:
        idx = dates.get_loc(date)
        ax1.scatter(date, prices[idx], s=100, c='red', marker='*',
                    zorder=5, label='Important Date' if date == important_dates[0] else "")

plt.title('Stock Price and Volume Visualization - how2matplotlib.com')
plt.legend()
plt.grid(True)
plt.show()

print("Stock price and volume visualization has been displayed.")
这个示例展示了如何同时可视化股票价格和交易量。价格用蓝色线表示,交易量用灰色柱状图表示。重要日期用红色星形标记突出显示。
13.2 多只股票比较
import matplotlib.pyplot as plt
import numpy as np
import pandas as pd

# 生成示例数据
np.random.seed(42)
dates = pd.date_range(start='2023-01-01', end='2023-12-31', freq='B')
stocks = ['AAPL', 'GOOGL', 'MSFT', 'AMZN']
data = {stock: np.cumsum(np.random.randn(len(dates))) + 100 for stock in stocks}

# 创建多只股票比较可视化
plt.figure(figsize=(14, 10))

markers = ['o', 's', '^', 'D']
colors = ['red', 'blue', 'green', 'purple']

for stock, marker, color in zip(stocks, markers, colors):
    plt.plot(dates, data[stock], label=stock, marker=marker, markevery=20,
             markersize=8, color=color, alpha=0.7)

plt.title('Stock Price Comparison - how2matplotlib.com')
plt.xlabel('Date')
plt.ylabel('Price')
plt.legend()
plt.grid(True)
plt.xticks(rotation=45)
plt.tight_layout()
plt.show()

print("Stock price comparison visualization has been displayed.")
Output:
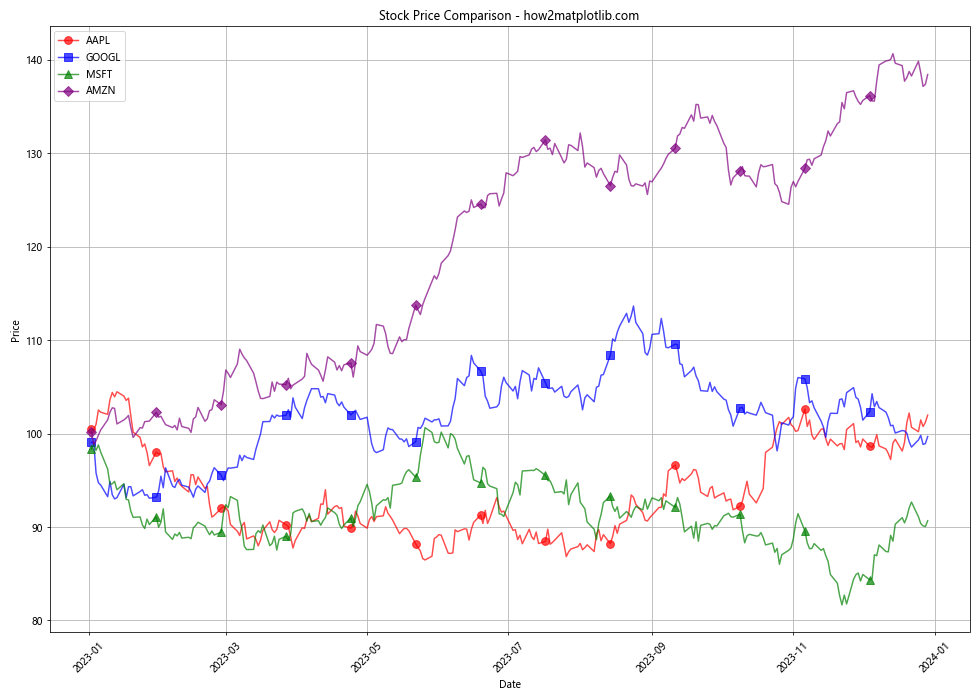
这个示例展示了如何比较多只股票的价格走势。每只股票用不同的颜色和标记表示,以便于区分。markevery参数用于控制标记的显示频率,避免图表过于拥挤。
14. 标记样式在机器学习结果可视化中的应用
在机器学习中,可视化是理解模型性能和结果的重要工具。标记样式可以帮助我们更好地展示分类结果、决策边界等。
14.1 分类结果可视化
import matplotlib.pyplot as plt
import numpy as np
from sklearn.datasets import make_classification
from sklearn.model_selection import train_test_split
from sklearn.svm import SVC

# 生成示例数据
X, y = make_classification(n_samples=200, n_features=2, n_informative=2,
                           n_redundant=0, n_clusters_per_class=1, random_state=42)
X_train, X_test, y_train, y_test = train_test_split(X, y, test_size=0.3, random_state=42)

# 训练SVM分类器
clf = SVC(kernel='rbf', random_state=42)
clf.fit(X_train, y_train)

# 创建网格以绘制决策边界
xx, yy = np.meshgrid(np.linspace(X[:, 0].min()-1, X[:, 0].max()+1, 100),
                     np.linspace(X[:, 1].min()-1, X[:, 1].max()+1, 100))
Z = clf.decision_function(np.c_[xx.ravel(), yy.ravel()])
Z = Z.reshape(xx.shape)

# 创建分类结果可视化
plt.figure(figsize=(12, 10))

# 绘制决策边界
plt.contourf(xx, yy, Z, levels=[-1, 0, 1], alpha=0.5,
             colors=['#FFAAAA', '#AAAAFF'])
plt.contour(xx, yy, Z, levels=[-1, 0, 1], colors=['red', 'black', 'blue'],
            linestyles=['--', '-', '--'])

# 绘制训练数据
plt.scatter(X_train[y_train == 0][:, 0], X_train[y_train == 0][:, 1],
            c='red', marker='o', s=100, label='Class 0 (Train)')
plt.scatter(X_train[y_train == 1][:, 0], X_train[y_train == 1][:, 1],
            c='blue', marker='s', s=100, label='Class 1 (Train)')

# 绘制测试数据
plt.scatter(X_test[y_test == 0][:, 0], X_test[y_test == 0][:, 1],
            c='red', marker='^', s=100, label='Class 0 (Test)')
plt.scatter(X_test[y_test == 1][:, 0], X_test[y_test == 1][:, 1],
            c='blue', marker='D', s=100, label='Class 1 (Test)')

plt.title('SVM Classification Results - how2matplotlib.com')
plt.xlabel('Feature 1')
plt.ylabel('Feature 2')
plt.legend()
plt.grid(True)
plt.show()

print("SVM classification results visualization has been displayed.")
Output:
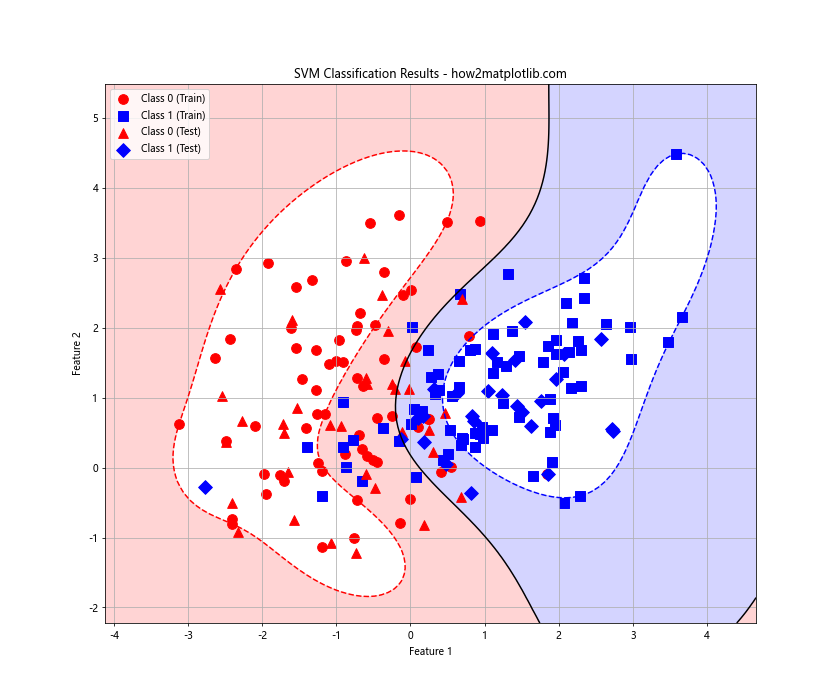
这个示例展示了如何可视化SVM分类器的结果。决策边界用颜色填充区域表示,不同类别的训练和测试数据点用不同的颜色和标记表示。
14.2 学习曲线可视化
import matplotlib.pyplot as plt
import numpy as np
from sklearn.model_selection import learning_curve
from sklearn.datasets import load_digits
from sklearn.svm import SVC

# 加载数据
digits = load_digits()
X, y = digits.data, digits.target

# 计算学习曲线
train_sizes, train_scores, test_scores = learning_curve(
    SVC(kernel='rbf', gamma=0.001), X, y, cv=5, n_jobs=-1,
    train_sizes=np.linspace(0.1, 1.0, 10))

# 计算平均值和标准差
train_mean = np.mean(train_scores, axis=1)
train_std = np.std(train_scores, axis=1)
test_mean = np.mean(test_scores, axis=1)
test_std = np.std(test_scores, axis=1)

# 创建学习曲线可视化
plt.figure(figsize=(12, 8))

# 绘制训练集得分
plt.plot(train_sizes, train_mean, 'o-', color='r', label='Training score')
plt.fill_between(train_sizes, train_mean - train_std, train_mean + train_std,
                 alpha=0.1, color='r')

# 绘制测试集得分
plt.plot(train_sizes, test_mean, 's-', color='g', label='Cross-validation score')
plt.fill_between(train_sizes, test_mean - test_std, test_mean + test_std,
                 alpha=0.1, color='g')

plt.title('Learning Curves - SVM on Digits Dataset - how2matplotlib.com')
plt.xlabel('Training Examples')
plt.ylabel('Score')
plt.legend(loc='best')
plt.grid(True)
plt.show()

print("Learning curves visualization has been displayed.")
Output:
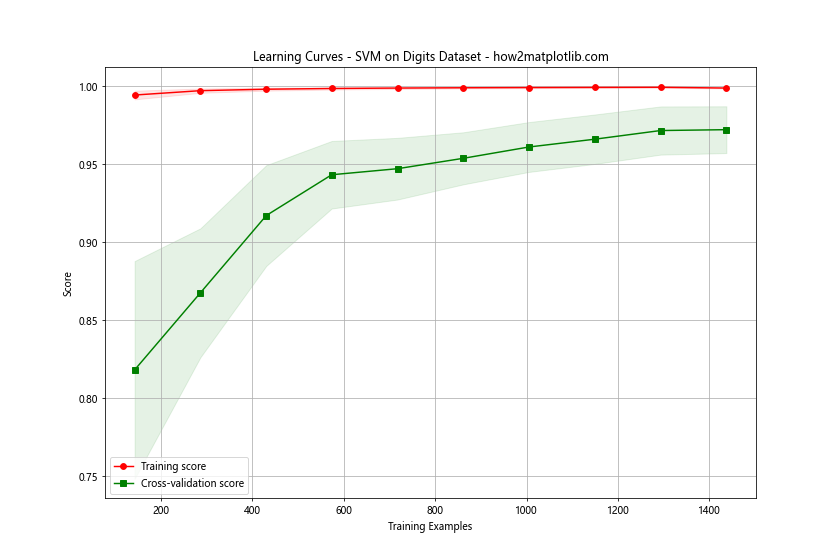
这个示例展示了如何可视化机器学习模型的学习曲线。训练集和测试集的得分用不同的颜色和标记表示,阴影区域表示标准差范围。
15. 标记样式在社交网络分析中的应用
社交网络分析是一个复杂的领域,其中图形可视化扮演着重要角色。标记样式可以帮助我们更好地展示网络结构和节点特征。
15.1 社交网络图可视化
import matplotlib.pyplot as plt
import networkx as nx
import numpy as np

# 创建一个随机图
np.random.seed(42)
G = nx.random_geometric_graph(20, 0.3)

# 计算节点度数
degrees = dict(nx.degree(G))

# 创建社交网络图可视化
plt.figure(figsize=(12, 10))

# 设置节点位置
pos = nx.spring_layout(G)

# 绘制边
nx.draw_networkx_edges(G, pos, alpha=0.2)

# 绘制节点
node_sizes = [v * 100 for v in degrees.values()]
node_colors = [plt.cm.viridis(v / max(degrees.values())) for v in degrees.values()]
nx.draw_networkx_nodes(G, pos, node_size=node_sizes, node_color=node_colors, alpha=0.8)

# 绘制标签
nx.draw_networkx_labels(G, pos, font_size=8, font_family='sans-serif')

plt.title('Social Network Visualization - how2matplotlib.com')
plt.axis('off')
plt.tight_layout()
plt.show()

print("Social network visualization has been displayed.")
Output:
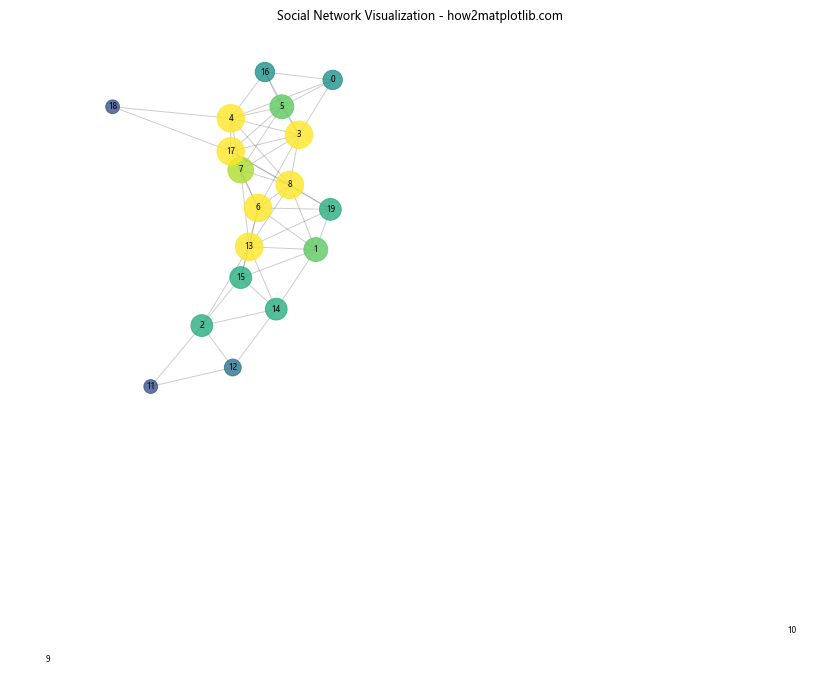
这个示例展示了如何可视化一个简单的社交网络。节点的大小表示其度数(连接数),颜色表示度数的相对大小。
15.2 社区检测结果可视化
import matplotlib.pyplot as plt
import networkx as nx
import numpy as np
from community import community_louvain

# 创建一个随机图
np.random.seed(42)
G = nx.random_geometric_graph(50, 0.2)

# 进行社区检测
partition = community_louvain.best_partition(G)

# 创建社区检测结果可视化
plt.figure(figsize=(14, 12))

# 设置节点位置
pos = nx.spring_layout(G)

# 绘制边
nx.draw_networkx_edges(G, pos, alpha=0.2)

# 绘制节点
cmap = plt.cm.get_cmap("viridis", max(partition.values()) + 1)
nx.draw_networkx_nodes(G, pos, partition.keys(), node_size=100,
                       cmap=cmap, node_color=list(partition.values()))

# 绘制标签
nx.draw_networkx_labels(G, pos, font_size=8, font_family='sans-serif')

plt.title('Community Detection in Social Network - how2matplotlib.com')
plt.axis('off')
plt.tight_layout()
plt.show()

print("Community detection visualization has been displayed.")
这个示例展示了如何可视化社交网络中的社区检测结果。不同颜色表示不同的社区,节点的位置是根据网络结构自动计算的。
16. 标记样式在生物信息学中的应用
在生物信息学中,数据可视化对于理解复杂的生物学过程和关系至关重要。标记样式可以帮助我们更好地展示基因表达、蛋白质相互作用等数据。
16.1 基因表达热图
import matplotlib.pyplot as plt
import numpy as np
import seaborn as sns

# 生成示例数据
np.random.seed(42)
genes = [f'Gene_{i}' for i in range(20)]
samples = [f'Sample_{i}' for i in range(10)]
expression_data = np.random.rand(20, 10)

# 创建基因表达热图
plt.figure(figsize=(12, 10))
sns.heatmap(expression_data, xticklabels=samples, yticklabels=genes, cmap='viridis')

plt.title('Gene Expression Heatmap - how2matplotlib.com')
plt.xlabel('Samples')
plt.ylabel('Genes')
plt.tight_layout()
plt.show()

print("Gene expression heatmap has been displayed.")
Output:
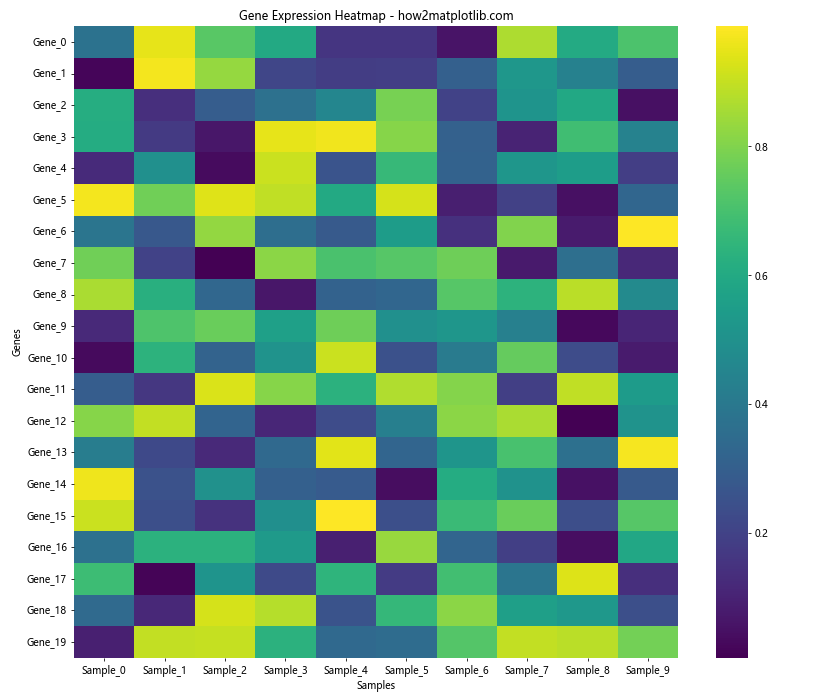
这个示例展示了如何创建基因表达热图。颜色强度表示基因表达水平,每一行代表一个基因,每一列代表一个样本。
16.2 蛋白质相互作用网络
import matplotlib.pyplot as plt
import networkx as nx
import numpy as np

# 创建一个随机蛋白质相互作用网络
np.random.seed(42)
G = nx.random_geometric_graph(30, 0.3)

# 为节点分配蛋白质名称
proteins = [f'Protein_{chr(65+i)}' for i in range(30)]
G = nx.relabel_nodes(G, dict(zip(G.nodes(), proteins)))

# 计算节点度数
degrees = dict(nx.degree(G))

# 创建蛋白质相互作用网络可视化
plt.figure(figsize=(14, 12))

# 设置节点位置
pos = nx.spring_layout(G)

# 绘制边
nx.draw_networkx_edges(G, pos, alpha=0.2)

# 绘制节点
node_sizes = [v * 100 for v in degrees.values()]
node_colors = [plt.cm.viridis(v / max(degrees.values())) for v in degrees.values()]
nx.draw_networkx_nodes(G, pos, node_size=node_sizes, node_color=node_colors, alpha=0.8)

# 绘制标签
nx.draw_networkx_labels(G, pos, font_size=8, font_family='sans-serif')

plt.title('Protein-Protein Interaction Network - how2matplotlib.com')
plt.axis('off')
plt.tight_layout()
plt.show()

print("Protein-protein interaction network visualization has been displayed.")
Output:
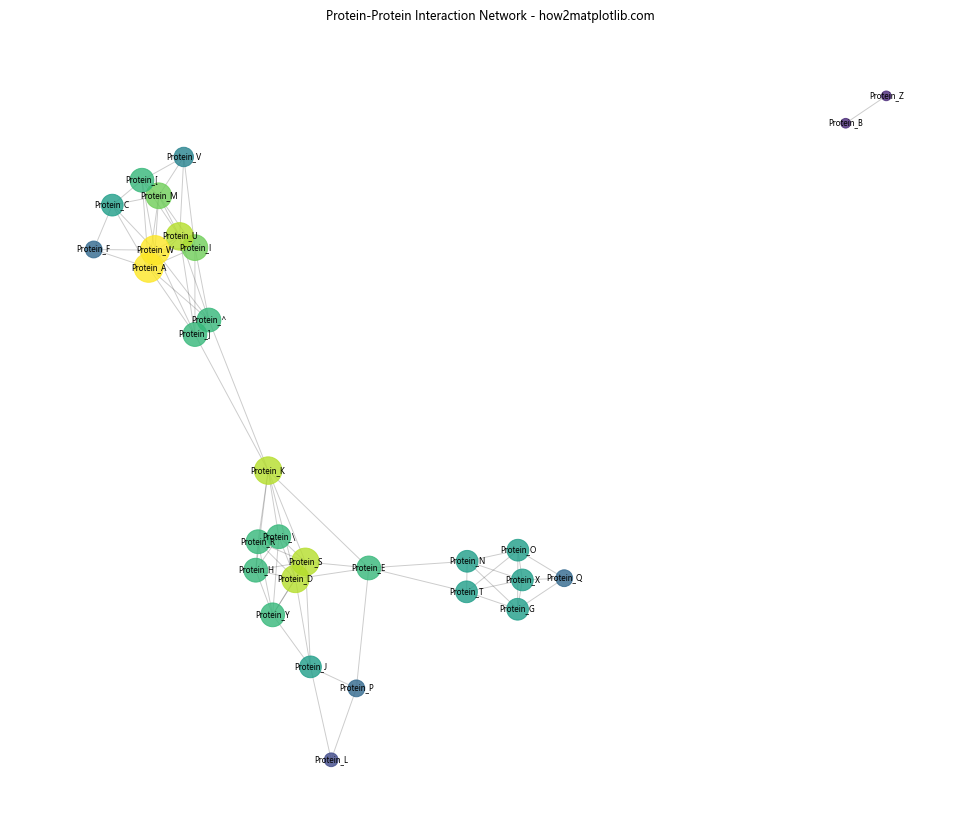
这个示例展示了如何可视化蛋白质相互作用网络。节点大小表示蛋白质的相互作用数量,颜色表示相互作用的相对强度。
结论
通过本文的详细探讨,我们深入了解了Matplotlib中散点图标记样式的丰富性和灵活性。从基本的内置标记到高级的自定义标记,从简单的静态图表到复杂的动态可视化,标记样式在数据可视化中扮演着至关重要的角色。
我们看到了标记样式如何在各个领域中应用,包括数据分析、机器学习、金融、社交网络分析和生物信息学等。通过合理使用标记的形状、大小、颜色和其他属性,我们可以有效地传达多维数据信息,突出关键点,区分不同类别,并展示数据的模式和趋势。
在实际应用中,选择合适的标记样式不仅可以增强图表的美观性,更重要的是可以提高数据的可读性和解释性。因此,掌握和灵活运用各种标记样式技巧,对于数据科学家、研究人员和可视化专家来说都是非常重要的技能。
最后,我们鼓励读者在自己的项目中尝试使用这些技巧,探索更多创新的可视化方法,以更好地展示和理解数据。记住,优秀的数据可视化不仅是一门科学,也是一门艺术,需要不断实践和创新。
 极客笔记
极客笔记