Matplotlib中使用Figure.set_constrained_layout_pads()优化布局间距
参考:Matplotlib.figure.Figure.set_constrained_layout_pads() in Python
Matplotlib是Python中最常用的数据可视化库之一,它提供了丰富的绘图功能和自定义选项。在创建复杂的图表布局时,合理调整各元素之间的间距对于提高图表的可读性和美观度至关重要。本文将深入探讨Matplotlib中Figure.set_constrained_layout_pads()方法的使用,这是一个强大的工具,可以帮助我们精确控制图表中各个元素的间距。
1. 什么是constrained_layout?
在开始讨论set_constrained_layout_pads()方法之前,我们需要先了解constrained_layout的概念。constrained_layout是Matplotlib中的一个自动布局调整机制,它可以自动调整子图(subplots)、轴标签、图例等元素的位置,以确保它们不会相互重叠,同时保持适当的间距。
使用constrained_layout可以大大简化复杂图表的布局过程,减少手动调整的工作量。要启用constrained_layout,我们可以在创建图形时设置constrained_layout=True参数。
示例代码:
import matplotlib.pyplot as plt

fig, axs = plt.subplots(2, 2, constrained_layout=True)
for ax in axs.flat:
    ax.plot([1, 2, 3], [4, 5, 6])
    ax.set_title('how2matplotlib.com')

plt.show()
Output:
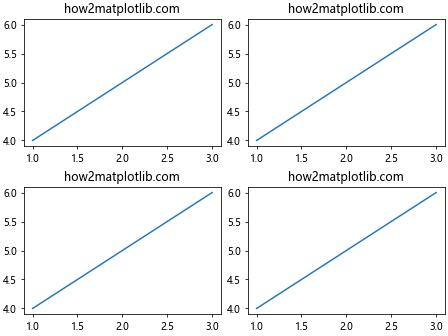
在这个例子中,我们创建了一个2×2的子图网格,并启用了constrained_layout。这将自动调整子图之间的间距,确保标题不会重叠。
2. set_constrained_layout_pads()方法简介
虽然constrained_layout可以自动调整布局,但有时我们可能需要更精细的控制。这就是Figure.set_constrained_layout_pads()方法发挥作用的地方。这个方法允许我们手动设置constrained_layout使用的各种间距参数。
set_constrained_layout_pads()方法接受以下参数:
- w_pad:子图之间的水平间距
- h_pad:子图之间的垂直间距
- wspace:子图与图形边缘之间的水平间距
- hspace:子图与图形边缘之间的垂直间距
所有这些参数都是以英寸为单位的浮点数。
3. 基本用法
让我们从一个基本的例子开始,看看如何使用set_constrained_layout_pads()方法:
import matplotlib.pyplot as plt

fig, axs = plt.subplots(2, 2, constrained_layout=True)
fig.set_constrained_layout_pads(w_pad=0.1, h_pad=0.1, wspace=0.1, hspace=0.1)

for ax in axs.flat:
    ax.plot([1, 2, 3], [4, 5, 6])
    ax.set_title('how2matplotlib.com')

plt.show()
Output:
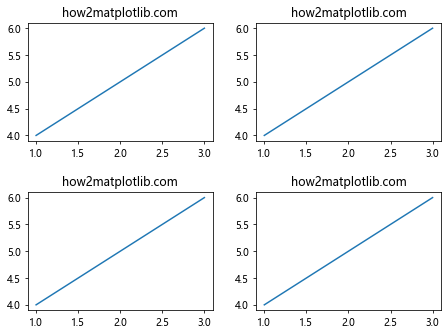
在这个例子中,我们创建了一个2×2的子图网格,并使用set_constrained_layout_pads()方法设置了所有间距参数为0.1英寸。这将使子图之间的间距变小,整体布局更加紧凑。
4. 调整水平间距(w_pad)
w_pad参数控制子图之间的水平间距。增加w_pad会使子图在水平方向上分开得更远。让我们看一个例子:
import matplotlib.pyplot as plt

fig, axs = plt.subplots(1, 3, constrained_layout=True)
fig.set_constrained_layout_pads(w_pad=0.5)  # 增加水平间距

for ax in axs:
    ax.plot([1, 2, 3], [4, 5, 6])
    ax.set_title('how2matplotlib.com')

plt.show()
Output:
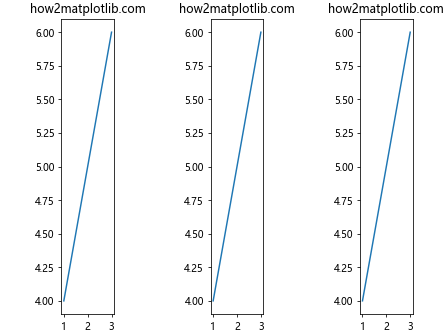
在这个例子中,我们创建了一个包含三个水平排列的子图的图形,并将w_pad设置为0.5英寸。这将使子图之间有更大的水平间距。
5. 调整垂直间距(h_pad)
h_pad参数控制子图之间的垂直间距。增加h_pad会使子图在垂直方向上分开得更远。例如:
import matplotlib.pyplot as plt

fig, axs = plt.subplots(3, 1, constrained_layout=True)
fig.set_constrained_layout_pads(h_pad=0.5)  # 增加垂直间距

for ax in axs:
    ax.plot([1, 2, 3], [4, 5, 6])
    ax.set_title('how2matplotlib.com')

plt.show()
Output:
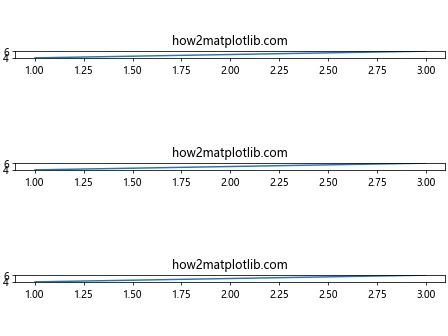
这个例子创建了一个包含三个垂直排列的子图的图形,并将h_pad设置为0.5英寸,增加了子图之间的垂直间距。
6. 调整与图形边缘的水平间距(wspace)
wspace参数控制子图与图形边缘之间的水平间距。增加wspace会使子图离图形的左右边缘更远。例如:
import matplotlib.pyplot as plt

fig, axs = plt.subplots(2, 2, constrained_layout=True)
fig.set_constrained_layout_pads(wspace=0.3)  # 增加与图形边缘的水平间距

for ax in axs.flat:
    ax.plot([1, 2, 3], [4, 5, 6])
    ax.set_title('how2matplotlib.com')

plt.show()
Output:
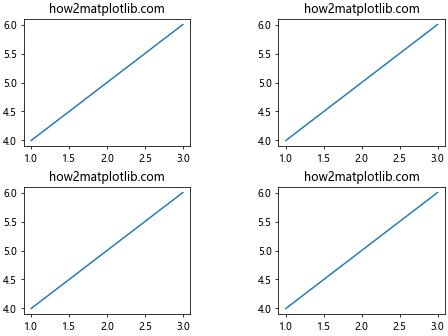
在这个例子中,我们将wspace设置为0.3英寸,这会使子图与图形的左右边缘之间有更大的间距。
7. 调整与图形边缘的垂直间距(hspace)
hspace参数控制子图与图形边缘之间的垂直间距。增加hspace会使子图离图形的上下边缘更远。例如:
import matplotlib.pyplot as plt

fig, axs = plt.subplots(2, 2, constrained_layout=True)
fig.set_constrained_layout_pads(hspace=0.3)  # 增加与图形边缘的垂直间距

for ax in axs.flat:
    ax.plot([1, 2, 3], [4, 5, 6])
    ax.set_title('how2matplotlib.com')

plt.show()
Output:
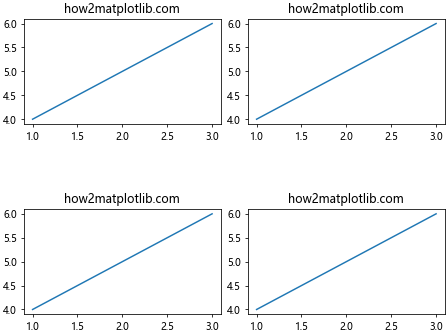
这个例子将hspace设置为0.3英寸,增加了子图与图形上下边缘之间的间距。
8. 同时调整多个参数
我们可以同时调整多个参数来精细控制图表布局。例如:
import matplotlib.pyplot as plt

fig, axs = plt.subplots(2, 2, constrained_layout=True)
fig.set_constrained_layout_pads(w_pad=0.2, h_pad=0.3, wspace=0.1, hspace=0.1)

for ax in axs.flat:
    ax.plot([1, 2, 3], [4, 5, 6])
    ax.set_title('how2matplotlib.com')

plt.show()
Output:
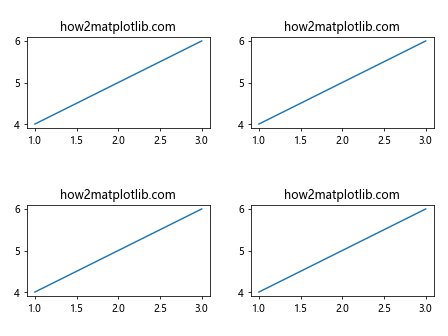
在这个例子中,我们同时设置了所有四个参数,创建了一个自定义的布局间距配置。
9. 处理复杂布局
当处理复杂的布局时,set_constrained_layout_pads()方法特别有用。例如,当我们有不同大小的子图时:
import matplotlib.pyplot as plt

fig = plt.figure(constrained_layout=True)
gs = fig.add_gridspec(3, 3)

ax1 = fig.add_subplot(gs[0, :])
ax2 = fig.add_subplot(gs[1, :-1])
ax3 = fig.add_subplot(gs[1:, -1])
ax4 = fig.add_subplot(gs[-1, 0])
ax5 = fig.add_subplot(gs[-1, -2])

fig.set_constrained_layout_pads(w_pad=0.2, h_pad=0.2, wspace=0.1, hspace=0.1)

for ax in [ax1, ax2, ax3, ax4, ax5]:
    ax.plot([1, 2, 3], [4, 5, 6])
    ax.set_title('how2matplotlib.com')

plt.show()
Output:
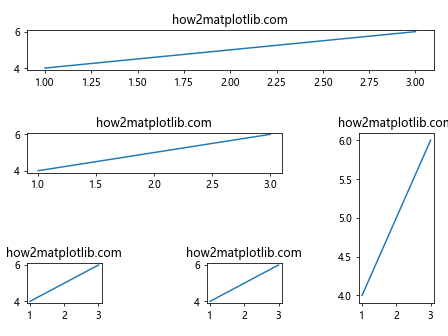
这个例子创建了一个复杂的布局,包含不同大小和位置的子图。通过调整set_constrained_layout_pads()的参数,我们可以优化这种复杂布局的间距。
10. 处理图例
当图表包含图例时,set_constrained_layout_pads()也可以帮助调整图例的位置:
import matplotlib.pyplot as plt

fig, ax = plt.subplots(constrained_layout=True)
lines = ax.plot([1, 2, 3], [4, 5, 6], label='Line 1')
ax.plot([1, 2, 3], [1, 2, 3], label='Line 2')
ax.set_title('how2matplotlib.com')
ax.legend(loc='center left', bbox_to_anchor=(1, 0.5))

fig.set_constrained_layout_pads(w_pad=0.2, h_pad=0.2, wspace=0.5, hspace=0.2)

plt.show()
Output:
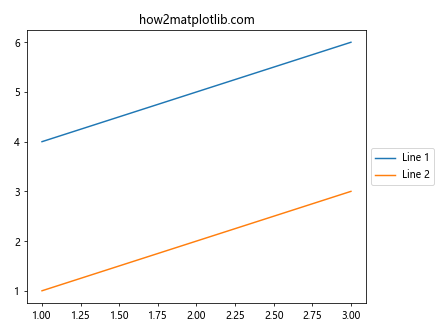
在这个例子中,我们将图例放置在子图的右侧,并通过增加wspace来为图例留出足够的空间。
11. 处理颜色条
当图表包含颜色条时,set_constrained_layout_pads()也可以帮助调整颜色条的位置:
import matplotlib.pyplot as plt
import numpy as np

fig, ax = plt.subplots(constrained_layout=True)
data = np.random.rand(10, 10)
im = ax.imshow(data)
ax.set_title('how2matplotlib.com')
fig.colorbar(im, ax=ax)

fig.set_constrained_layout_pads(w_pad=0.2, h_pad=0.2, wspace=0.3, hspace=0.2)

plt.show()
Output:
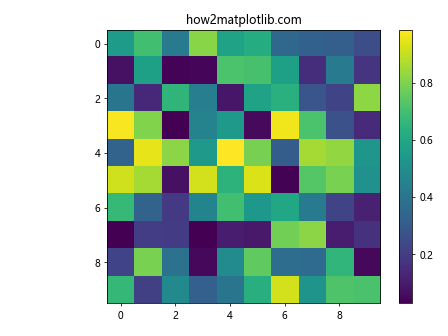
在这个例子中,我们创建了一个热图并添加了颜色条。通过增加wspace,我们为颜色条留出了更多空间。
12. 处理多行标题
当子图有多行标题时,可能需要调整垂直间距:
import matplotlib.pyplot as plt

fig, axs = plt.subplots(2, 2, constrained_layout=True)
fig.set_constrained_layout_pads(w_pad=0.2, h_pad=0.5, wspace=0.2, hspace=0.2)

for ax in axs.flat:
    ax.plot([1, 2, 3], [4, 5, 6])
    ax.set_title('how2matplotlib.com\nMulti-line Title')

plt.show()
Output:
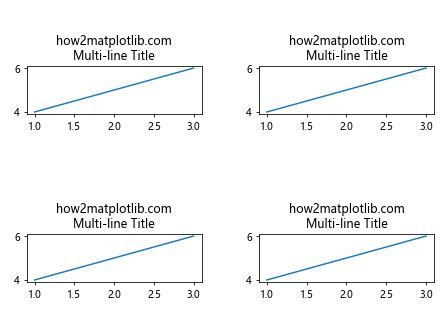
在这个例子中,我们增加了h_pad和hspace来为多行标题留出更多空间。
13. 处理x轴和y轴标签
当x轴和y轴标签较长时,可能需要调整间距:
import matplotlib.pyplot as plt

fig, axs = plt.subplots(2, 2, constrained_layout=True)
fig.set_constrained_layout_pads(w_pad=0.5, h_pad=0.5, wspace=0.3, hspace=0.3)

for ax in axs.flat:
    ax.plot([1, 2, 3], [4, 5, 6])
    ax.set_xlabel('Long X-axis Label for how2matplotlib.com')
    ax.set_ylabel('Long Y-axis Label for how2matplotlib.com')

plt.show()
Output:
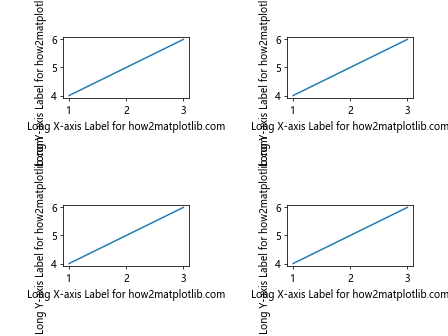
在这个例子中,我们增加了所有的间距参数来为长标签留出足够的空间。
14. 处理旋转的刻度标签
当刻度标签旋转时,可能需要额外的空间:
import matplotlib.pyplot as plt
import numpy as np

fig, ax = plt.subplots(constrained_layout=True)
fig.set_constrained_layout_pads(w_pad=0.2, h_pad=0.5, wspace=0.2, hspace=0.2)

x = np.arange(10)
y = np.random.rand(10)
ax.bar(x, y)
ax.set_xticklabels(['how2matplotlib.com']*10, rotation=45, ha='right')
ax.set_title('Rotated Tick Labels')

plt.show()
Output:
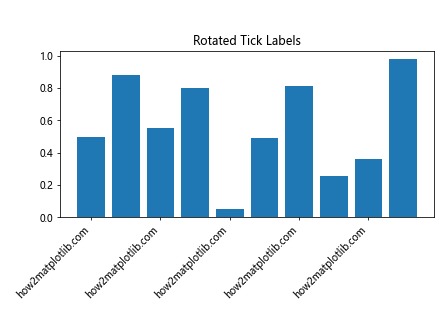
在这个例子中,我们增加了h_pad来为旋转的x轴刻度标签留出更多空间。
15. 结合tight_layout()使用
虽然set_constrained_layout_pads()通常与constrained_layout一起使用,但它也可以与tight_layout()结合使用:
import matplotlib.pyplot as plt

fig, axs = plt.subplots(2, 2)
for ax in axs.flat:
    ax.plot([1, 2, 3], [4, 5, 6])
    ax.set_title('how2matplotlib.com')

fig.set_constrained_layout_pads(w_pad=0.2, h_pad=0.2, wspace=0.2, hspace=0.2)
fig.tight_layout()

plt.show()
Output:
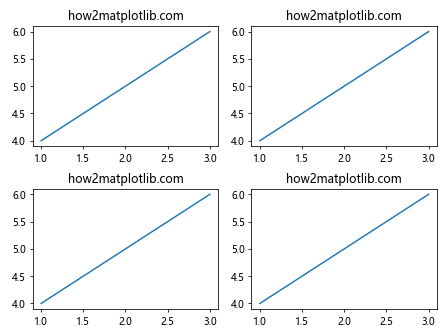
在这个例子中,我们首先使用set_constrained_layout_pads()设置间距,然后调用tight_layout()进行进一步的自动调整。
16. 动态调整间距
在某些情况下,我们可能需要根据图表的内容动态调整间距。以下是一个简单的例子:
import matplotlib.pyplot as plt
import numpy as np

def adjust_spacing(fig, axs):
    max_ylabel_width = max(ax.yaxis.label.get_window_extent().width for ax in axs.flat)
    fig.set_constrained_layout_pads(w_pad=0.2, h_pad=0.2,
                                    wspace=max_ylabel_width/fig.dpi + 0.1,
                                    hspace=0.2)

fig, axs = plt.subplots(2, 2, constrained_layout=True)

for i, ax in enumerate(axs.flat):
    ax.plot(np.random.rand(10))
    ax.set_ylabel(f'Y Label {i+1} for how2matplotlib.com')
    ax.set_title(f'Title {i+1}')

adjust_spacing(fig, axs)

plt.show()
Output:
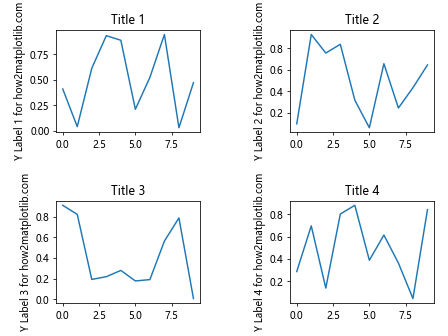
在这个例子中,我们定义了一个adjust_spacing函数,它根据y轴标签的最大宽度动态调整wspace。
17. 处理不同大小的子图
当处理不同大小的子图时,set_constrained_layout_pads()可以帮助我们保持适当的间距:
import matplotlib.pyplot as plt
import matplotlib.gridspec as gridspec

fig = plt.figure(constrained_layout=True)
gs = gridspec.GridSpec(3, 3, figure=fig)

ax1 = fig.add_subplot(gs[0, :])
ax2 = fig.add_subplot(gs[1, :-1])
ax3 = fig.add_subplot(gs[1:, -1])
ax4 = fig.add_subplot(gs[2, 0])
ax5 = fig.add_subplot(gs[2, 1])

fig.set_constrained_layout_pads(w_pad=0.2, h_pad=0.2, wspace=0.1, hspace=0.1)

for ax in [ax1, ax2, ax3, ax4, ax5]:
    ax.plot([1, 2, 3], [4, 5, 6])
    ax.set_title('how2matplotlib.com')

plt.show()
Output:
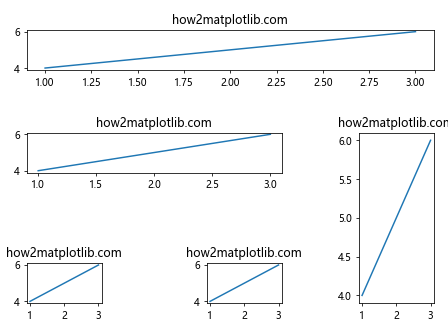
这个例子创建了一个包含不同大小子图的复杂布局,并使用set_constrained_layout_pads()来调整间距。
18. 处理嵌套的子图
当处理嵌套的子图时,set_constrained_layout_pads()也能发挥作用:
import matplotlib.pyplot as plt

fig = plt.figure(constrained_layout=True)
gs0 = fig.add_gridspec(1, 2)

gs00 = gs0[0].subgridspec(2, 2)
gs01 = gs0[1].subgridspec(1, 2)

for a in range(2):
    for b in range(2):
        ax = fig.add_subplot(gs00[a, b])
        ax.set_title(f'how2matplotlib.com {a}{b}')

for i in range(2):
    ax = fig.add_subplot(gs01[0, i])
    ax.set_title(f'how2matplotlib.com 1{i}')

fig.set_constrained_layout_pads(w_pad=0.2, h_pad=0.2, wspace=0.1, hspace=0.1)

plt.show()
Output:
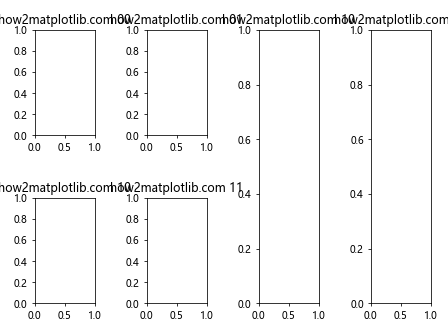
这个例子创建了一个包含嵌套子图的复杂布局,并使用set_constrained_layout_pads()来调整所有子图之间的间距。
19. 结合suptitle使用
当我们为整个图形添加一个总标题(suptitle)时,可能需要调整上边距:
import matplotlib.pyplot as plt

fig, axs = plt.subplots(2, 2, constrained_layout=True)
fig.suptitle('Main Title for how2matplotlib.com', fontsize=16)

for ax in axs.flat:
    ax.plot([1, 2, 3], [4, 5, 6])
    ax.set_title('Subplot Title')

fig.set_constrained_layout_pads(w_pad=0.2, h_pad=0.2, wspace=0.2, hspace=0.3)

plt.show()
Output:
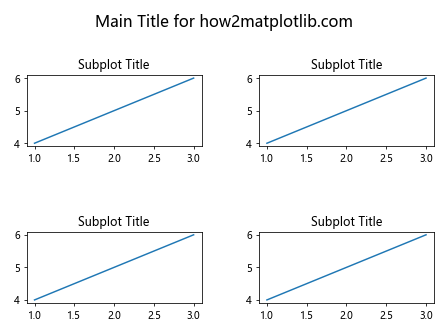
在这个例子中,我们增加了hspace来为suptitle留出更多空间。
20. 结合自定义文本使用
当我们在图形中添加自定义文本时,set_constrained_layout_pads()可以帮助我们调整布局以适应这些额外的元素:
import matplotlib.pyplot as plt

fig, axs = plt.subplots(2, 2, constrained_layout=True)

for ax in axs.flat:
    ax.plot([1, 2, 3], [4, 5, 6])
    ax.set_title('how2matplotlib.com')

fig.text(0.5, 0.02, 'Custom text at the bottom', ha='center')
fig.text(0.02, 0.5, 'Custom text on the left', va='center', rotation='vertical')

fig.set_constrained_layout_pads(w_pad=0.2, h_pad=0.2, wspace=0.2, hspace=0.2)

plt.show()
Output:
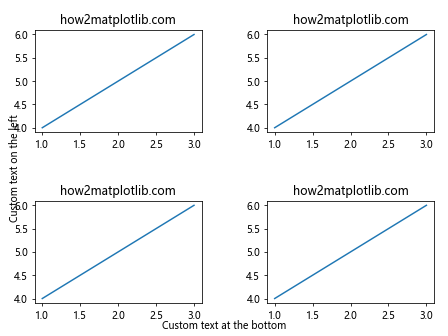
在这个例子中,我们在图形的底部和左侧添加了自定义文本,并使用set_constrained_layout_pads()来调整间距,以确保这些文本不会与子图重叠。
总结起来,Figure.set_constrained_layout_pads()是Matplotlib中一个强大的工具,它允许我们精细控制图表布局中的各种间距。通过调整w_pad、h_pad、wspace和hspace参数,我们可以创建既美观又易读的复杂图表。无论是处理简单的子图网格,还是复杂的嵌套布局,这个方法都能帮助我们实现理想的布局效果。在实际应用中,可能需要多次尝试和调整才能找到最佳的参数组合。同时,也要记住图表的最终目的是清晰地传达信息,所以在追求美观的同时,也要确保图表的可读性和信息传达的有效性。
 极客笔记
极客笔记