Matplotlib中Artist对象的变换设置检查:深入理解is_transform_set()方法
参考:Matplotlib.artist.Artist.is_transform_set() in Python
Matplotlib是Python中最流行的数据可视化库之一,它提供了丰富的绘图功能和灵活的自定义选项。在Matplotlib的架构中,Artist对象扮演着核心角色,负责绘制图形的各个元素。本文将深入探讨Matplotlib中Artist对象的一个重要方法:is_transform_set()。我们将详细介绍这个方法的作用、使用场景以及相关的概念,并通过多个示例代码来展示其实际应用。
1. Artist对象简介
在深入了解is_transform_set()方法之前,我们需要先了解Matplotlib中的Artist对象。Artist是Matplotlib中所有可视元素的基类,包括图形、轴、线条、文本等。每个Artist对象都可以有自己的变换(transform),用于控制其在图形中的位置和形状。
以下是一个简单的示例,展示了如何创建一个基本的Artist对象:
import matplotlib.pyplot as plt
from matplotlib.artist import Artist

fig, ax = plt.subplots()
artist = Artist()
ax.add_artist(artist)
plt.title("Basic Artist Example - how2matplotlib.com")
plt.show()
Output:
在这个例子中,我们创建了一个空的Artist对象并将其添加到坐标轴中。虽然这个Artist对象本身不可见,但它为我们理解Artist的概念提供了一个起点。
2. 变换(Transform)概念
变换是Matplotlib中的一个重要概念,它定义了如何将数据坐标转换为显示坐标。每个Artist对象都可以有自己的变换,这使得我们可以灵活地控制图形元素的位置和形状。
以下是一个使用变换的简单示例:
import matplotlib.pyplot as plt
import matplotlib.transforms as transforms

fig, ax = plt.subplots()
circle = plt.Circle((0.5, 0.5), 0.2)
ax.add_artist(circle)

# 应用平移变换
t = transforms.Affine2D().translate(0.2, 0.2) + ax.transData
circle.set_transform(t)

plt.title("Transform Example - how2matplotlib.com")
plt.show()
Output:
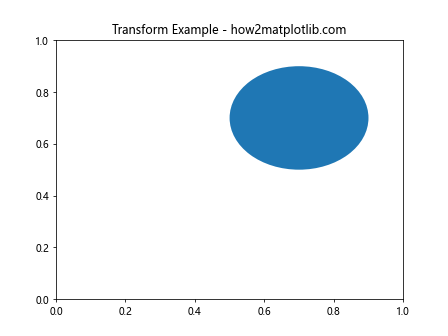
在这个例子中,我们创建了一个圆形,并对其应用了平移变换,将其向右上方移动。
3. is_transform_set()方法介绍
is_transform_set()是Artist类的一个方法,用于检查Artist对象是否已经设置了自定义的变换。这个方法返回一个布尔值:如果已经设置了变换,返回True;否则返回False。
以下是一个使用is_transform_set()方法的基本示例:
import matplotlib.pyplot as plt
from matplotlib.patches import Rectangle

fig, ax = plt.subplots()
rect = Rectangle((0.1, 0.1), 0.5, 0.5)
ax.add_patch(rect)

print(f"Transform set: {rect.is_transform_set()}")

# 设置变换
rect.set_transform(ax.transData)
print(f"Transform set after setting: {rect.is_transform_set()}")

plt.title("is_transform_set() Example - how2matplotlib.com")
plt.show()
Output:
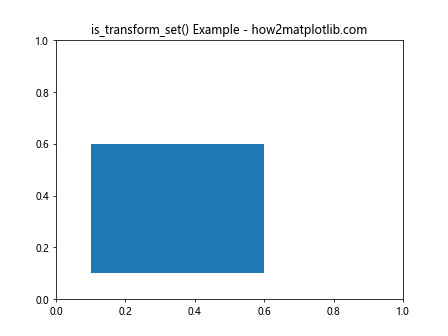
在这个例子中,我们首先创建了一个矩形,并检查其是否设置了变换。然后,我们为矩形设置了一个变换,并再次检查。
4. is_transform_set()的应用场景
is_transform_set()方法在多种场景下都很有用,特别是在处理复杂的图形或动画时。以下是一些常见的应用场景:
4.1 条件变换设置
在某些情况下,我们可能只想在特定条件下设置变换。使用is_transform_set()可以帮助我们避免重复设置变换。
import matplotlib.pyplot as plt
import matplotlib.transforms as transforms

fig, ax = plt.subplots()
circle = plt.Circle((0.5, 0.5), 0.2)
ax.add_artist(circle)

if not circle.is_transform_set():
    t = transforms.Affine2D().rotate_deg(45) + ax.transData
    circle.set_transform(t)

plt.title("Conditional Transform Setting - how2matplotlib.com")
plt.show()
Output:
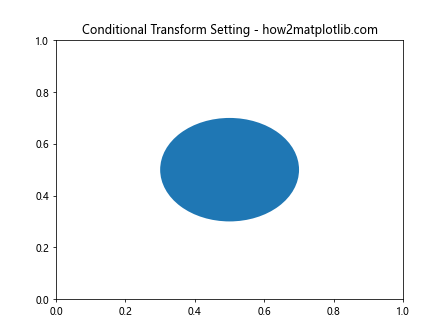
在这个例子中,我们只在圆形没有设置变换时才应用旋转变换。
4.2 动画中的变换管理
在创建动画时,is_transform_set()可以帮助我们管理对象的变换状态。
import matplotlib.pyplot as plt
import matplotlib.animation as animation
import matplotlib.transforms as transforms

fig, ax = plt.subplots()
rect = plt.Rectangle((0, 0), 0.5, 0.5, fc='b')
ax.add_patch(rect)

def animate(frame):
    if not rect.is_transform_set():
        t = transforms.Affine2D()
        rect.set_transform(t + ax.transData)

    rect.get_transform().clear().translate(frame * 0.01, 0)
    return rect,

ani = animation.FuncAnimation(fig, animate, frames=100, interval=50, blit=True)
plt.title("Animation with Transform - how2matplotlib.com")
plt.show()
在这个动画示例中,我们使用is_transform_set()来确保只在第一帧设置变换,然后在后续帧中更新现有的变换。
4.3 自定义Artist类
当创建自定义的Artist类时,is_transform_set()可以用于管理变换状态。
import matplotlib.pyplot as plt
from matplotlib.artist import Artist
import matplotlib.transforms as transforms

class MyCustomArtist(Artist):
    def __init__(self):
        super().__init__()
        self._x = 0
        self._y = 0

    def draw(self, renderer):
        if not self.is_transform_set():
            self.set_transform(transforms.Affine2D() + self.axes.transData)

        ctx = renderer.new_gc()
        ctx.set_linewidth(2)
        renderer.draw_line(ctx, self._x, self._y, self._x + 1, self._y + 1)
        ctx.restore()

fig, ax = plt.subplots()
custom_artist = MyCustomArtist()
ax.add_artist(custom_artist)

plt.title("Custom Artist with Transform Check - how2matplotlib.com")
plt.show()
在这个自定义Artist类中,我们在draw方法中使用is_transform_set()来确保在绘制之前设置了适当的变换。
5. is_transform_set()与其他变换相关方法的比较
Matplotlib提供了多个与变换相关的方法,了解它们之间的区别和联系可以帮助我们更好地管理Artist对象的变换。
5.1 is_transform_set() vs. get_transform()
get_transform()方法返回Artist对象当前的变换,而is_transform_set()只检查是否设置了变换。
import matplotlib.pyplot as plt
from matplotlib.patches import Rectangle

fig, ax = plt.subplots()
rect = Rectangle((0.1, 0.1), 0.5, 0.5)
ax.add_patch(rect)

print(f"Transform set: {rect.is_transform_set()}")
print(f"Current transform: {rect.get_transform()}")

rect.set_transform(ax.transData)
print(f"Transform set after setting: {rect.is_transform_set()}")
print(f"New transform: {rect.get_transform()}")

plt.title("is_transform_set() vs get_transform() - how2matplotlib.com")
plt.show()
Output:
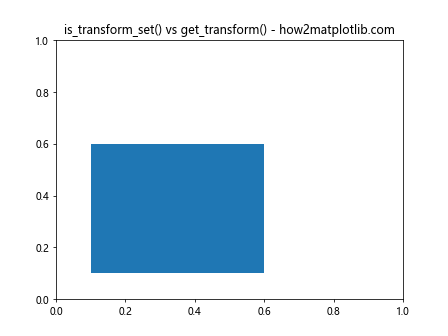
这个例子展示了is_transform_set()和get_transform()的区别。即使is_transform_set()返回False,get_transform()仍然会返回一个默认的变换。
5.2 is_transform_set() vs. set_transform()
set_transform()方法用于设置Artist对象的变换,而is_transform_set()用于检查是否已设置变换。
import matplotlib.pyplot as plt
import matplotlib.transforms as transforms

fig, ax = plt.subplots()
circle = plt.Circle((0.5, 0.5), 0.2)
ax.add_artist(circle)

print(f"Before setting: {circle.is_transform_set()}")

t = transforms.Affine2D().scale(1.5) + ax.transData
circle.set_transform(t)

print(f"After setting: {circle.is_transform_set()}")

plt.title("is_transform_set() and set_transform() - how2matplotlib.com")
plt.show()
Output:
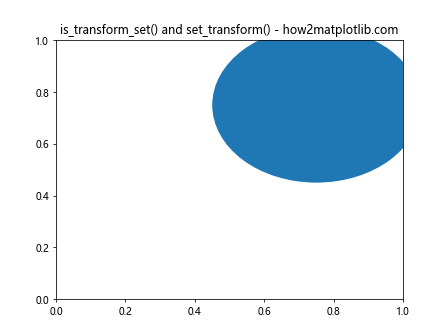
这个例子展示了如何使用set_transform()设置变换,以及如何使用is_transform_set()检查变换是否已设置。
6. 在复杂图形中使用is_transform_set()
在创建复杂的图形时,is_transform_set()可以帮助我们管理多个Artist对象的变换状态。以下是一个更复杂的示例:
import matplotlib.pyplot as plt
import matplotlib.transforms as transforms
import numpy as np

fig, ax = plt.subplots()

# 创建多个Artist对象
circle = plt.Circle((0.5, 0.5), 0.2, fc='r')
rect = plt.Rectangle((0.2, 0.2), 0.3, 0.3, fc='b')
line, = ax.plot([0, 1], [0, 1], 'g-')

artists = [circle, rect, line]
for artist in artists:
    ax.add_artist(artist)

# 应用不同的变换
for i, artist in enumerate(artists):
    if not artist.is_transform_set():
        t = transforms.Affine2D().rotate_deg(30 * i) + ax.transData
        artist.set_transform(t)

plt.title("Complex Figure with Multiple Transforms - how2matplotlib.com")
plt.show()
Output:
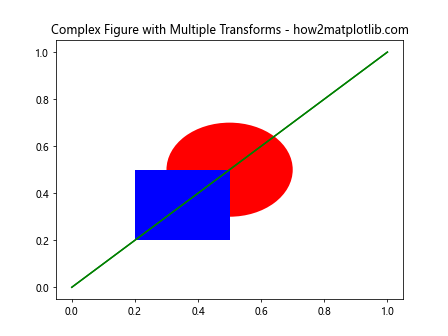
在这个例子中,我们创建了多个Artist对象,并使用is_transform_set()来确保每个对象只被设置一次变换。
7. is_transform_set()在动态图形中的应用
在创建动态图形或交互式可视化时,is_transform_set()可以帮助我们管理变换的状态变化。
import matplotlib.pyplot as plt
import matplotlib.transforms as transforms
import numpy as np

fig, ax = plt.subplots()

circle = plt.Circle((0.5, 0.5), 0.2, fc='r')
ax.add_artist(circle)

def on_click(event):
    if not circle.is_transform_set():
        t = transforms.Affine2D()
        circle.set_transform(t + ax.transData)

    scale = np.random.uniform(0.5, 2)
    rotation = np.random.uniform(0, 360)

    circle.get_transform().clear().scale(scale).rotate_deg(rotation)
    fig.canvas.draw()

fig.canvas.mpl_connect('button_press_event', on_click)

plt.title("Interactive Transform with is_transform_set() - how2matplotlib.com")
plt.show()
Output:
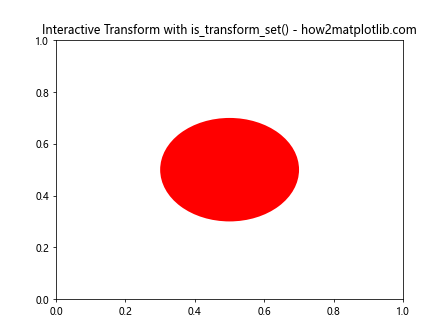
在这个交互式示例中,每次点击图形时,我们都会检查圆形是否已设置变换,然后应用随机的缩放和旋转变换。
8. is_transform_set()在自定义可视化中的应用
当创建自定义的可视化组件时,is_transform_set()可以帮助我们管理组件的变换状态。以下是一个创建自定义图例的示例:
import matplotlib.pyplot as plt
import matplotlib.patches as patches
import matplotlib.transforms as transforms

class CustomLegend:
    def __init__(self, ax):
        self.ax = ax
        self.items = []

    def add_item(self, color, label):
        rect = patches.Rectangle((0, 0), 0.1, 0.1, fc=color)
        text = plt.Text(0, 0, label)
        self.items.append((rect, text))
        self.ax.add_artist(rect)
        self.ax.add_artist(text)

    def arrange(self):
        for i, (rect, text) in enumerate(self.items):
            if not rect.is_transform_set():
                t_rect = transforms.Affine2D().translate(0.8, 0.9 - i * 0.1) + self.ax.transAxes
                rect.set_transform(t_rect)

            if not text.is_transform_set():
                t_text = transforms.Affine2D().translate(0.92, 0.9 - i * 0.1) + self.ax.transAxes
                text.set_transform(t_text)

fig, ax = plt.subplots()

custom_legend = CustomLegend(ax)
custom_legend.add_item('red', 'Item 1')
custom_legend.add_item('blue', 'Item 2')
custom_legend.add_item('green', 'Item 3')
custom_legend.arrange()

plt.title("Custom Legend with is_transform_set() - how2matplotlib.com")
plt.show()
Output:
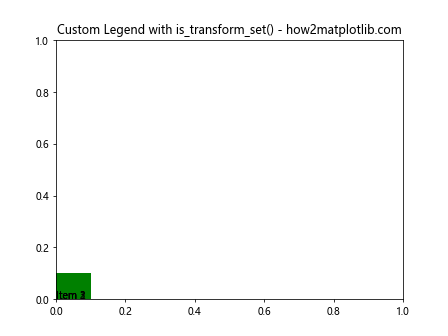
在这个自定义图例的例子中,我们使用is_transform_set()来确保每个图例项只被设置一次变换,从而避免重复设置或不必要的计算。
9. is_transform_set()在图形导出中的作用
当我们需要导出图形为不同格式或调整图形大小时,了解Artist对象的变换状态可能会很有用。
import matplotlib.pyplot as plt
import matplotlib.transforms as transforms

def create_figure():
    fig, ax = plt.subplots()
    circle = plt.Circle((0.5, 0.5), 0.2, fc='r')
    ax.add_artist(circle)
    return fig, ax, circle

def export_figure(filename, dpi):
    fig, ax, circle = create_figure()

    if not circle.is_transform_set():
        t = transforms.Affine2D().scale(1.5) +ax.transData
        circle.set_transform(t)

    plt.title(f"Exported Figure - {filename} - how2matplotlib.com")
    fig.savefig(filename, dpi=dpi)
    plt.close(fig)

export_figure("figure_low_res.png", 72)
export_figure("figure_high_res.png", 300)

print("Figures exported successfully.")
在这个例子中,我们创建了一个函数来导出图形,并使用is_transform_set()来确保在导出之前正确设置了变换。这对于确保在不同分辨率下图形元素的一致性很有帮助。
10. is_transform_set()在图形组合中的应用
当我们需要组合多个图形或在一个图形中嵌入另一个图形时,管理变换状态变得尤为重要。以下是一个示例:
import matplotlib.pyplot as plt
import matplotlib.transforms as transforms

def create_subfigure():
    fig, ax = plt.subplots(figsize=(2, 2))
    circle = plt.Circle((0.5, 0.5), 0.4, fc='r')
    ax.add_artist(circle)
    ax.set_xlim(0, 1)
    ax.set_ylim(0, 1)
    return fig

fig, ax = plt.subplots(figsize=(6, 6))

subfig = create_subfigure()
subfig_artist = ax.imshow(subfig.canvas.renderer.buffer_rgba())

if not subfig_artist.is_transform_set():
    t = transforms.Affine2D().scale(0.3).translate(0.6, 0.6) + ax.transAxes
    subfig_artist.set_transform(t)

plt.title("Combined Figure with is_transform_set() - how2matplotlib.com")
plt.show()
在这个例子中,我们创建了一个子图形,并将其作为图像嵌入到主图形中。使用is_transform_set()可以确保我们只设置一次子图形的变换。
11. is_transform_set()在动画中的高级应用
在创建复杂的动画时,is_transform_set()可以帮助我们更有效地管理多个对象的变换状态。以下是一个更复杂的动画示例:
import matplotlib.pyplot as plt
import matplotlib.animation as animation
import matplotlib.transforms as transforms
import numpy as np

fig, ax = plt.subplots()

circles = [plt.Circle((0.5, 0.5), 0.1, fc=f'C{i}') for i in range(5)]
for circle in circles:
    ax.add_artist(circle)

def init():
    for circle in circles:
        if not circle.is_transform_set():
            t = transforms.Affine2D() + ax.transData
            circle.set_transform(t)
    return circles

def animate(frame):
    for i, circle in enumerate(circles):
        angle = 2 * np.pi * frame / 100 + i * 2 * np.pi / 5
        x = 0.5 + 0.3 * np.cos(angle)
        y = 0.5 + 0.3 * np.sin(angle)
        circle.get_transform().clear().translate(x, y)
    return circles

ani = animation.FuncAnimation(fig, animate, frames=100, init_func=init, blit=True)

plt.title("Complex Animation with is_transform_set() - how2matplotlib.com")
plt.show()
Output:
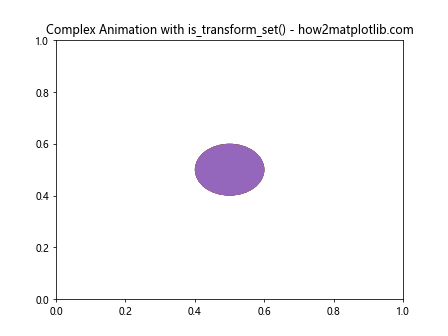
在这个动画中,我们创建了多个圆形对象,并使用is_transform_set()来确保在动画开始前正确设置了每个对象的变换。
12. is_transform_set()在自定义投影中的应用
当使用自定义投影时,管理变换状态变得更加重要。以下是一个使用极坐标投影的示例:
import matplotlib.pyplot as plt
import matplotlib.transforms as transforms
import numpy as np

fig, ax = plt.subplots(subplot_kw=dict(projection='polar'))

# 创建一个自定义的Artist
class CustomWedge(plt.Wedge):
    def __init__(self, center, r, theta1, theta2, **kwargs):
        super().__init__(center, r, theta1, theta2, **kwargs)

    def draw(self, renderer):
        if not self.is_transform_set():
            self.set_transform(transforms.Affine2D() + ax.transData)
        super().draw(renderer)

# 添加自定义Wedge
wedge = CustomWedge((0, 0), 0.5, 0, 60, fc='r')
ax.add_artist(wedge)

# 添加一些极坐标数据
theta = np.linspace(0, 2*np.pi, 100)
r = np.abs(np.sin(3*theta))
ax.plot(theta, r)

plt.title("Custom Projection with is_transform_set() - how2matplotlib.com")
plt.show()
在这个例子中,我们创建了一个自定义的Wedge类,并使用is_transform_set()来确保在绘制之前正确设置了变换。
13. is_transform_set()在图形布局中的应用
当处理复杂的图形布局时,is_transform_set()可以帮助我们更好地管理子图和注释的位置。
import matplotlib.pyplot as plt
import matplotlib.transforms as transforms

fig = plt.figure(figsize=(10, 6))

# 创建不规则的子图布局
gs = fig.add_gridspec(2, 3)
ax1 = fig.add_subplot(gs[0, :2])
ax2 = fig.add_subplot(gs[0, 2])
ax3 = fig.add_subplot(gs[1, :])

# 在每个子图中添加一些内容
ax1.plot([0, 1], [0, 1])
ax2.scatter([0.5], [0.5])
ax3.bar([1, 2, 3], [3, 1, 2])

# 添加一个跨越多个子图的注释
annotation = ax1.annotate("Important Note", xy=(0.5, 0.5), xytext=(0.8, 1.2),
                          arrowprops=dict(arrowstyle="->"))

if not annotation.is_transform_set():
    t = transforms.blended_transform_factory(ax1.transAxes, fig.transFigure)
    annotation.set_transform(t)

plt.title("Complex Layout with is_transform_set() - how2matplotlib.com")
plt.tight_layout()
plt.show()
Output:
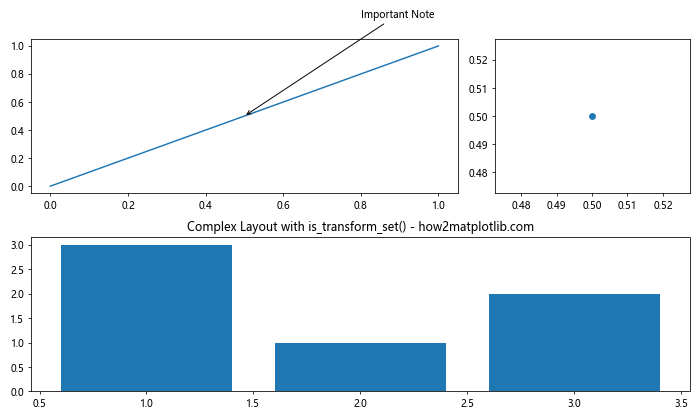
在这个例子中,我们创建了一个复杂的子图布局,并添加了一个跨越多个子图的注释。使用is_transform_set()可以确保我们只设置一次注释的变换。
14. 总结
通过本文的详细介绍和多个示例,我们深入探讨了Matplotlib中Artist.is_transform_set()方法的作用和应用场景。这个方法在管理图形元素的变换状态、优化性能以及创建复杂可视化时都发挥着重要作用。
主要要点包括:
is_transform_set()用于检查Artist对象是否已设置自定义变换。- 它在条件变换设置、动画创建、自定义Artist类等场景中非常有用。
- 与其他变换相关方法(如
get_transform()和set_transform())配合使用,可以更好地管理图形元素的变换。 - 在复杂图形、动态可视化、自定义组件等高级应用中,
is_transform_set()有助于提高代码的效率和可维护性。
通过合理使用is_transform_set()方法,我们可以创建更加灵活、高效的Matplotlib可视化。无论是简单的静态图表还是复杂的交互式可视化,掌握这个方法都将使您的Matplotlib技能更上一层楼。
 极客笔记
极客笔记