在Snack中使用图片
有时候任务是从移动设备中选择图片,然后在应用中展示这些图片。为此,可以使用expo-image-picker提供的ImagePicker。本文展示了React Native和JavaScript代码的两个不同示例。第一个示例中,使用React Native组件“Image”来选择图片、调整大小并显示。另一个示例展示了如何从计算机或移动设备中选择图片,然后在设备屏幕上渲染它。
示例1:使用React Native调整大小并显示图片
步骤
- 步骤1 - 从’react-native’导入View和Image。
-
步骤2 - 创建App.js并编写代码,将图片上传到项目的资源文件夹后使用该图片。
-
步骤3 - 通过点击图片名称检查图片大小。在显示原始大小图片时,在样式部分指定相同的宽度和高度。
-
步骤4 - 将图片大小乘以相同的值以等量地增加所有方向的图片大小。
-
步骤5 - 将图片大小除以相同的值以等量地减小所有方向的图片大小。
-
步骤6 - 在宽度和高度上添加相同的值,也可以让图片大小在所有方向上等量改变。
项目中使用的重要文件
-
App.js
-
资源文件夹包含图片”bluestar.jpg”。点击图片的文件名时会显示图片的原始大小。例如,”bluestar.jpg”的大小为136 * 112。
App.js:这是该项目的主要JavaScript文件。
示例
import React from 'react';
import {View , Image} from 'react-native';

//displaying and controlling the size of the image

export default class App extends React.Component {
   render() {
      return (
         <View>
            <Image source = {require('./assets/bluestar.jpg')}
            style = {{ width: 112, height: 136}}/>
            <Image source = {require('./assets/bluestar.jpg')}
            style = {{ width: 112*2, height: 136*2}}/>
            <Image source = {require('./assets/bluestar.jpg')}
            style = {{ width: 112/2, height: 136/2}}/>
            <Image source = {require('./assets/bluestar.jpg')}
            style = {{ width: 112+50, height: 136+50}}/>

         </View>
      );
   }
}
查看结果 – 示例1
结果可以在线上看到。当用户输入代码时,默认选择Web视图,并且结果会立即显示出来。

Img:在Snack中调整图像大小并在Web视图中显示。
示例2:使用ImagePicker从设备中选择图像,然后显示它
步骤
- 步骤1 − 从 ‘react-native’ 导入 Image、View、StyleSheet 和 Button。从 ‘expo-image-picker’ 导入 ImagePicker。
-
步骤2 − 创建 App.js,并使用 MediaLibrary.requestPermissionsAsync() 和 ImagePicker.launchImageLibraryAsync() 函数编写代码。
-
步骤3 − 创建按钮,点击按钮从电脑/移动设备中选择图像。
-
步骤4 − 定义图像样式,然后显示图像。
项目中使用的重要文件是
- App.js
App.js:这是此项目的主要 JavaScript 文件。
示例
import * as React from 'react';
import { Image, View, StyleSheet, Button } from 'react-native';
import * as ImagePicker from 'expo-image-picker';

export default class SelectImageAndShow extends React.Component {
   state = {
      theimage: null
   }

   getPermissionAsync = async () => {
      const { status } = await MediaLibrary.requestPermissionsAsync();
   }

   picktheImage = async () => {
      let resultimg = await ImagePicker.launchImageLibraryAsync({
         mediaTypes: ImagePicker.MediaTypeOptions.All,
         allowsEditing: true,
         aspect: [4, 3],
         quality: 1
      });

       if (!resultimg.cancelled) {
         this.setState({ theimage: resultimg.uri });
      }
   }

   render() {
      const { theimage } = this.state;
      return (
         <View style={styles.thespace}>

            <View style={{width:"90%", justifyContent:"center", margin:20 }}>
            <Button title="Select the image from your device" color="#A42585"width="50%"onPress={this.picktheImage}/>
            </View>

            {theimage && <Image style={{ justifyContent:"center", width: 300, height: 300, margin:20}} source={{ uri: theimage }}/>}

         </View>
      );
   }
}

const styles = StyleSheet.create({
   thespace: {
      flex: 1,
      justifyContent: 'center',
      backgroundColor: '#000',
   },
});
查看结果 – 示例2
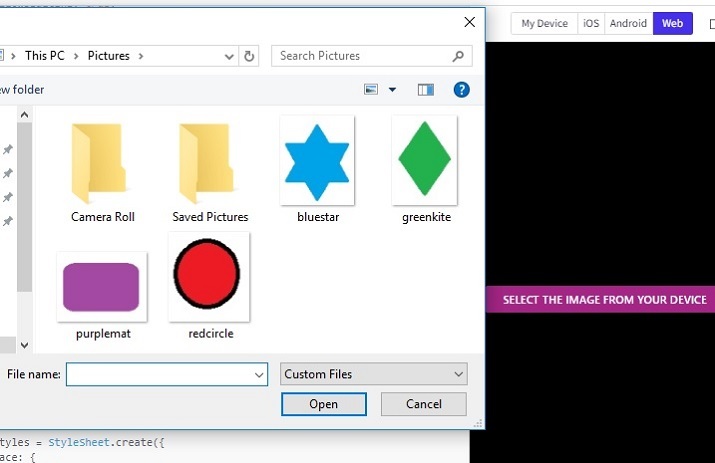
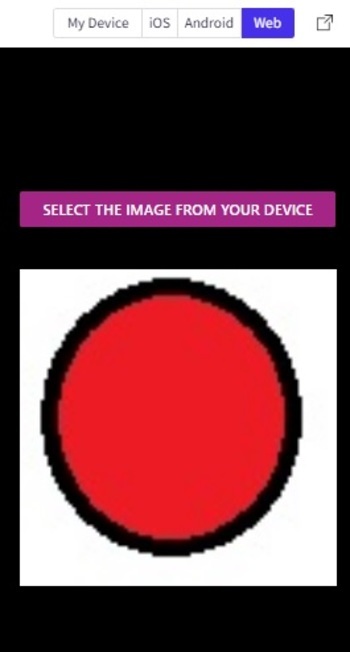
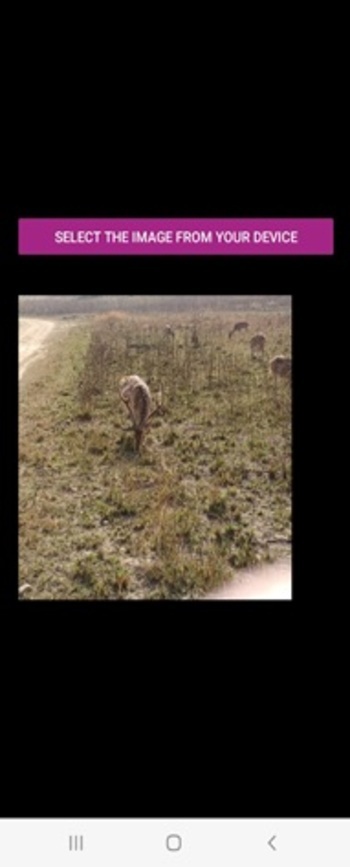
结果可以在线上观看。当用户输入代码时,默认选择Web视图,结果会立即显示出来。当用户点击按钮时,会打开一个文件夹,用户可以从电脑中选择图片。当用户选择图片后,它会显示在屏幕上。如果用户在移动设备上使用该应用程序,ImagePicker提供了从移动设备选择图片的选项。这里展示了两种情况下的结果。

Fig:显示使用Web视图从计算机选择图片的选项。

图:使用Web视图从计算机中选择图像后显示的图像。

Img: 在手机上选择图片后,将图片显示在个人移动设备上。
在本文中,通过两个不同的示例,给出了展示Expo Snack 图像的方式。首先,给出了将图片存储在项目的本地的方法,然后给出了获取图像并显示的过程。例2中还指定了从计算机和移动设备中选择图像,然后执行在屏幕上显示的操作的方法。此外,还展示了在线网页视图和个人移动设备上的输出。
 极客笔记
极客笔记