Matplotlib散点图标注技巧:如何优雅地为数据点添加标签
参考:matplotlib scatter label points
Matplotlib是Python中最流行的数据可视化库之一,它提供了丰富的绘图功能,其中散点图(scatter plot)是一种常用的可视化方式,用于展示两个变量之间的关系。在实际应用中,我们经常需要为散点图中的数据点添加标签,以便更好地解释和分析数据。本文将详细介绍如何使用Matplotlib为散点图中的数据点添加标签,包括基本方法、自定义样式、避免重叠等进阶技巧。
1. 基本的散点图标注方法
在Matplotlib中,我们可以使用plt.scatter()函数绘制散点图,然后使用plt.annotate()函数为数据点添加标签。下面是一个简单的示例:
import matplotlib.pyplot as plt
import numpy as np

# 生成示例数据
x = np.array([1, 2, 3, 4, 5])
y = np.array([2, 4, 1, 5, 3])
labels = ['A', 'B', 'C', 'D', 'E']

# 创建散点图
plt.figure(figsize=(8, 6))
plt.scatter(x, y)

# 为每个点添加标签
for i, label in enumerate(labels):
    plt.annotate(f'{label} (how2matplotlib.com)', (x[i], y[i]), xytext=(5, 5), textcoords='offset points')

plt.title('Basic Scatter Plot with Labels')
plt.xlabel('X-axis')
plt.ylabel('Y-axis')
plt.show()
Output:
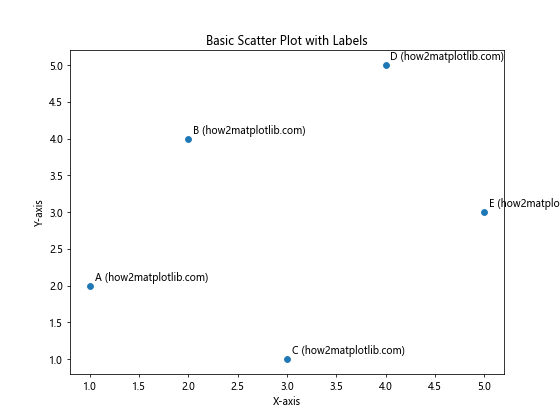
在这个示例中,我们首先创建了一个散点图,然后使用循环遍历每个数据点,为其添加标签。plt.annotate()函数的第一个参数是要显示的文本,第二个参数是标注的位置(即数据点的坐标),xytext参数指定了标签相对于数据点的偏移量。
2. 自定义标签样式
我们可以通过调整plt.annotate()函数的参数来自定义标签的样式,包括字体、颜色、大小等。以下是一个更加丰富的示例:
import matplotlib.pyplot as plt
import numpy as np

x = np.random.rand(10)
y = np.random.rand(10)
labels = [f'Point {i+1}' for i in range(10)]

plt.figure(figsize=(10, 8))
scatter = plt.scatter(x, y, c=np.random.rand(10), s=100, cmap='viridis')

for i, label in enumerate(labels):
    plt.annotate(f'{label} (how2matplotlib.com)', (x[i], y[i]),
                 xytext=(10, 10),
                 textcoords='offset points',
                 fontsize=8,
                 color='red',
                 bbox=dict(boxstyle='round,pad=0.5', fc='yellow', alpha=0.5),
                 arrowprops=dict(arrowstyle='->', connectionstyle='arc3,rad=0'))

plt.colorbar(scatter)
plt.title('Customized Scatter Plot with Labels')
plt.xlabel('X-axis')
plt.ylabel('Y-axis')
plt.show()
Output:
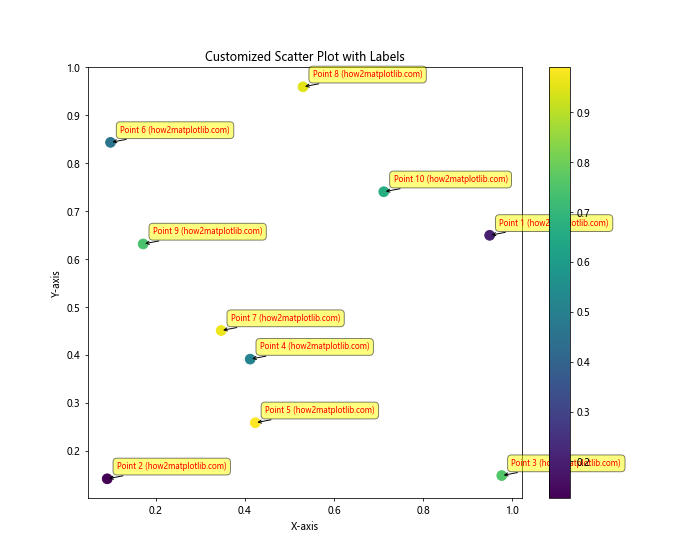
在这个示例中,我们使用了更多的参数来自定义标签的外观:
fontsize:设置字体大小color:设置文本颜色bbox:为标签添加背景框arrowprops:添加从标签指向数据点的箭头
这些自定义选项可以帮助我们创建更加美观和信息丰富的散点图。
3. 避免标签重叠
当数据点较多或分布密集时,标签可能会相互重叠,影响可读性。为了解决这个问题,我们可以使用一些技巧来调整标签的位置。以下是一个使用adjustText库来自动调整标签位置的示例:
import matplotlib.pyplot as plt
import numpy as np
from adjustText import adjust_text

x = np.random.rand(20)
y = np.random.rand(20)
labels = [f'Point {i+1}' for i in range(20)]

plt.figure(figsize=(12, 9))
plt.scatter(x, y)

texts = []
for i, label in enumerate(labels):
    texts.append(plt.text(x[i], y[i], f'{label} (how2matplotlib.com)'))

adjust_text(texts, arrowprops=dict(arrowstyle='->', color='red'))

plt.title('Scatter Plot with Non-overlapping Labels')
plt.xlabel('X-axis')
plt.ylabel('Y-axis')
plt.show()
在这个示例中,我们使用adjustText库的adjust_text()函数来自动调整标签的位置,以避免重叠。这个库会尝试移动标签,使它们不会相互遮挡,同时保持与对应数据点的连接。
4. 选择性标注
有时候,我们可能只想标注部分重要的数据点,而不是所有点。以下是一个根据某些条件选择性标注的示例:
import matplotlib.pyplot as plt
import numpy as np

np.random.seed(42)
x = np.random.rand(50)
y = np.random.rand(50)
values = np.random.randint(0, 100, 50)

plt.figure(figsize=(12, 9))
scatter = plt.scatter(x, y, c=values, s=100, cmap='viridis')

for i, value in enumerate(values):
    if value > 80:  # 只标注值大于80的点
        plt.annotate(f'High: {value} (how2matplotlib.com)', (x[i], y[i]),
                     xytext=(5, 5),
                     textcoords='offset points',
                     fontsize=8,
                     bbox=dict(boxstyle='round,pad=0.5', fc='white', ec='red', alpha=0.8))

plt.colorbar(scatter, label='Value')
plt.title('Scatter Plot with Selective Labeling')
plt.xlabel('X-axis')
plt.ylabel('Y-axis')
plt.show()
Output:
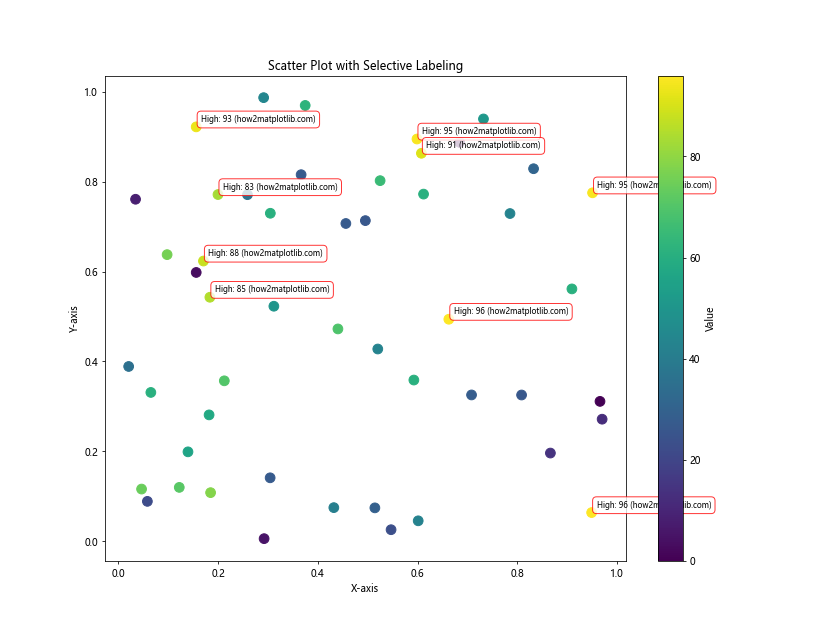
在这个示例中,我们只为值大于80的数据点添加了标签。这种方法可以帮助我们突出显示重要的数据点,而不会使图表变得过于拥挤。
5. 使用图例代替直接标注
对于某些类型的数据,使用图例(legend)而不是直接在点上标注可能更合适。以下是一个使用图例来标识不同类别数据点的示例:
import matplotlib.pyplot as plt
import numpy as np

np.random.seed(42)
categories = ['A', 'B', 'C']
colors = ['red', 'green', 'blue']
data = {cat: (np.random.rand(20), np.random.rand(20)) for cat in categories}

plt.figure(figsize=(10, 8))

for cat, color in zip(categories, colors):
    x, y = data[cat]
    plt.scatter(x, y, c=color, label=f'{cat} (how2matplotlib.com)', alpha=0.7)

plt.legend()
plt.title('Scatter Plot with Legend')
plt.xlabel('X-axis')
plt.ylabel('Y-axis')
plt.show()
Output:
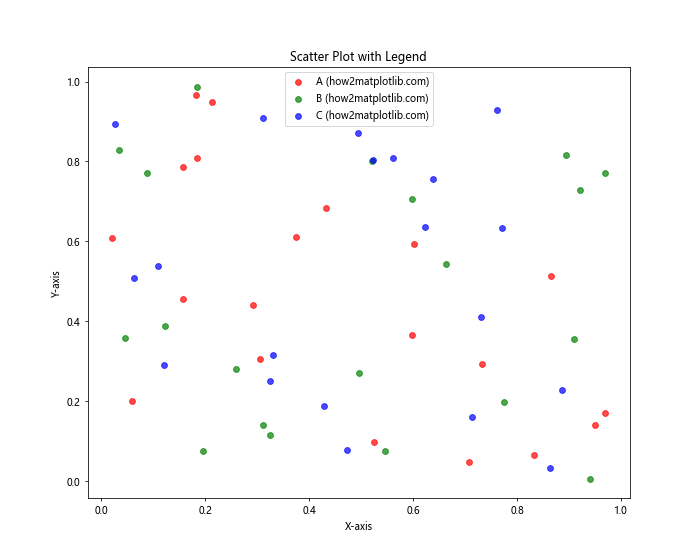
这个示例展示了如何使用不同的颜色来表示不同类别的数据点,并使用图例来解释各个类别。这种方法特别适合于分类数据的可视化。
6. 交互式标签
对于大量数据点,我们可以考虑使用交互式标签,只有当鼠标悬停在数据点上时才显示标签。这可以通过使用Matplotlib的事件处理功能来实现:
import matplotlib.pyplot as plt
import numpy as np

np.random.seed(42)
x = np.random.rand(100)
y = np.random.rand(100)
labels = [f'Point {i+1}' for i in range(100)]

fig, ax = plt.subplots(figsize=(12, 9))
scatter = ax.scatter(x, y)

annot = ax.annotate("", xy=(0,0), xytext=(20,20),textcoords="offset points",
                    bbox=dict(boxstyle="round", fc="w"),
                    arrowprops=dict(arrowstyle="->"))
annot.set_visible(False)

def update_annot(ind):
    pos = scatter.get_offsets()[ind["ind"][0]]
    annot.xy = pos
    text = f"{labels[ind['ind'][0]]} (how2matplotlib.com)"
    annot.set_text(text)
    annot.get_bbox_patch().set_alpha(0.4)

def hover(event):
    vis = annot.get_visible()
    if event.inaxes == ax:
        cont, ind = scatter.contains(event)
        if cont:
            update_annot(ind)
            annot.set_visible(True)
            fig.canvas.draw_idle()
        else:
            if vis:
                annot.set_visible(False)
                fig.canvas.draw_idle()

fig.canvas.mpl_connect("motion_notify_event", hover)

plt.title('Interactive Scatter Plot Labels')
plt.xlabel('X-axis')
plt.ylabel('Y-axis')
plt.show()
Output:
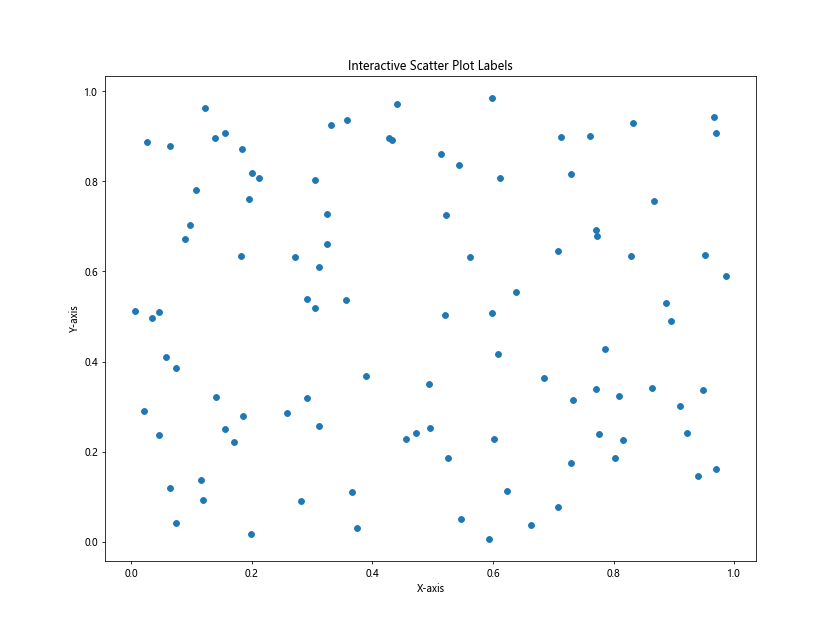
这个示例创建了一个交互式散点图,当鼠标悬停在数据点上时,会显示该点的标签。这种方法特别适合于数据点非常多的情况,可以保持图表的整洁性,同时仍然提供详细信息。
7. 3D散点图标注
Matplotlib也支持3D散点图的绘制和标注。以下是一个3D散点图标注的示例:
import matplotlib.pyplot as plt
from mpl_toolkits.mplot3d import Axes3D
import numpy as np

fig = plt.figure(figsize=(12, 9))
ax = fig.add_subplot(111, projection='3d')

n = 20
xs = np.random.rand(n)
ys = np.random.rand(n)
zs = np.random.rand(n)
colors = np.random.rand(n)

scatter = ax.scatter(xs, ys, zs, c=colors, s=50)

for i in range(n):
    label = f'Point {i+1} (how2matplotlib.com)'
    ax.text(xs[i], ys[i], zs[i], label, fontsize=8)

ax.set_xlabel('X Label')
ax.set_ylabel('Y Label')
ax.set_zlabel('Z Label')
ax.set_title('3D Scatter Plot with Labels')

plt.show()
Output:
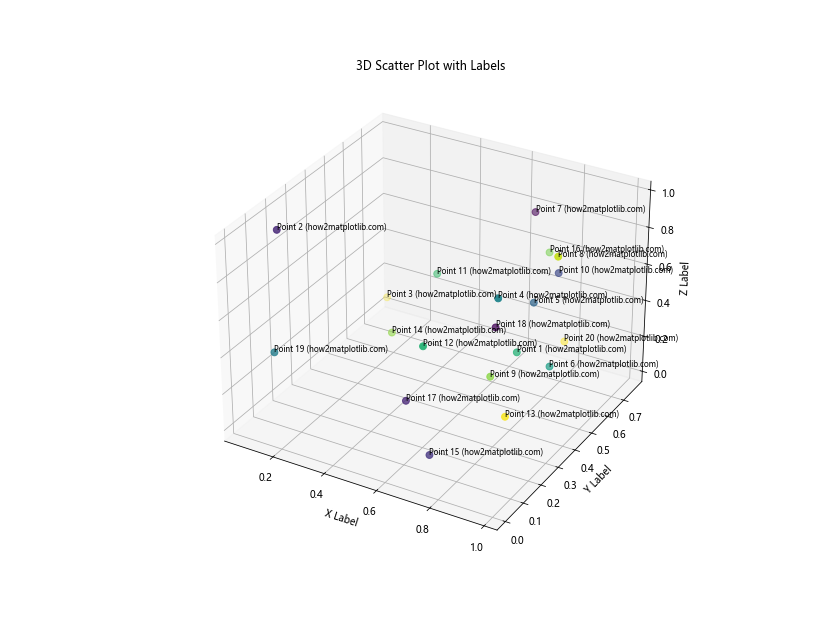
这个示例展示了如何在3D空间中创建散点图并为每个点添加标签。在3D图中,标签的位置会自动调整以保持可读性。
8. 使用不同形状和大小
除了颜色,我们还可以使用不同的形状和大小来区分数据点,并相应地调整标签。以下是一个综合使用这些特性的示例:
import matplotlib.pyplot as plt
import numpy as np

np.random.seed(42)
categories = ['A', 'B', 'C']
shapes = ['o', 's', '^']
sizes = [50, 100, 150]
data = {cat: (np.random.rand(10), np.random.rand(10)) for cat in categories}

plt.figure(figsize=(12, 9))

for cat, shape, size in zip(categories, shapes, sizes):
    x, y = data[cat]
    scatter = plt.scatter(x, y, marker=shape, s=size, label=f'{cat} (how2matplotlib.com)', alpha=0.7)

    for i in range(len(x)):
        plt.annotate(f'{cat}{i+1}', (x[i], y[i]),
                     xytext=(5, 5),
                     textcoords='offset points',
                     fontsize=8,
                     bbox=dict(boxstyle='round,pad=0.5', fc='white', ec='gray', alpha=0.8))

plt.legend()
plt.title('Scatter Plot with Different Shapes, Sizes, and Labels')
plt.xlabel('X-axis')
plt.ylabel('Y-axis')
plt.show()
Output:
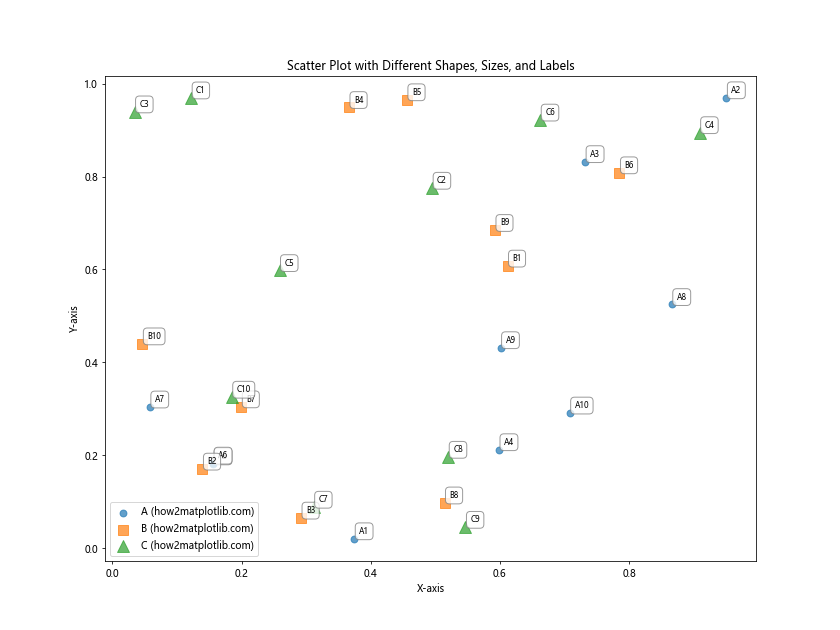
在这个示例中,我们为不同类别的数据点使用了不同的形状和大小,并为每个点添加了标签。这种方法可以在一个图表中传达多个维度的信息。
9. 标签旋转和对齐
有时,为了避免标签重叠或提高可读性,我们可能需要旋转标签或调整其对齐方式。以下是一个展示这些技巧的示例:
import matplotlib.pyplot as plt
import numpy as np

np.random.seed(42)
x = np.random.rand(15)
y = np.random.rand(15)
labels = [f'Label {i+1}' for i in range(15)]

plt.figure(figsize=(12, 9))
plt.scatter(x, y)

for i, (xi, yi, label) in enumerate(zip(x, y, labels)):
    angle = np.random.randint(-45, 45)
    alignment = ['left', 'center', 'right'][i % 3]

    plt.annotate(f'{label} (how2matplotlib.com)', (xi, yi),
                 xytext=(5, 5),
                 textcoords='offset points',
                 fontsize=8,
                 rotation=angle,
                 ha=alignment,
                 va='bottom',
                 bbox=dict(boxstyle='round,pad=0.5', fc='yellow', ec='gray', alpha=0.8))

plt.title('Scatter Plot with Rotated and Aligned Labels')
plt.xlabel('X-axis')
plt.ylabel('Y-axis')
plt.show()
Output:
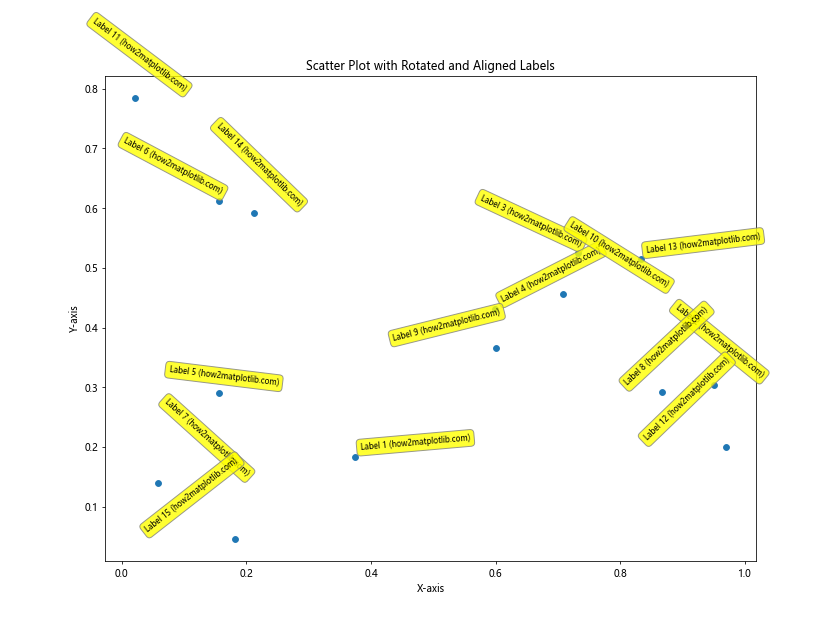
这个示例展示了如何使用不同的角度和对齐方式来放置标签。通过旋转和调整对齐,我们可以在有限的空间内更好地排布标签。
10. 使用文本框和连接线
对于某些复杂的图表,我们可能需要使用文本框和连接线来更清晰地标注数据点。以下是一个使用文本框和连接线的高级标注示例:
import matplotlib.pyplot as plt
import numpy as np

np.random.seed(42)
x = np.random.rand(10)
y = np.random.rand(10)
labels = [f'Point {i+1}' for i in range(10)]

fig, ax = plt.subplots(figsize=(12, 9))
scatter = ax.scatter(x, y, s=100)

for i, (xi, yi, label) in enumerate(zip(x, y, labels)):
    bbox_props = dict(boxstyle="round,pad=0.3", fc="white", ec="gray", lw=2)
    t = ax.text(xi, yi, f"{label} (how2matplotlib.com)", ha="center", va="center",
                bbox=bbox_props, zorder=3)

    # 创建连接线
    ax.annotate("", xy=(xi, yi), xytext=(xi + 0.1, yi + 0.1),
                arrowprops=dict(arrowstyle="-", color="gray", connectionstyle="arc3,rad=0.3"))

plt.title('Scatter Plot with Text Boxes and Connecting Lines')
plt.xlabel('X-axis')
plt.ylabel('Y-axis')
plt.show()
Output:
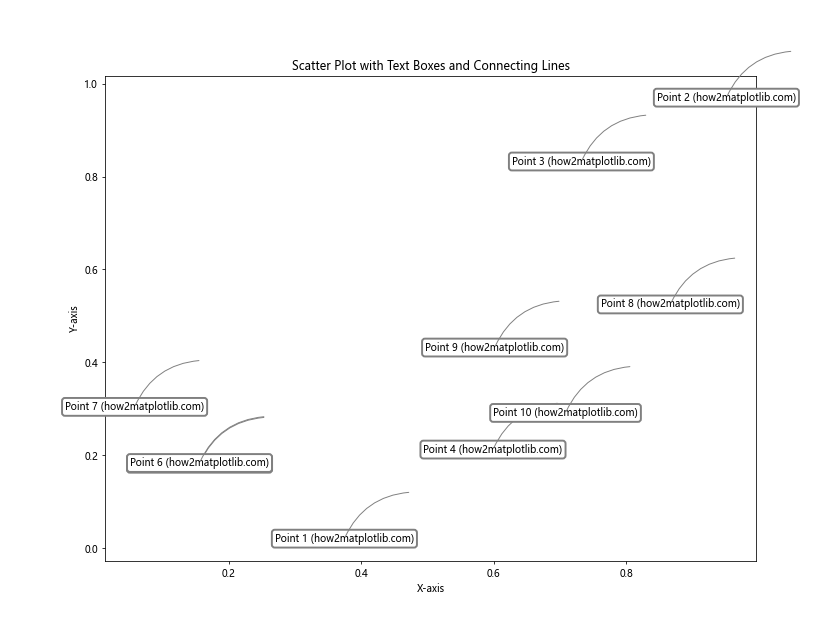
在这个示例中,我们为每个数据点创建了一个带有背景的文本框,并使用曲线连接线将文本框与数据点连接起来。这种方法可以在图表较为复杂时提供清晰的标注。
11. 动态标签位置调整
在某些情况下,我们可能需要根据数据点的位置动态调整标签的位置,以避免标签超出图表边界或与其他元素重叠。以下是一个动态调整标签位置的示例:
import matplotlib.pyplot as plt
import numpy as np

np.random.seed(42)
x = np.random.rand(20)
y = np.random.rand(20)
labels = [f'Point {i+1}' for i in range(20)]

fig, ax = plt.subplots(figsize=(12, 9))
scatter = ax.scatter(x, y)

for i, (xi, yi, label) in enumerate(zip(x, y, labels)):
    # 根据点的位置决定标签的位置
    if xi < 0.5 and yi < 0.5:
        xytext = (5, 5)
        ha = 'left'
        va = 'bottom'
    elif xi >= 0.5 and yi < 0.5:
        xytext = (-5, 5)
        ha = 'right'
        va = 'bottom'
    elif xi < 0.5 and yi >= 0.5:
        xytext = (5, -5)
        ha = 'left'
        va = 'top'
    else:
        xytext = (-5, -5)
        ha = 'right'
        va = 'top'

    ax.annotate(f'{label} (how2matplotlib.com)', (xi, yi),
                xytext=xytext,
                textcoords='offset points',
                fontsize=8,
                ha=ha, va=va,
                bbox=dict(boxstyle='round,pad=0.5', fc='white', ec='gray', alpha=0.8))

plt.title('Scatter Plot with Dynamically Positioned Labels')
plt.xlabel('X-axis')
plt.ylabel('Y-axis')
plt.show()
Output:
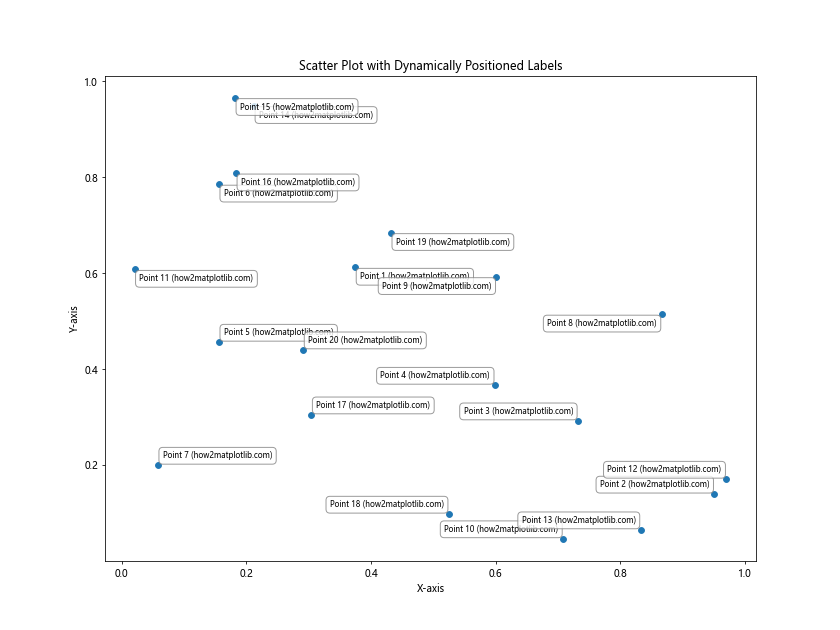
这个示例根据数据点在图表中的位置动态调整标签的放置方向,确保标签始终朝向图表的中心,从而避免标签超出图表边界。
12. 使用颜色编码的标签
我们可以使用颜色来编码标签,以传达额外的信息。以下是一个使用颜色编码标签的示例:
import matplotlib.pyplot as plt
import numpy as np

np.random.seed(42)
x = np.random.rand(15)
y = np.random.rand(15)
values = np.random.randint(0, 100, 15)

fig, ax = plt.subplots(figsize=(12, 9))
scatter = ax.scatter(x, y, c=values, cmap='viridis', s=100)

for i, (xi, yi, val) in enumerate(zip(x, y, values)):
    color = plt.cm.viridis(val / 100)  # 根据值映射到颜色
    ax.annotate(f'{val} (how2matplotlib.com)', (xi, yi),
                xytext=(5, 5),
                textcoords='offset points',
                fontsize=8,
                color=color,
                weight='bold',
                bbox=dict(boxstyle='round,pad=0.5', fc='white', ec='gray', alpha=0.8))

plt.colorbar(scatter, label='Value')
plt.title('Scatter Plot with Color-coded Labels')
plt.xlabel('X-axis')
plt.ylabel('Y-axis')
plt.show()
Output:
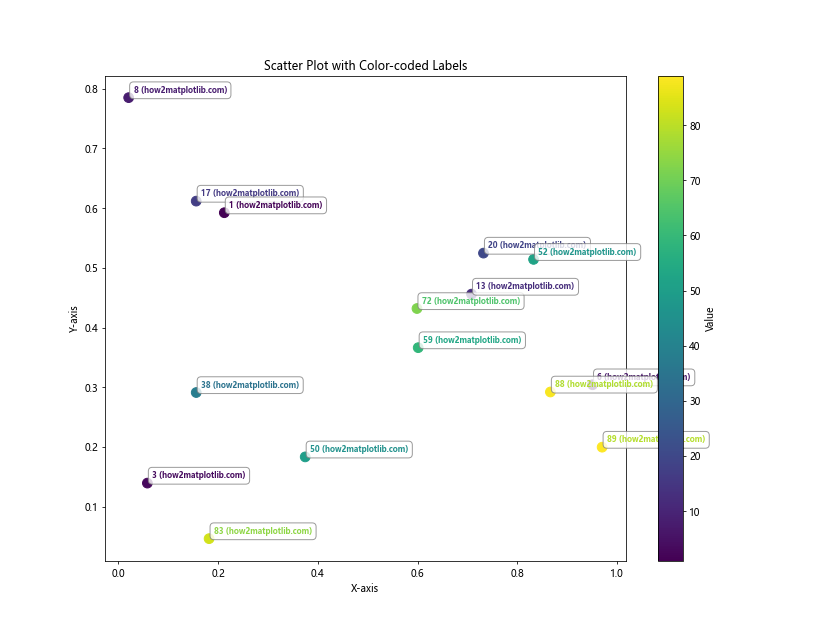
在这个示例中,标签的颜色与数据点的颜色相对应,这样可以直观地展示数值的大小关系。
13. 使用自定义标记
有时,我们可能想要使用自定义的标记来标注特定的数据点。以下是一个使用自定义标记的示例:
import matplotlib.pyplot as plt
import numpy as np

np.random.seed(42)
x = np.random.rand(20)
y = np.random.rand(20)
importance = np.random.choice(['low', 'medium', 'high'], 20)

fig, ax = plt.subplots(figsize=(12, 9))

# 定义不同重要性级别的标记样式
markers = {'low': 'o', 'medium': 's', 'high': '^'}
colors = {'low': 'green', 'medium': 'blue', 'high': 'red'}

for imp in markers:
    mask = importance == imp
    ax.scatter(x[mask], y[mask], marker=markers[imp], c=colors[imp], label=imp, s=100)

for i, (xi, yi, imp) in enumerate(zip(x, y, importance)):
    if imp == 'high':
        ax.annotate(f'Important (how2matplotlib.com)', (xi, yi),
                    xytext=(5, 5),
                    textcoords='offset points',
                    fontsize=8,
                    color='red',
                    bbox=dict(boxstyle='round,pad=0.5', fc='yellow', ec='red', alpha=0.8))

plt.legend()
plt.title('Scatter Plot with Custom Markers and Selective Labeling')
plt.xlabel('X-axis')
plt.ylabel('Y-axis')
plt.show()
Output:
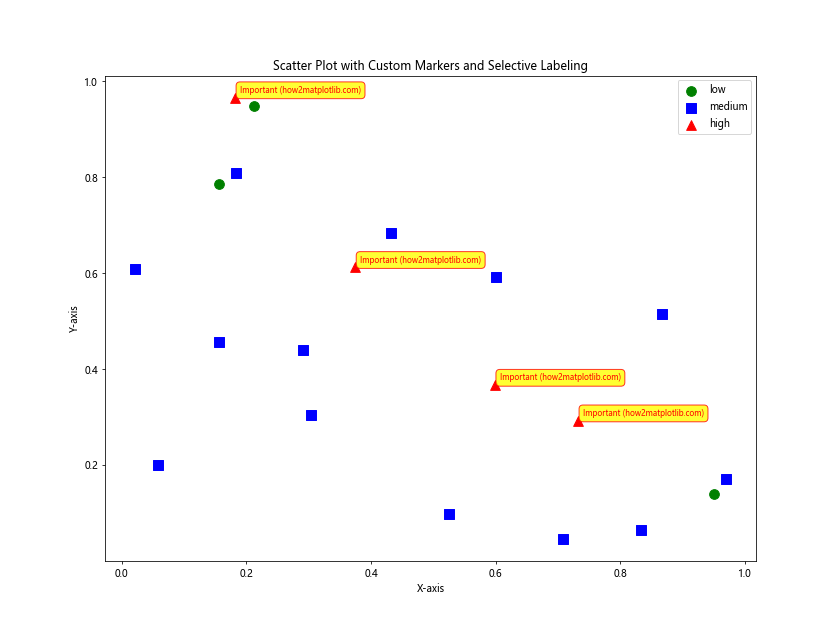
这个示例使用不同的标记和颜色来表示数据点的重要性级别,并只为高重要性的点添加标签。
14. 使用箭头标注
在某些情况下,使用箭头可以更清晰地指示特定的数据点。以下是一个使用箭头标注的示例:
import matplotlib.pyplot as plt
import numpy as np

np.random.seed(42)
x = np.random.rand(10)
y = np.random.rand(10)

fig, ax = plt.subplots(figsize=(12, 9))
ax.scatter(x, y, s=100)

for i, (xi, yi) in enumerate(zip(x, y)):
    if i % 3 == 0:  # 每隔三个点添加一个箭头标注
        ax.annotate(f'Point {i} (how2matplotlib.com)', (xi, yi),
                    xytext=(xi+0.1, yi+0.1),
                    arrowprops=dict(facecolor='black', shrink=0.05, width=2, headwidth=8),
                    fontsize=8,
                    bbox=dict(boxstyle='round,pad=0.5', fc='yellow', ec='gray', alpha=0.8))

plt.title('Scatter Plot with Arrow Annotations')
plt.xlabel('X-axis')
plt.ylabel('Y-axis')
plt.show()
Output:
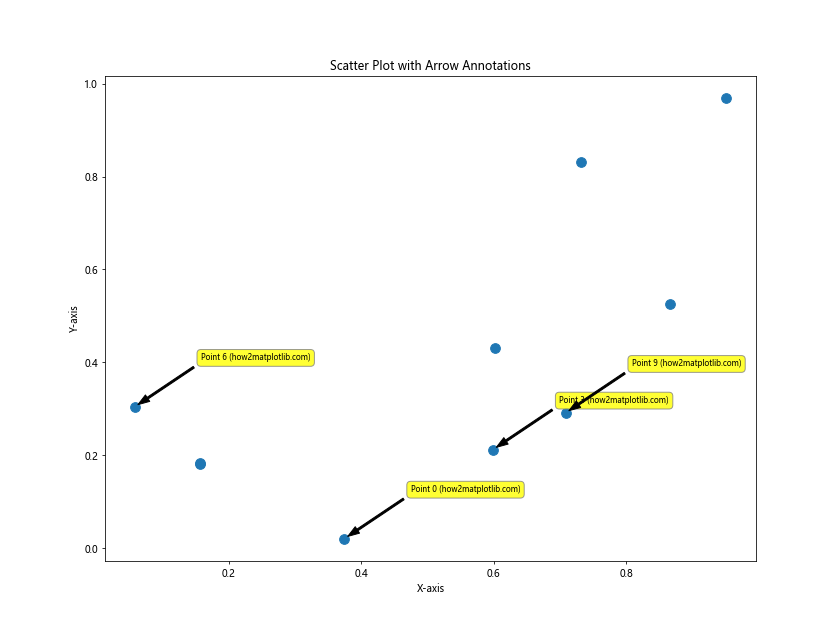
这个示例为部分数据点添加了带箭头的标注,箭头清晰地指向了被标注的点。
15. 分组标注
当数据点可以分为不同的组时,我们可以使用分组标注来突出显示这种结构。以下是一个分组标注的示例:
import matplotlib.pyplot as plt
import numpy as np

np.random.seed(42)
groups = ['A', 'B', 'C']
colors = ['red', 'green', 'blue']
data = {group: (np.random.rand(5), np.random.rand(5)) for group in groups}

fig, ax = plt.subplots(figsize=(12, 9))

for group, color in zip(groups, colors):
    x, y = data[group]
    ax.scatter(x, y, c=color, label=group, s=100)

    # 计算每组的平均位置
    mean_x, mean_y = np.mean(x), np.mean(y)

    # 为每组添加一个大的标签
    ax.annotate(f'Group {group} (how2matplotlib.com)', (mean_x, mean_y),
                xytext=(0, 20),
                textcoords='offset points',
                fontsize=12,
                ha='center',
                va='bottom',
                bbox=dict(boxstyle='round,pad=0.5', fc=color, ec='gray', alpha=0.3),
                arrowprops=dict(arrowstyle='->', connectionstyle='arc3,rad=0'))

plt.legend()
plt.title('Scatter Plot with Group Annotations')
plt.xlabel('X-axis')
plt.ylabel('Y-axis')
plt.show()
Output:
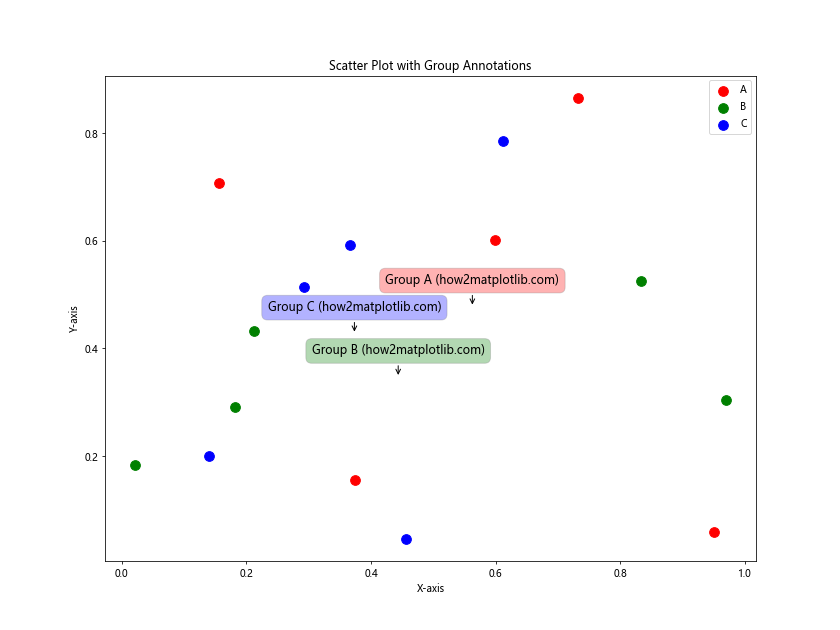
这个示例为每个组的中心位置添加了一个大的标签,并用箭头指向该组的数据点集合。
总结
本文详细介绍了在Matplotlib中为散点图添加标签的多种方法和技巧。从基本的标注方法到高级的自定义技巧,我们探讨了如何创建信息丰富、美观且易于理解的散点图。这些技巧包括:
- 基本的散点图标注
- 自定义标签样式
- 避免标签重叠
- 选择性标注
- 使用图例代替直接标注
- 交互式标签
- 3D散点图标注
- 使用不同形状和大小
- 标签旋转和对齐
- 使用文本框和连接线
- 动态标签位置调整
- 使用颜色编码的标签
- 使用自定义标记
- 使用箭头标注
- 分组标注
通过灵活运用这些技巧,我们可以根据数据的特点和可视化的目的,创建出既美观又富有信息量的散点图。在实际应用中,可以根据具体需求选择合适的标注方法,或者结合多种技巧来达到最佳的可视化效果。
记住,好的数据可视化不仅要准确地呈现数据,还要让观众能够轻松理解和解读图表。通过恰当的标注,我们可以大大提高散点图的可读性和信息传递效率。在使用这些技巧时,始终要考虑到图表的整体平衡和美观,避免过度标注导致图表变得杂乱。
最后,Matplotlib的强大和灵活性使得我们可以创建出各种复杂和精美的散点图。随着对这些技巧的熟练掌握,你将能够制作出更加专业和有说服力的数据可视化作品。
 极客笔记
极客笔记