Matplotlib中使用set_minor_formatter()函数设置次要刻度格式
参考:Matplotlib.axis.Axis.set_minor_formatter() function in Python
Matplotlib是Python中最流行的数据可视化库之一,它提供了丰富的绘图功能和自定义选项。在创建图表时,刻度标签的格式化是一个重要的方面,可以大大提高图表的可读性和美观度。本文将深入探讨Matplotlib中的Axis.set_minor_formatter()函数,这是一个用于设置坐标轴次要刻度标签格式的强大工具。
1. set_minor_formatter()函数简介
set_minor_formatter()是Matplotlib库中axis.Axis类的一个方法,用于设置坐标轴次要刻度的格式化器。次要刻度通常是主要刻度之间的较小刻度,用于提供更精细的刻度信息。通过使用这个函数,我们可以自定义次要刻度标签的显示方式,使图表更加清晰和信息丰富。
基本语法如下:
axis.set_minor_formatter(formatter)
其中,axis是坐标轴对象(可以是x轴或y轴),formatter是一个格式化器对象或可调用对象,用于定义如何格式化次要刻度标签。
2. 常用的格式化器类型
Matplotlib提供了多种内置的格式化器类,可以直接用于set_minor_formatter()函数。以下是一些常用的格式化器:
NullFormatter: 不显示任何标签FixedFormatter: 使用固定的字符串列表作为标签FuncFormatter: 使用自定义函数格式化标签FormatStrFormatter: 使用格式字符串格式化标签ScalarFormatter: 根据数值自动选择合适的格式PercentFormatter: 将数值格式化为百分比
接下来,我们将通过具体的示例来展示如何使用这些格式化器。
3. 使用NullFormatter
NullFormatter用于完全隐藏次要刻度标签,这在某些情况下可能很有用,比如当你只想显示主要刻度标签时。
import matplotlib.pyplot as plt
import numpy as np
from matplotlib.ticker import NullFormatter

# 创建数据
x = np.linspace(0, 10, 100)
y = np.sin(x)

# 创建图表
fig, ax = plt.subplots(figsize=(10, 6))
ax.plot(x, y, label='sin(x)')

# 设置次要刻度
ax.xaxis.set_minor_locator(plt.MultipleLocator(0.5))
ax.yaxis.set_minor_locator(plt.MultipleLocator(0.1))

# 使用NullFormatter隐藏次要刻度标签
ax.xaxis.set_minor_formatter(NullFormatter())
ax.yaxis.set_minor_formatter(NullFormatter())

ax.set_title('Using NullFormatter - how2matplotlib.com')
ax.legend()
plt.grid(True, which='both', linestyle='--', alpha=0.5)
plt.show()
Output:
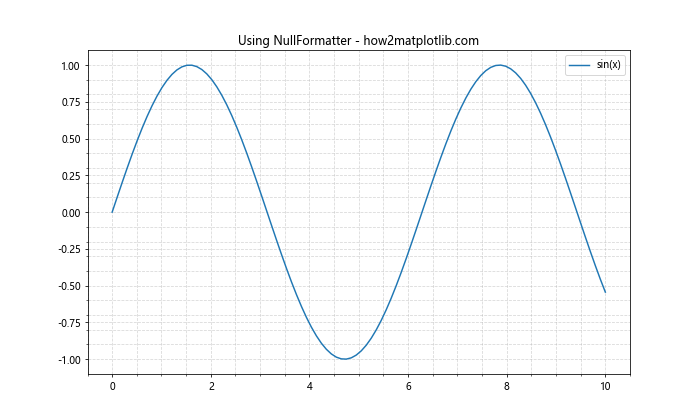
在这个例子中,我们首先创建了一个简单的正弦曲线图。然后,我们使用MultipleLocator设置了x轴和y轴的次要刻度间隔。最后,我们对两个轴都应用了NullFormatter,这样次要刻度就不会显示标签,但刻度线仍然可见。
4. 使用FixedFormatter
FixedFormatter允许你为次要刻度指定一个固定的标签列表。这在你想要为特定位置设置自定义标签时非常有用。
import matplotlib.pyplot as plt
import numpy as np
from matplotlib.ticker import FixedFormatter, MultipleLocator

# 创建数据
x = np.linspace(0, 10, 100)
y = np.cos(x)

# 创建图表
fig, ax = plt.subplots(figsize=(10, 6))
ax.plot(x, y, label='cos(x)')

# 设置次要刻度
ax.xaxis.set_minor_locator(MultipleLocator(0.5))

# 使用FixedFormatter设置自定义标签
minor_labels = ['A', 'B', 'C', 'D', 'E'] * 4
ax.xaxis.set_minor_formatter(FixedFormatter(minor_labels))

ax.set_title('Using FixedFormatter - how2matplotlib.com')
ax.legend()
plt.grid(True, which='both', linestyle='--', alpha=0.5)
plt.show()
Output:
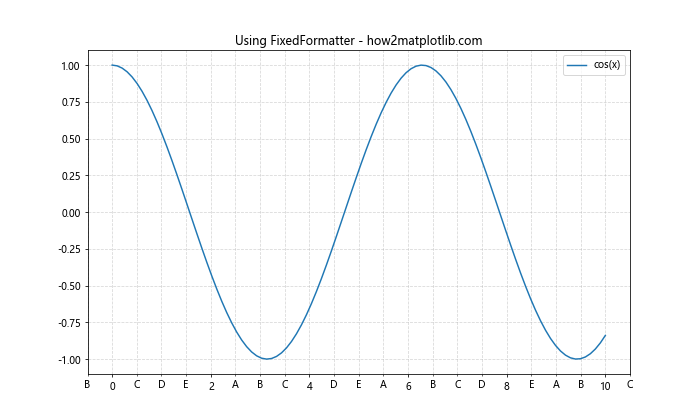
在这个例子中,我们创建了一个余弦曲线图。我们使用MultipleLocator设置了x轴的次要刻度间隔为0.5。然后,我们创建了一个包含字母A到E的标签列表,并使用FixedFormatter将这些标签应用到次要刻度上。注意,标签列表会循环使用,直到覆盖所有的次要刻度。
5. 使用FuncFormatter
FuncFormatter是一个非常灵活的格式化器,它允许你定义一个自定义函数来格式化刻度标签。这在你需要复杂的标签格式化逻辑时特别有用。
import matplotlib.pyplot as plt
import numpy as np
from matplotlib.ticker import FuncFormatter, MultipleLocator

def minor_formatter(x, pos):
    """自定义格式化函数"""
    return f"({x:.1f})"

# 创建数据
x = np.linspace(0, 5, 100)
y = x ** 2

# 创建图表
fig, ax = plt.subplots(figsize=(10, 6))
ax.plot(x, y, label='x^2')

# 设置次要刻度
ax.xaxis.set_minor_locator(MultipleLocator(0.25))

# 使用FuncFormatter设置自定义格式
ax.xaxis.set_minor_formatter(FuncFormatter(minor_formatter))

ax.set_title('Using FuncFormatter - how2matplotlib.com')
ax.legend()
plt.grid(True, which='both', linestyle='--', alpha=0.5)
plt.show()
Output:
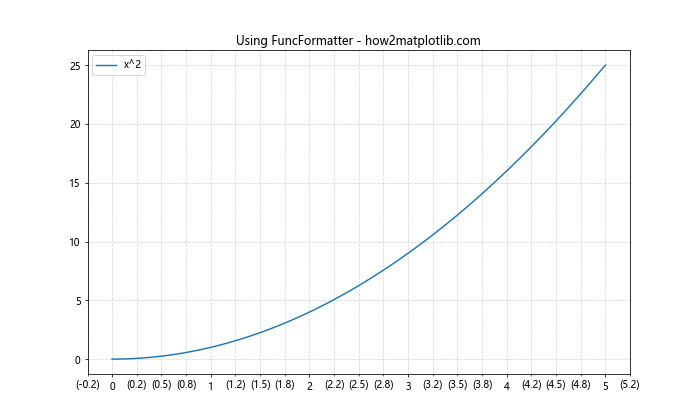
在这个例子中,我们定义了一个名为minor_formatter的函数,它将数值格式化为带括号的一位小数。然后,我们创建了一个二次函数图,并使用MultipleLocator设置x轴的次要刻度间隔为0.25。最后,我们使用FuncFormatter将我们的自定义格式化函数应用到x轴的次要刻度上。
6. 使用FormatStrFormatter
FormatStrFormatter允许你使用Python的字符串格式化语法来定义刻度标签的格式。这在你需要控制数值的显示精度或添加特定前缀/后缀时很有用。
import matplotlib.pyplot as plt
import numpy as np
from matplotlib.ticker import FormatStrFormatter, MultipleLocator

# 创建数据
x = np.linspace(0, 2*np.pi, 100)
y = np.sin(x)

# 创建图表
fig, ax = plt.subplots(figsize=(10, 6))
ax.plot(x, y, label='sin(x)')

# 设置次要刻度
ax.xaxis.set_minor_locator(MultipleLocator(0.1))
ax.yaxis.set_minor_locator(MultipleLocator(0.05))

# 使用FormatStrFormatter设置格式
ax.xaxis.set_minor_formatter(FormatStrFormatter('%.2f'))
ax.yaxis.set_minor_formatter(FormatStrFormatter('%.3f'))

ax.set_title('Using FormatStrFormatter - how2matplotlib.com')
ax.legend()
plt.grid(True, which='both', linestyle='--', alpha=0.5)
plt.show()
Output:
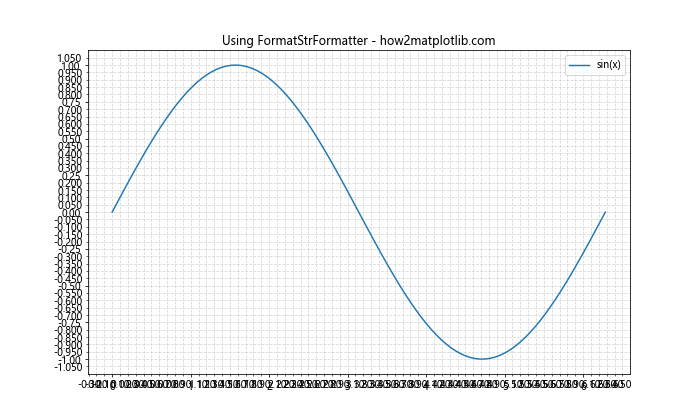
在这个例子中,我们创建了一个正弦函数图。我们使用MultipleLocator设置了x轴和y轴的次要刻度间隔。然后,我们使用FormatStrFormatter为x轴设置了两位小数的格式,为y轴设置了三位小数的格式。这样可以精确控制次要刻度标签的显示精度。
7. 使用ScalarFormatter
ScalarFormatter是一个智能的格式化器,它可以根据数值的大小自动选择合适的表示方式,包括科学记数法。这在处理范围很大的数据时特别有用。
import matplotlib.pyplot as plt
import numpy as np
from matplotlib.ticker import ScalarFormatter, MultipleLocator

# 创建数据
x = np.logspace(0, 8, 100)
y = np.sqrt(x)

# 创建图表
fig, ax = plt.subplots(figsize=(10, 6))
ax.plot(x, y, label='sqrt(x)')

# 设置对数刻度
ax.set_xscale('log')

# 设置次要刻度
ax.xaxis.set_minor_locator(plt.LogLocator(subs=[2, 3, 4, 5, 6, 7, 8, 9]))

# 使用ScalarFormatter设置格式
formatter = ScalarFormatter()
formatter.set_scientific(True)
formatter.set_powerlimits((-1, 1))
ax.xaxis.set_minor_formatter(formatter)

ax.set_title('Using ScalarFormatter - how2matplotlib.com')
ax.legend()
plt.grid(True, which='both', linestyle='--', alpha=0.5)
plt.show()
Output:
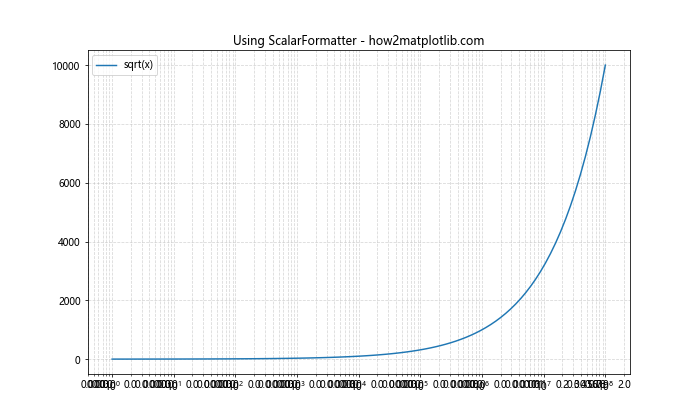
在这个例子中,我们创建了一个对数刻度的平方根函数图。我们使用LogLocator设置了x轴的次要刻度位置。然后,我们创建了一个ScalarFormatter对象,启用了科学记数法,并设置了幂限制。这样,当数值超出[-10, 10]范围时,就会使用科学记数法表示。
8. 使用PercentFormatter
PercentFormatter用于将数值格式化为百分比形式。这在处理比例或百分比数据时非常有用。
import matplotlib.pyplot as plt
import numpy as np
from matplotlib.ticker import PercentFormatter, MultipleLocator

# 创建数据
x = np.linspace(0, 1, 100)
y = x ** 2

# 创建图表
fig, ax = plt.subplots(figsize=(10, 6))
ax.plot(x, y, label='x^2')

# 设置次要刻度
ax.xaxis.set_minor_locator(MultipleLocator(0.05))
ax.yaxis.set_minor_locator(MultipleLocator(0.02))

# 使用PercentFormatter设置格式
ax.xaxis.set_minor_formatter(PercentFormatter(xmax=1))
ax.yaxis.set_minor_formatter(PercentFormatter(xmax=1))

ax.set_title('Using PercentFormatter - how2matplotlib.com')
ax.legend()
plt.grid(True, which='both', linestyle='--', alpha=0.5)
plt.show()
Output:
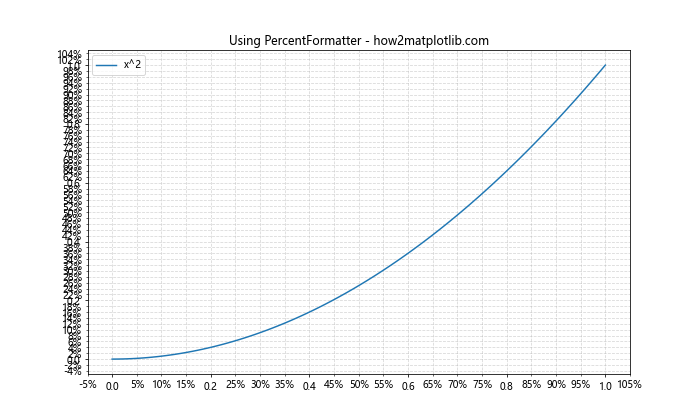
在这个例子中,我们创建了一个二次函数图,x和y的范围都是0到1。我们使用MultipleLocator设置了x轴和y轴的次要刻度间隔。然后,我们使用PercentFormatter将x轴和y轴的次要刻度标签格式化为百分比。注意,我们设置xmax=1,因为我们的数据范围是0到1。
9. 组合使用不同的格式化器
在实际应用中,我们可能需要为不同的轴设置不同的格式化器。以下是一个组合使用多种格式化器的例子:
import matplotlib.pyplot as plt
import numpy as np
from matplotlib.ticker import (MultipleLocator, FormatStrFormatter,
                               PercentFormatter, FuncFormatter)

def custom_formatter(x, pos):
    return f"[{x:.1f}]"

# 创建数据
x = np.linspace(0, 1, 100)
y = np.exp(x) - 1

# 创建图表
fig, ax = plt.subplots(figsize=(10, 6))
ax.plot(x, y, label='exp(x) - 1')

# 设置次要刻度
ax.xaxis.set_minor_locator(MultipleLocator(0.05))
ax.yaxis.set_minor_locator(MultipleLocator(0.1))

# 为x轴使用PercentFormatter
ax.xaxis.set_minor_formatter(PercentFormatter(xmax=1))

# 为y轴使用自定义的FuncFormatter
ax.yaxis.set_minor_formatter(FuncFormatter(custom_formatter))

ax.set_title('Combining Different Formatters - how2matplotlib.com')
ax.legend()
plt.grid(True, which='both', linestyle='--', alpha=0.5)
plt.show()
Output:
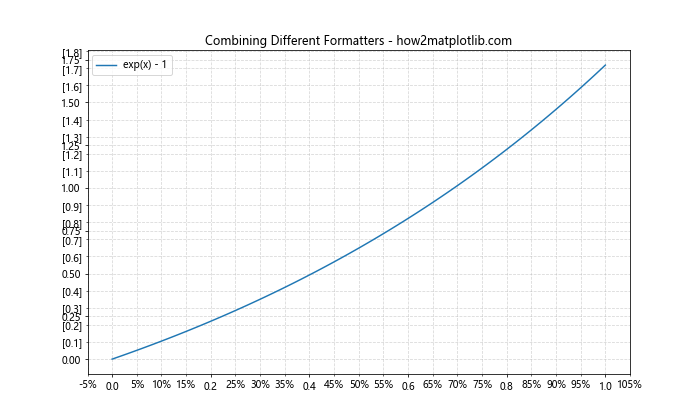
在这个例子中,我们创建了一个指数函数图。我们为x轴和y轴设置了不同的次要刻度间隔。然后,我们为x轴使用了PercentFormatter来显示百分比,为y轴使用了自定义的FuncFormatter来显示带方括号的数值。这个例子展示了如何灵活地组合不同的格式化器来满足特定的可视化需求。
10. 处理日期时间刻度
当处理时间序列数据时,我们可能需要特别格式化日期时间刻度。Matplotlib提供了专门的日期时间格式化器来处理这种情况。
import matplotlib.pyplot as plt
import numpy as np
from matplotlib.dates import DateFormatter, MinuteLocator, HourLocator
from datetime import datetime, timedelta

# 创建日期时间数据
base = datetime(2023, 1, 1)
dates = [base + timedelta(hours=i) for i in range(24)]# 创建数据
y = np.random.rand(24)

# 创建图表
fig, ax = plt.subplots(figsize=(12, 6))
ax.plot(dates, y, label='Random Data')

# 设置主要和次要刻度
ax.xaxis.set_major_locator(HourLocator(byhour=range(0, 24, 3)))
ax.xaxis.set_minor_locator(MinuteLocator(byminute=[15, 30, 45]))

# 设置主要和次要刻度格式
ax.xaxis.set_major_formatter(DateFormatter('%H:%M'))
ax.xaxis.set_minor_formatter(DateFormatter('%M'))

ax.set_title('Date Time Formatting - how2matplotlib.com')
ax.legend()
plt.grid(True, which='both', linestyle='--', alpha=0.5)
fig.autofmt_xdate()  # 自动格式化x轴日期标签
plt.show()
Output:
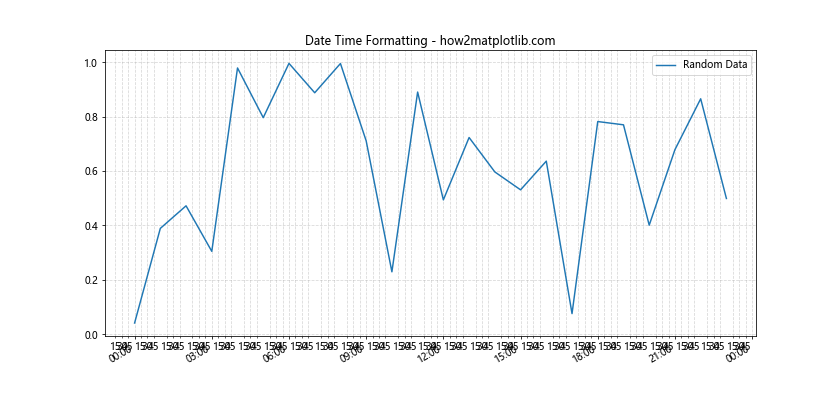
在这个例子中,我们创建了一个24小时的时间序列数据。我们使用HourLocator设置了每3小时一个主要刻度,使用MinuteLocator设置了每15分钟一个次要刻度。然后,我们使用DateFormatter分别为主要和次要刻度设置了不同的日期时间格式。这样,主要刻度显示小时和分钟,而次要刻度只显示分钟。
11. 使用LaTeX格式化数学表达式
Matplotlib支持使用LaTeX来格式化数学表达式,这在科学和工程可视化中非常有用。以下是一个使用LaTeX格式化次要刻度标签的例子:
import matplotlib.pyplot as plt
import numpy as np
from matplotlib.ticker import FuncFormatter, MultipleLocator

def latex_formatter(x, pos):
    return f"\\frac{{{x:.0f}}}{{2}}"

# 创建数据
x = np.linspace(0, 10, 100)
y = np.sin(x)

# 创建图表
fig, ax = plt.subplots(figsize=(10, 6))
ax.plot(x, y, label='sin(x)')

# 设置次要刻度
ax.xaxis.set_minor_locator(MultipleLocator(0.5))

# 使用LaTeX格式化次要刻度标签
ax.xaxis.set_minor_formatter(FuncFormatter(latex_formatter))

ax.set_title('LaTeX Formatting - how2matplotlib.com')
ax.legend()
plt.grid(True, which='both', linestyle='--', alpha=0.5)
plt.show()
Output:
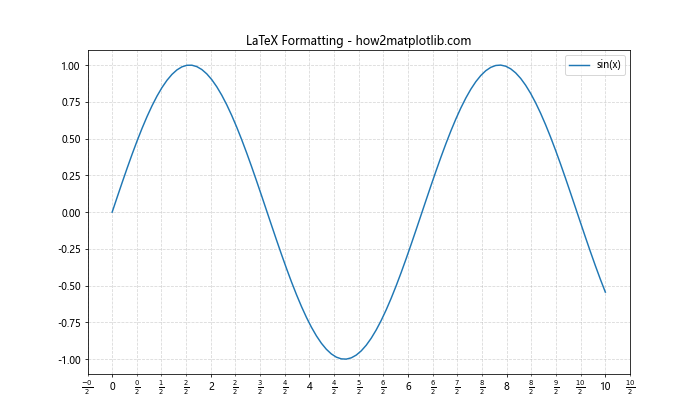
在这个例子中,我们定义了一个latex_formatter函数,它将数值格式化为LaTeX分数形式。我们创建了一个正弦函数图,并使用MultipleLocator设置了x轴的次要刻度间隔为0.5。然后,我们使用FuncFormatter将LaTeX格式化函数应用到x轴的次要刻度上。这样,次要刻度标签会显示为分数形式。
12. 自定义颜色和样式
除了格式化标签内容,我们还可以自定义次要刻度标签的颜色和样式。以下是一个示例:
import matplotlib.pyplot as plt
import numpy as np
from matplotlib.ticker import FormatStrFormatter, MultipleLocator

# 创建数据
x = np.linspace(0, 10, 100)
y = np.exp(-x/10) * np.cos(2*np.pi*x)

# 创建图表
fig, ax = plt.subplots(figsize=(10, 6))
ax.plot(x, y, label='Damped oscillation')

# 设置次要刻度
ax.xaxis.set_minor_locator(MultipleLocator(0.5))
ax.yaxis.set_minor_locator(MultipleLocator(0.1))

# 设置次要刻度格式
ax.xaxis.set_minor_formatter(FormatStrFormatter('%.1f'))
ax.yaxis.set_minor_formatter(FormatStrFormatter('%.2f'))

# 自定义次要刻度标签的颜色和样式
ax.tick_params(which='minor', colors='red', labelsize=8)

ax.set_title('Custom Color and Style - how2matplotlib.com')
ax.legend()
plt.grid(True, which='both', linestyle='--', alpha=0.5)
plt.show()
Output:
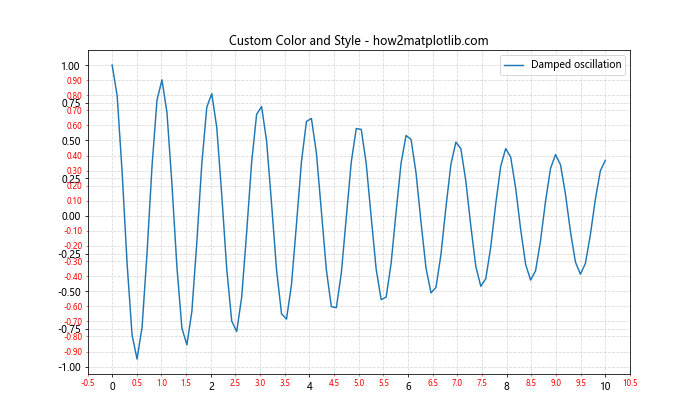
在这个例子中,我们创建了一个衰减振荡函数图。我们使用MultipleLocator设置了x轴和y轴的次要刻度间隔,并使用FormatStrFormatter设置了标签格式。然后,我们使用tick_params方法自定义了次要刻度标签的颜色和字体大小。这样,次要刻度标签会以红色和较小的字体显示。
13. 处理对数刻度
当处理跨越多个数量级的数据时,对数刻度非常有用。以下是一个在对数刻度上格式化次要刻度的例子:
import matplotlib.pyplot as plt
import numpy as np
from matplotlib.ticker import LogFormatter, LogLocator

# 创建数据
x = np.logspace(0, 5, 100)
y = x ** 2

# 创建图表
fig, ax = plt.subplots(figsize=(10, 6))
ax.plot(x, y, label='y = x^2')

# 设置对数刻度
ax.set_xscale('log')
ax.set_yscale('log')

# 设置次要刻度
ax.xaxis.set_minor_locator(LogLocator(subs=np.arange(2, 10)))
ax.yaxis.set_minor_locator(LogLocator(subs=np.arange(2, 10)))

# 设置次要刻度格式
formatter = LogFormatter(labelOnlyBase=False)
ax.xaxis.set_minor_formatter(formatter)
ax.yaxis.set_minor_formatter(formatter)

ax.set_title('Log Scale Formatting - how2matplotlib.com')
ax.legend()
plt.grid(True, which='both', linestyle='--', alpha=0.5)
plt.show()
Output:
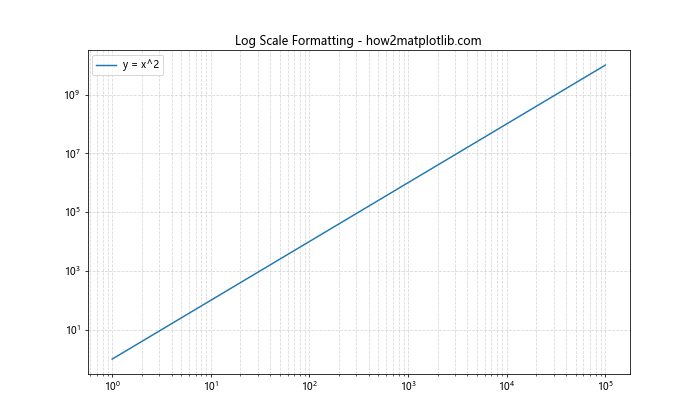
在这个例子中,我们创建了一个二次函数图,并将x轴和y轴都设置为对数刻度。我们使用LogLocator设置了次要刻度的位置,使其显示2到9之间的所有整数。然后,我们使用LogFormatter格式化次要刻度标签,设置labelOnlyBase=False以显示所有次要刻度标签。
14. 处理极坐标系
Matplotlib也支持极坐标系图表。以下是一个在极坐标系中格式化次要刻度的例子:
import matplotlib.pyplot as plt
import numpy as np
from matplotlib.ticker import FormatStrFormatter

# 创建数据
theta = np.linspace(0, 2*np.pi, 100)
r = 1 + 0.5 * np.cos(5*theta)

# 创建极坐标图
fig, ax = plt.subplots(figsize=(10, 10), subplot_kw=dict(projection='polar'))
ax.plot(theta, r)

# 设置角度次要刻度
ax.xaxis.set_minor_locator(plt.MultipleLocator(np.pi/12))

# 设置半径次要刻度
ax.yaxis.set_minor_locator(plt.MultipleLocator(0.1))

# 格式化角度次要刻度
ax.xaxis.set_minor_formatter(FormatStrFormatter('%.2f'))

# 格式化半径次要刻度
ax.yaxis.set_minor_formatter(FormatStrFormatter('%.1f'))

ax.set_title('Polar Plot Formatting - how2matplotlib.com')
plt.grid(True, which='both', linestyle='--', alpha=0.5)
plt.show()
Output:
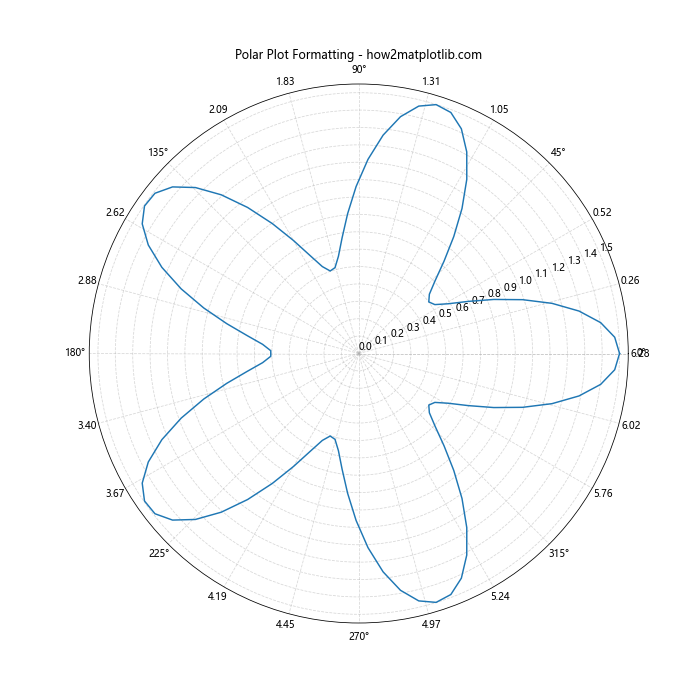
在这个例子中,我们创建了一个极坐标系下的玫瑰线图。我们使用MultipleLocator设置了角度和半径的次要刻度间隔。然后,我们使用FormatStrFormatter分别格式化了角度和半径的次要刻度标签。
15. 处理多子图
在复杂的可视化中,我们可能需要创建多个子图,每个子图可能需要不同的次要刻度格式。以下是一个处理多子图的例子:
import matplotlib.pyplot as plt
import numpy as np
from matplotlib.ticker import FormatStrFormatter, MultipleLocator, PercentFormatter

# 创建数据
x = np.linspace(0, 10, 100)
y1 = np.sin(x)
y2 = np.cos(x)
y3 = np.tan(x)
y4 = x**2 / 100

# 创建2x2的子图
fig, ((ax1, ax2), (ax3, ax4)) = plt.subplots(2, 2, figsize=(12, 12))

# 子图1:正弦函数
ax1.plot(x, y1)
ax1.set_title('Sine Function')
ax1.xaxis.set_minor_locator(MultipleLocator(0.5))
ax1.xaxis.set_minor_formatter(FormatStrFormatter('%.1f'))

# 子图2:余弦函数
ax2.plot(x, y2)
ax2.set_title('Cosine Function')
ax2.yaxis.set_minor_locator(MultipleLocator(0.1))
ax2.yaxis.set_minor_formatter(FormatStrFormatter('%.2f'))

# 子图3:正切函数
ax3.plot(x, y3)
ax3.set_title('Tangent Function')
ax3.xaxis.set_minor_locator(MultipleLocator(0.25))
ax3.xaxis.set_minor_formatter(FormatStrFormatter('%.2f'))

# 子图4:二次函数(百分比)
ax4.plot(x, y4)
ax4.set_title('Quadratic Function')
ax4.yaxis.set_minor_locator(MultipleLocator(0.02))
ax4.yaxis.set_minor_formatter(PercentFormatter(xmax=1))

fig.suptitle('Multiple Subplots with Different Formatters - how2matplotlib.com', fontsize=16)
plt.tight_layout()
plt.show()
Output:
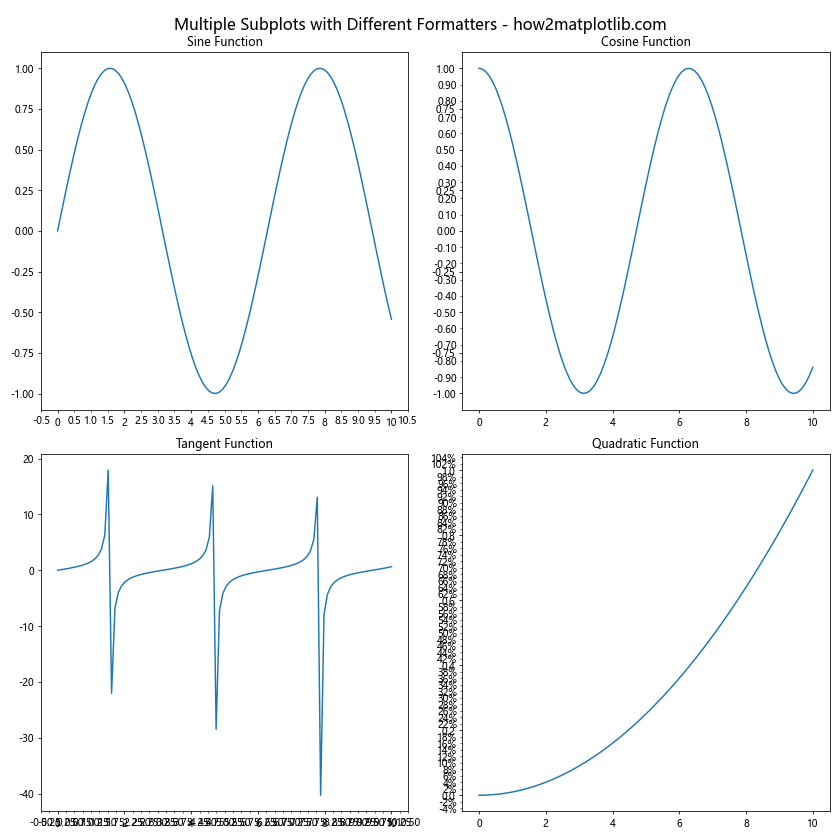
在这个例子中,我们创建了一个2×2的子图网格,每个子图显示不同的函数。我们为每个子图设置了不同的次要刻度格式:
– 子图1:x轴使用一位小数格式
– 子图2:y轴使用两位小数格式
– 子图3:x轴使用两位小数格式
– 子图4:y轴使用百分比格式
这个例子展示了如何在一个复杂的多子图设置中灵活地应用不同的次要刻度格式化方法。
结论
Axis.set_minor_formatter()函数是Matplotlib中一个强大的工具,它允许我们精确控制图表中次要刻度标签的显示方式。通过本文的详细介绍和多个示例,我们探讨了如何使用各种内置格式化器,如何创建自定义格式化器,以及如何在不同的图表类型和场景中应用这些技术。
掌握这些技巧可以帮助你创建更加清晰、信息丰富和专业的数据可视化。无论是处理简单的线图,还是复杂的多子图布局,合理使用次要刻度格式化都可以显著提升图表的可读性和美观度。
在实际应用中,选择合适的格式化方法取决于你的数据特性和可视化目标。建议根据具体需求进行实验,找出最适合你的数据和受众的表现方式。同时,也要注意保持图表的简洁性,避免过度格式化导致信息过载。
通过灵活运用set_minor_formatter()函数及其相关技术,你将能够创建出既精确又美观的数据可视化作品,有效地传达你的数据洞察。
 极客笔记
极客笔记