Matplotlib中Artist对象的update_from()方法:深入理解和实践
参考:Matplotlib.artist.Artist.update_from() in Python
Matplotlib是Python中最流行的数据可视化库之一,它提供了丰富的绘图功能和灵活的自定义选项。在Matplotlib的架构中,Artist对象扮演着至关重要的角色,它们是构建可视化图形的基本单元。本文将深入探讨Matplotlib中Artist对象的update_from()方法,这是一个强大而又常被忽视的工具,可以帮助我们更高效地管理和更新图形元素的属性。
1. Artist对象简介
在深入了解update_from()方法之前,我们需要先了解Artist对象的基本概念。在Matplotlib中,几乎所有可见的元素都是Artist对象的实例。这包括Figure、Axes以及线条、文本、矩形等基本图形元素。
Artist对象可以分为两类:
1. 基本Artist:如Line2D、Rectangle、Text等,用于绘制基本图形元素。
2. 容器Artist:如Figure、Axes、Axis等,用于组织和管理其他Artist对象。
让我们通过一个简单的例子来创建一个基本的Artist对象:
import matplotlib.pyplot as plt
import matplotlib.lines as mlines

fig, ax = plt.subplots()
line = mlines.Line2D([0, 1], [0, 1], lw=2, color='red')
ax.add_line(line)
ax.set_xlim(0, 1)
ax.set_ylim(0, 1)
ax.set_title('How to use Artist objects in Matplotlib - how2matplotlib.com')
plt.show()
Output:
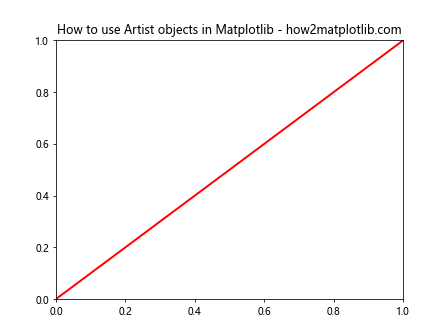
在这个例子中,我们创建了一个Line2D对象,这是一个基本的Artist对象,然后将其添加到Axes中。
2. update_from()方法概述
update_from()是Artist类的一个方法,它允许我们从另一个Artist对象复制属性。这个方法的主要用途是快速更新一个Artist对象的多个属性,而不需要逐个设置。
update_from()方法的基本语法如下:
artist.update_from(other)
其中,artist是要更新的Artist对象,other是作为属性来源的Artist对象。
3. update_from()方法的工作原理
update_from()方法会复制源Artist对象的以下属性:
- 变换(transform)
- 可见性(visible)
- 透明度(alpha)
- 剪裁(clip_box)
- 剪裁路径(clip_path)
- 剪裁on/off(clip_on)
- 拾取(picker)
- 光栅化(rasterized)
- 绘图层级(zorder)
- 动画(animated)
- 绘图样式(sketch_params)
- 标签(label)
- 数据(data)
需要注意的是,update_from()方法不会复制所有属性,只会复制上述列出的属性。
4. 使用update_from()方法的实际例子
让我们通过一些实际的例子来看看如何使用update_from()方法。
4.1 更新线条属性
import matplotlib.pyplot as plt
import matplotlib.lines as mlines

fig, ax = plt.subplots()

# 创建两条线
line1 = mlines.Line2D([0, 1], [0, 1], lw=2, color='red', alpha=0.5, linestyle='--')
line2 = mlines.Line2D([0, 1], [1, 0], lw=1, color='blue')

# 使用update_from()方法更新line2的属性
line2.update_from(line1)

ax.add_line(line1)
ax.add_line(line2)
ax.set_xlim(0, 1)
ax.set_ylim(0, 1)
ax.set_title('Updating line properties with update_from() - how2matplotlib.com')
plt.show()
Output:
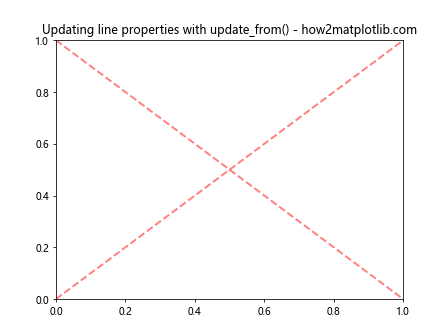
在这个例子中,我们创建了两条线,然后使用update_from()方法将line1的属性复制到line2。注意,line2的位置([0, 1], [1, 0])没有被更新,因为这不是update_from()方法复制的属性之一。
4.2 更新文本属性
import matplotlib.pyplot as plt
import matplotlib.text as mtext

fig, ax = plt.subplots()

# 创建两个文本对象
text1 = mtext.Text(0.5, 0.5, 'Hello, how2matplotlib.com!',
                   fontsize=15, color='red', rotation=45, alpha=0.7)
text2 = mtext.Text(0.5, 0.3, 'Welcome to Matplotlib!')

# 使用update_from()方法更新text2的属性
text2.update_from(text1)

ax.add_artist(text1)
ax.add_artist(text2)
ax.set_xlim(0, 1)
ax.set_ylim(0, 1)
ax.set_title('Updating text properties with update_from() - how2matplotlib.com')
plt.show()
Output:
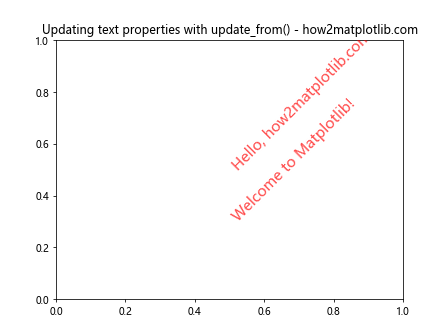
在这个例子中,我们创建了两个文本对象,然后使用update_from()方法将text1的属性复制到text2。注意,text2的内容和位置没有被更新。
4.3 更新矩形属性
import matplotlib.pyplot as plt
import matplotlib.patches as mpatches

fig, ax = plt.subplots()

# 创建两个矩形
rect1 = mpatches.Rectangle((0.1, 0.1), 0.4, 0.4,
                           facecolor='red', edgecolor='black', alpha=0.5)
rect2 = mpatches.Rectangle((0.5, 0.5), 0.3, 0.3,
                           facecolor='blue', edgecolor='green')

# 使用update_from()方法更新rect2的属性
rect2.update_from(rect1)

ax.add_patch(rect1)
ax.add_patch(rect2)
ax.set_xlim(0, 1)
ax.set_ylim(0, 1)
ax.set_title('Updating rectangle properties with update_from() - how2matplotlib.com')
plt.show()
Output:
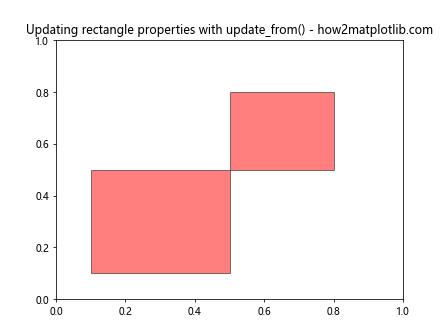
在这个例子中,我们创建了两个矩形,然后使用update_from()方法将rect1的属性复制到rect2。注意,rect2的位置和大小没有被更新。
5. update_from()方法的高级用法
5.1 批量更新多个Artist对象
update_from()方法的一个强大用途是批量更新多个Artist对象的属性。这在处理大量相似的图形元素时特别有用。
import matplotlib.pyplot as plt
import matplotlib.lines as mlines

fig, ax = plt.subplots()

# 创建一个模板线条
template_line = mlines.Line2D([0, 1], [0, 1], lw=2, color='red',
                              alpha=0.5, linestyle='--')

# 创建多条线并批量更新
lines = [mlines.Line2D([0, 1], [i/5, (i+1)/5]) for i in range(5)]
for line in lines:
    line.update_from(template_line)
    ax.add_line(line)

ax.set_xlim(0, 1)
ax.set_ylim(0, 1)
ax.set_title('Batch updating lines with update_from() - how2matplotlib.com')
plt.show()
Output:
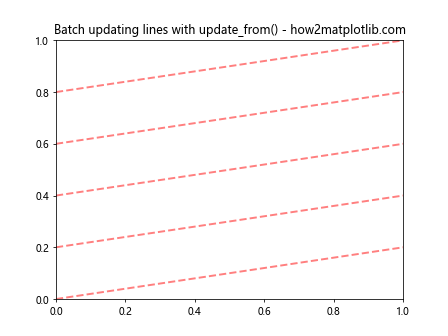
在这个例子中,我们创建了一个模板线条,然后使用列表推导式创建了多条线。我们使用update_from()方法将模板线条的属性应用到所有新创建的线条上。
5.2 动态更新图形元素
update_from()方法也可以用于动态更新图形元素,这在创建动画或交互式图形时非常有用。
import matplotlib.pyplot as plt
import matplotlib.patches as mpatches
import numpy as np

fig, ax = plt.subplots()

# 创建一个模板圆
template_circle = mpatches.Circle((0.5, 0.5), 0.1,
                                  facecolor='red', edgecolor='black', alpha=0.5)

# 创建多个圆并动态更新
circles = [mpatches.Circle((x, y), 0.05) for x, y in np.random.rand(10, 2)]
for circle in circles:
    circle.update_from(template_circle)
    ax.add_patch(circle)

ax.set_xlim(0, 1)
ax.set_ylim(0, 1)
ax.set_title('Dynamic updating with update_from() - how2matplotlib.com')

def update(frame):
    for circle in circles:
        circle.center = np.random.rand(2)
    return circles

from matplotlib.animation import FuncAnimation
anim = FuncAnimation(fig, update, frames=50, interval=200, blit=True)
plt.show()
Output:
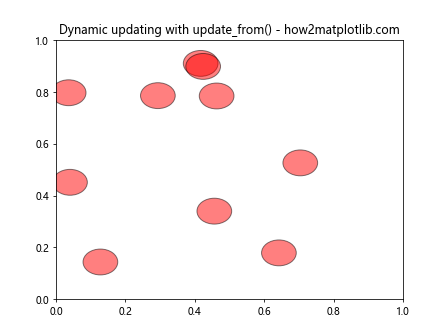
在这个例子中,我们创建了多个圆,并使用update_from()方法将模板圆的属性应用到所有圆上。然后,我们定义了一个update函数,在每一帧中随机更新圆的位置。这个例子展示了如何使用update_from()方法来创建具有一致视觉样式的动态图形。
6. update_from()方法的注意事项
虽然update_from()方法非常有用,但在使用时也需要注意一些事项:
6.1 部分属性不会被更新
如前所述,update_from()方法只会更新特定的属性集。一些重要的属性,如图形元素的位置和大小,不会被更新。让我们通过一个例子来说明这一点:
import matplotlib.pyplot as plt
import matplotlib.patches as mpatches

fig, ax = plt.subplots()

# 创建两个矩形
rect1 = mpatches.Rectangle((0.1, 0.1), 0.4, 0.4,
                           facecolor='red', edgecolor='black', alpha=0.5)
rect2 = mpatches.Rectangle((0.5, 0.5), 0.3, 0.3,
                           facecolor='blue', edgecolor='green')

# 使用update_from()方法更新rect2的属性
rect2.update_from(rect1)

ax.add_patch(rect1)
ax.add_patch(rect2)
ax.set_xlim(0, 1)
ax.set_ylim(0, 1)
ax.set_title('Limitations of update_from() - how2matplotlib.com')
plt.show()
Output:
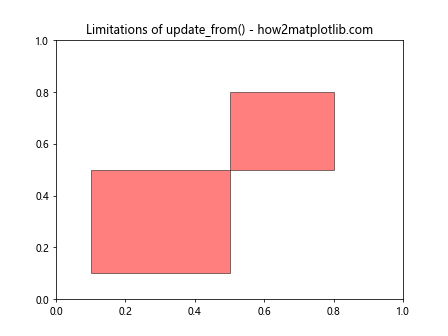
在这个例子中,尽管我们使用了update_from()方法,rect2的位置和大小仍然保持不变。只有颜色、透明度等属性被更新了。
6.2 可能覆盖重要的自定义属性
如果你在使用update_from()方法之前对目标对象进行了特定的自定义设置,这些设置可能会被源对象的属性覆盖。因此,在使用update_from()方法时,需要仔细考虑哪些属性会被更新,哪些属性需要保留。
import matplotlib.pyplot as plt
import matplotlib.lines as mlines

fig, ax = plt.subplots()

# 创建两条线
line1 = mlines.Line2D([0, 1], [0, 1], lw=2, color='red', alpha=0.5, linestyle='--')
line2 = mlines.Line2D([0, 1], [1, 0], lw=1, color='blue', marker='o')

# 使用update_from()方法更新line2的属性
line2.update_from(line1)

ax.add_line(line1)
ax.add_line(line2)
ax.set_xlim(0, 1)
ax.set_ylim(0, 1)
ax.set_title('Overwriting custom properties with update_from() - how2matplotlib.com')
plt.show()
Output:
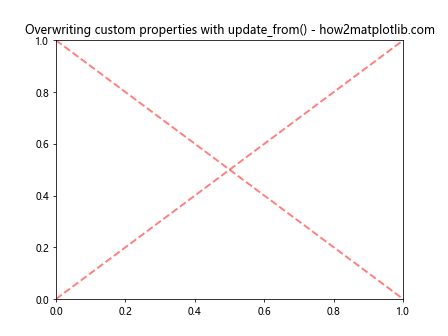
在这个例子中,line2原本设置了marker=’o’,但在使用update_from()方法后,这个设置被line1的属性覆盖了。
7. update_from()方法的替代方案
虽然update_from()方法非常有用,但在某些情况下,你可能需要更精细的控制或者更新update_from()方法不涉及的属性。在这些情况下,你可以考虑以下替代方案:
7.1 手动设置属性
最直接的方法是手动设置每个需要更新的属性。这种方法虽然可能比较繁琐,但提供了最大的灵活性。
import matplotlib.pyplot as plt
import matplotlib.lines as mlines

fig, ax = plt.subplots()

# 创建两条线
line1 = mlines.Line2D([0, 1], [0, 1], lw=2, color='red', alpha=0.5, linestyle='--')
line2 = mlines.Line2D([0, 1], [1, 0], lw=1, color='blue')

# 手动更新line2的属性
line2.set_color(line1.get_color())
line2.set_alpha(line1.get_alpha())
line2.set_linestyle(line1.get_linestyle())
line2.set_linewidth(line1.get_linewidth())

ax.add_line(line1)
ax.add_line(line2)
ax.set_xlim(0, 1)
ax.set_ylim(0, 1)
ax.set_title('Manually updating properties - how2matplotlib.com')
plt.show()
Output:
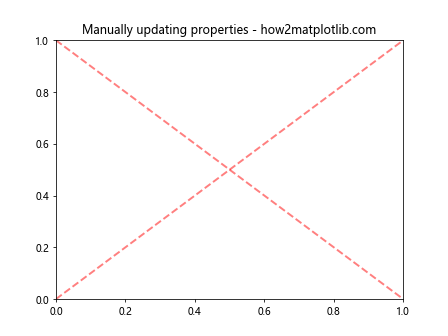
这种方法允许你精确控制要更新哪些属性,同时保留其他属性不变。
7.2 使用字典更新属性
另一种方法是使用字典来更新属性。这种方法比手动设置每个属性更简洁,同时仍然提供了良好的控制。
import matplotlib.pyplot as plt
import matplotlib.patches as mpatches

fig, ax = plt.subplots()# 创建两个矩形
rect1 = mpatches.Rectangle((0.1, 0.1), 0.4, 0.4,
                           facecolor='red', edgecolor='black', alpha=0.5)
rect2 = mpatches.Rectangle((0.5, 0.5), 0.3, 0.3,
                           facecolor='blue', edgecolor='green')

# 使用字典更新rect2的属性
props = dict(facecolor=rect1.get_facecolor(),
             edgecolor=rect1.get_edgecolor(),
             alpha=rect1.get_alpha())
rect2.update(props)

ax.add_patch(rect1)
ax.add_patch(rect2)
ax.set_xlim(0, 1)
ax.set_ylim(0, 1)
ax.set_title('Updating properties with dictionary - how2matplotlib.com')
plt.show()
Output:
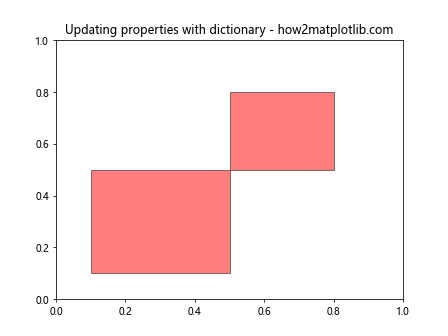
这种方法允许你选择性地更新特定属性,而不是像update_from()那样更新预定义的属性集。
7.3 创建自定义更新函数
对于更复杂的更新逻辑,你可以创建一个自定义的更新函数。这种方法提供了最大的灵活性,允许你实现任何所需的更新逻辑。
import matplotlib.pyplot as plt
import matplotlib.lines as mlines

def custom_update(target, source):
    target.set_color(source.get_color())
    target.set_alpha(source.get_alpha())
    target.set_linestyle(source.get_linestyle())
    # 保持原有的线宽
    # 添加自定义逻辑,例如调整透明度
    target.set_alpha(min(1, source.get_alpha() * 1.5))

fig, ax = plt.subplots()

# 创建两条线
line1 = mlines.Line2D([0, 1], [0, 1], lw=2, color='red', alpha=0.5, linestyle='--')
line2 = mlines.Line2D([0, 1], [1, 0], lw=1, color='blue')

# 使用自定义函数更新line2的属性
custom_update(line2, line1)

ax.add_line(line1)
ax.add_line(line2)
ax.set_xlim(0, 1)
ax.set_ylim(0, 1)
ax.set_title('Custom update function - how2matplotlib.com')
plt.show()
Output:
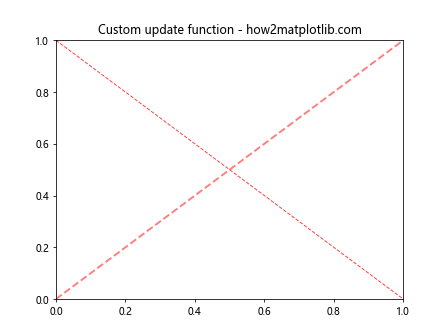
这种方法允许你完全控制更新过程,可以实现任何所需的自定义逻辑。
8. update_from()方法在实际项目中的应用
update_from()方法在许多实际项目中都有广泛的应用。以下是一些常见的使用场景:
8.1 创建具有一致样式的图形元素
当你需要创建多个具有相似样式的图形元素时,update_from()方法可以帮助你快速复制样式属性。
import matplotlib.pyplot as plt
import matplotlib.patches as mpatches
import numpy as np

fig, ax = plt.subplots()

# 创建一个模板矩形
template_rect = mpatches.Rectangle((0, 0), 0.1, 0.1,
                                   facecolor='red', edgecolor='black',
                                   alpha=0.5, hatch='/')

# 创建多个具有一致样式的矩形
for _ in range(10):
    x, y = np.random.rand(2)
    rect = mpatches.Rectangle((x, y), 0.1, 0.1)
    rect.update_from(template_rect)
    ax.add_patch(rect)

ax.set_xlim(0, 1)
ax.set_ylim(0, 1)
ax.set_title('Creating consistent style elements - how2matplotlib.com')
plt.show()
Output:
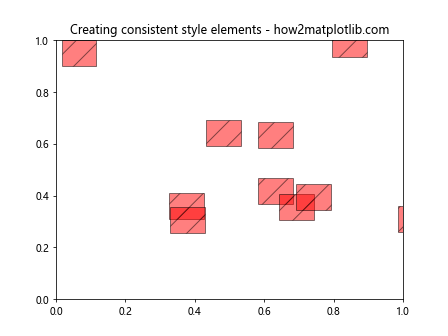
这个例子展示了如何使用update_from()方法快速创建多个具有一致样式的矩形。
8.2 动态更新图形
在创建动画或交互式图形时,update_from()方法可以用于快速更新多个图形元素的属性。
import matplotlib.pyplot as plt
import matplotlib.patches as mpatches
import numpy as np

fig, ax = plt.subplots()

# 创建多个圆
circles = [mpatches.Circle((x, y), 0.05, facecolor='red', alpha=0.5)
           for x, y in np.random.rand(10, 2)]

for circle in circles:
    ax.add_patch(circle)

ax.set_xlim(0, 1)
ax.set_ylim(0, 1)
ax.set_title('Dynamic updating with update_from() - how2matplotlib.com')

def update(frame):
    template_circle = mpatches.Circle((0, 0), 0.05,
                                      facecolor=plt.cm.viridis(frame/50),
                                      alpha=0.5)
    for circle in circles:
        circle.center = np.random.rand(2)
        circle.update_from(template_circle)
    return circles

from matplotlib.animation import FuncAnimation
anim = FuncAnimation(fig, update, frames=50, interval=200, blit=True)
plt.show()
Output:
这个例子展示了如何使用update_from()方法在动画中动态更新多个圆的颜色和位置。
8.3 创建图例
update_from()方法也可以用于创建自定义图例,确保图例中的元素与实际图形元素具有相同的样式。
import matplotlib.pyplot as plt
import matplotlib.lines as mlines
import matplotlib.patches as mpatches

fig, ax = plt.subplots()

# 创建实际的图形元素
line = mlines.Line2D([0, 1], [0, 1], lw=2, color='red', alpha=0.5, label='Line')
rect = mpatches.Rectangle((0.2, 0.2), 0.3, 0.3, facecolor='blue', alpha=0.5, label='Rectangle')

ax.add_line(line)
ax.add_patch(rect)

# 创建图例元素
legend_line = mlines.Line2D([], [], lw=2)
legend_rect = mpatches.Rectangle((0, 0), 1, 1)

# 使用update_from()方法更新图例元素的样式
legend_line.update_from(line)
legend_rect.update_from(rect)

ax.legend([legend_line, legend_rect], ['Line', 'Rectangle'])

ax.set_xlim(0, 1)
ax.set_ylim(0, 1)
ax.set_title('Creating custom legend with update_from() - how2matplotlib.com')
plt.show()
Output:
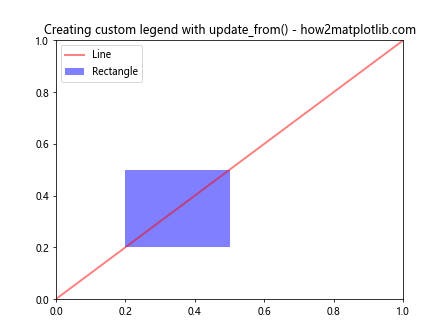
这个例子展示了如何使用update_from()方法创建与实际图形元素样式一致的自定义图例。
9. update_from()方法的性能考虑
虽然update_from()方法提供了一种便捷的方式来更新Artist对象的属性,但在处理大量对象时,它可能不是最高效的选择。这是因为update_from()方法会复制多个属性,即使有些属性可能不需要更新。
对于需要高性能的应用,特别是当处理大量对象或需要频繁更新时,可以考虑以下策略:
- 只更新必要的属性:如果你只需要更新特定的属性,直接设置这些属性可能比使用update_from()更快。
-
使用向量化操作:对于某些属性(如颜色或透明度),可以使用NumPy的向量化操作来一次性更新多个对象。
-
使用blitting技术:在创建动画时,使用blitting可以显著提高性能,只重绘发生变化的部分。
以下是一个结合这些策略的例子:
import matplotlib.pyplot as plt
import matplotlib.collections as mcollections
import numpy as np

fig, ax = plt.subplots()

# 创建一个点集合
n_points = 1000
xy = np.random.rand(n_points, 2)
collection = mcollections.PathCollection(
    [plt.Circle((0, 0), 0.01) for _ in range(n_points)],
    offsets=xy, transOffset=ax.transData)

ax.add_collection(collection)
ax.set_xlim(0, 1)
ax.set_ylim(0, 1)
ax.set_title('Efficient updating with collections - how2matplotlib.com')

def update(frame):
    # 更新位置
    collection.set_offsets(np.random.rand(n_points, 2))
    # 更新颜色
    colors = np.random.rand(n_points, 4)
    collection.set_facecolors(colors)
    return collection,

from matplotlib.animation import FuncAnimation
anim = FuncAnimation(fig, update, frames=50, interval=50, blit=True)
plt.show()
这个例子使用了PathCollection来高效地管理和更新大量点。通过使用set_offsets()和set_facecolors()方法,我们可以一次性更新所有点的位置和颜色,而不需要使用update_from()方法。
10. 总结
Matplotlib的Artist.update_from()方法是一个强大的工具,可以帮助我们快速复制和更新图形元素的属性。它在创建具有一致样式的多个图形元素、动态更新图形和创建自定义图例等场景中特别有用。
然而,使用update_from()方法时也需要注意一些限制:
– 它只更新预定义的属性集,不包括位置和大小等重要属性。
– 它可能会覆盖之前设置的自定义属性。
– 在处理大量对象或需要频繁更新时,可能不是最高效的选择。
对于需要更精细控制或更高性能的场景,我们可以考虑使用手动设置属性、字典更新、自定义更新函数或向量化操作等替代方案。
无论如何,理解和掌握update_from()方法及其替代方案,将使我们能够更灵活、高效地创建和管理Matplotlib图形,从而提高数据可视化的效率和质量。
在实际应用中,选择使用update_from()还是其他方法,应该根据具体需求、性能要求和代码可读性等因素来决定。通过合理使用这些工具,我们可以创建出更加精美、高效的数据可视化作品。
 极客笔记
极客笔记