Matplotlib中的Artist.remove_callback()方法:移除回调函数的完整指南
参考:Matplotlib.artist.Artist.remove_callback() in Python
Matplotlib是Python中最流行的数据可视化库之一,它提供了丰富的绘图功能和灵活的自定义选项。在Matplotlib的架构中,Artist对象是构建可视化图形的基本单元。Artist类提供了许多方法来操作和管理这些对象,其中remove_callback()方法是一个重要但经常被忽视的功能。本文将深入探讨Artist.remove_callback()方法的用法、应用场景以及相关的最佳实践。
1. Artist.remove_callback()方法简介
Artist.remove_callback()是Matplotlib中Artist类的一个方法,用于移除之前通过add_callback()方法添加的回调函数。回调函数是在特定事件发生时自动调用的函数,在Matplotlib中,这些事件通常与图形元素的属性变化有关。
1.1 方法签名
Artist.remove_callback(oid)
参数oid是一个整数,表示要移除的回调函数的唯一标识符。这个标识符是在使用add_callback()方法添加回调函数时返回的。
1.2 基本用法示例
让我们看一个简单的例子来理解remove_callback()方法的基本用法:
import matplotlib.pyplot as plt

def on_xlim_change(ax):
    print("X轴限制已更改 - how2matplotlib.com")

fig, ax = plt.subplots()
ax.plot([1, 2, 3], [1, 2, 3])

# 添加回调函数
cid = ax.callbacks.connect('xlim_changed', on_xlim_change)

# 改变X轴限制,触发回调
ax.set_xlim(0, 5)

# 移除回调函数
ax.callbacks.disconnect(cid)

# 再次改变X轴限制,不会触发回调
ax.set_xlim(0, 10)

plt.show()
Output:
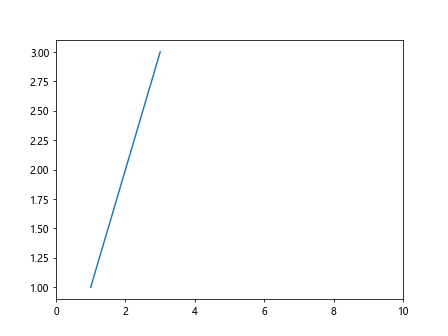
在这个例子中,我们首先定义了一个回调函数on_xlim_change,然后将其添加到轴对象的xlim_changed事件上。添加回调函数后,我们获得了一个唯一标识符cid。接着,我们使用这个标识符来移除回调函数。移除后,再次改变X轴限制不会触发回调函数。
2. 回调函数的工作原理
在深入了解remove_callback()方法之前,我们需要先理解Matplotlib中回调函数的工作原理。
2.1 事件系统
Matplotlib的事件系统允许用户对图形元素的变化做出响应。常见的事件包括:
- 鼠标事件(点击、移动、滚轮)
- 键盘事件
- 图形元素属性变化(如轴限制、颜色等)
2.2 添加回调函数
使用Artist.add_callback()方法可以为特定事件添加回调函数:
import matplotlib.pyplot as plt

def on_resize(event):
    print(f"图形大小已更改为 {event.width}x{event.height} - how2matplotlib.com")

fig, ax = plt.subplots()
cid = fig.canvas.mpl_connect('resize_event', on_resize)

plt.show()
Output:
在这个例子中,我们为图形的resize_event添加了一个回调函数。每当图形大小改变时,都会打印新的尺寸。
2.3 回调函数的执行
回调函数在相应的事件发生时自动执行。例如:
import matplotlib.pyplot as plt

def on_pick(event):
    artist = event.artist
    print(f"点击了 {artist} - how2matplotlib.com")

fig, ax = plt.subplots()
line, = ax.plot([1, 2, 3], [1, 2, 3], picker=5)
fig.canvas.mpl_connect('pick_event', on_pick)

plt.show()
Output:
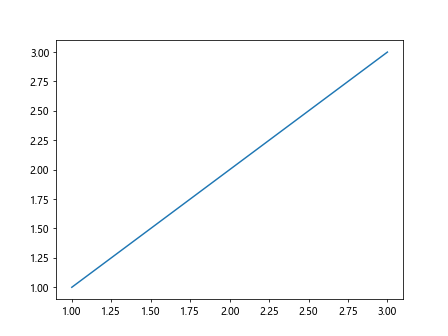
这个例子演示了如何响应鼠标点击事件。当用户点击线条附近时,会触发pick_event并执行on_pick函数。
3. remove_callback()方法的详细用法
现在我们已经了解了回调函数的基本概念,让我们深入探讨remove_callback()方法的详细用法。
3.1 移除特定的回调函数
最常见的用法是移除一个特定的回调函数:
import matplotlib.pyplot as plt

def callback1(event):
    print("回调函数1被触发 - how2matplotlib.com")

def callback2(event):
    print("回调函数2被触发 - how2matplotlib.com")

fig, ax = plt.subplots()

cid1 = fig.canvas.mpl_connect('button_press_event', callback1)
cid2 = fig.canvas.mpl_connect('button_press_event', callback2)

# 移除第一个回调函数
fig.canvas.mpl_disconnect(cid1)

plt.show()
Output:
在这个例子中,我们添加了两个回调函数,然后只移除了第一个。运行这段代码后,点击图形只会触发第二个回调函数。
3.2 移除所有回调函数
有时候,我们可能想要移除某个事件的所有回调函数:
import matplotlib.pyplot as plt

def callback1(event):
    print("回调函数1被触发 - how2matplotlib.com")

def callback2(event):
    print("回调函数2被触发 - how2matplotlib.com")

fig, ax = plt.subplots()

fig.canvas.mpl_connect('button_press_event', callback1)
fig.canvas.mpl_connect('button_press_event', callback2)

# 移除所有button_press_event的回调函数
fig.canvas.callbacks.disconnect(fig.canvas.callbacks.callbacks['button_press_event'])

plt.show()
这个例子展示了如何移除特定事件类型的所有回调函数。
3.3 在回调函数中移除自身
有时,我们可能希望回调函数只执行一次,然后自动移除:
import matplotlib.pyplot as plt

def self_removing_callback(event):
    print("这个回调函数只会执行一次 - how2matplotlib.com")
    fig.canvas.mpl_disconnect(cid)

fig, ax = plt.subplots()
cid = fig.canvas.mpl_connect('button_press_event', self_removing_callback)

plt.show()
Output:
在这个例子中,回调函数在执行后会立即移除自身,因此它只会响应一次鼠标点击事件。
4. 使用remove_callback()的最佳实践
在使用remove_callback()方法时,有一些最佳实践可以帮助我们更有效地管理回调函数。
4.1 保存回调ID
始终保存add_callback()返回的ID是一个好习惯:
import matplotlib.pyplot as plt

def on_xlim_change(ax):
    print("X轴限制已更改 - how2matplotlib.com")

fig, ax = plt.subplots()
ax.plot([1, 2, 3], [1, 2, 3])

# 保存回调ID
callback_ids = []
callback_ids.append(ax.callbacks.connect('xlim_changed', on_xlim_change))

# 稍后可以使用这些ID来移除回调
for cid in callback_ids:
    ax.callbacks.disconnect(cid)

plt.show()
Output:
这种方法使得管理多个回调函数变得更加容易。
4.2 使用类来管理回调
对于复杂的应用,使用类来管理回调函数可能是一个更好的选择:
import matplotlib.pyplot as plt

class CallbackManager:
    def __init__(self, fig, ax):
        self.fig = fig
        self.ax = ax
        self.callback_ids = []

    def add_callback(self, event, func):
        cid = self.fig.canvas.mpl_connect(event, func)
        self.callback_ids.append(cid)

    def remove_all_callbacks(self):
        for cid in self.callback_ids:
            self.fig.canvas.mpl_disconnect(cid)
        self.callback_ids.clear()

    def on_click(self, event):
        print(f"点击位置:({event.xdata}, {event.ydata}) - how2matplotlib.com")

fig, ax = plt.subplots()
manager = CallbackManager(fig, ax)
manager.add_callback('button_press_event', manager.on_click)

# 稍后可以移除所有回调
# manager.remove_all_callbacks()

plt.show()
Output:
这个类封装了添加和移除回调的逻辑,使得代码更加清晰和可维护。
4.3 避免重复添加相同的回调
在添加回调之前,最好先检查是否已经存在相同的回调:
import matplotlib.pyplot as plt

def on_click(event):
    print(f"点击位置:({event.xdata}, {event.ydata}) - how2matplotlib.com")

fig, ax = plt.subplots()

# 检查回调是否已存在
existing_callbacks = fig.canvas.callbacks.callbacks.get('button_press_event', [])
if on_click not in [cb.func for cb in existing_callbacks]:
    fig.canvas.mpl_connect('button_press_event', on_click)

plt.show()
这样可以避免重复添加相同的回调函数,从而提高效率并防止潜在的错误。
5. remove_callback()的常见应用场景
remove_callback()方法在许多实际应用中都非常有用。让我们探讨一些常见的应用场景。
5.1 临时事件监听
有时我们只需要在特定时间段内监听某个事件:
import matplotlib.pyplot as plt
import time

def temporary_listener(event):
    print(f"临时监听器:点击位置 ({event.xdata}, {event.ydata}) - how2matplotlib.com")

fig, ax = plt.subplots()
ax.plot([1, 2, 3], [1, 2, 3])

cid = fig.canvas.mpl_connect('button_press_event', temporary_listener)

# 5秒后移除监听器
plt.pause(5)
fig.canvas.mpl_disconnect(cid)

print("监听器已移除 - how2matplotlib.com")
plt.show()
Output:

这个例子展示了如何添加一个临时的事件监听器,并在5秒后自动移除它。
5.2 条件性事件处理
某些情况下,我们可能只想在特定条件下处理事件:
import matplotlib.pyplot as plt

class ConditionalHandler:
    def __init__(self, fig, ax):
        self.fig = fig
        self.ax = ax
        self.active = True
        self.cid = fig.canvas.mpl_connect('button_press_event', self.on_click)

    def on_click(self, event):
        if self.active:
            print(f"处理点击事件:({event.xdata}, {event.ydata}) - how2matplotlib.com")
        else:
            print("事件处理已暂停 - how2matplotlib.com")

    def toggle_active(self):
        self.active = not self.active
        print(f"事件处理已{'激活' if self.active else '暂停'} - how2matplotlib.com")

fig, ax = plt.subplots()
handler = ConditionalHandler(fig, ax)

# 添加一个按钮来切换事件处理状态
ax_button = plt.axes([0.81, 0.05, 0.1, 0.075])
button = plt.Button(ax_button, 'Toggle')
button.on_clicked(lambda event: handler.toggle_active())

plt.show()
Output:
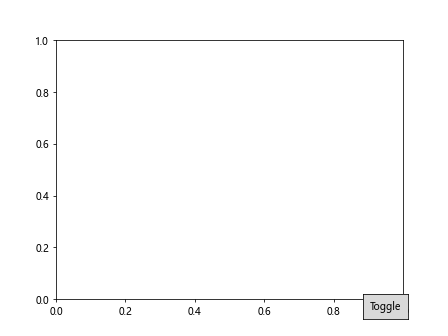
这个例子创建了一个条件性事件处理器,可以通过按钮来切换事件处理的开启和关闭。
5.3 动态更新图形
在创建动态更新的图形时,管理回调函数非常重要:
import matplotlib.pyplot as plt
import numpy as np

class DynamicPlot:
    def __init__(self, max_points=100):
        self.max_points = max_points
        self.fig, self.ax = plt.subplots()
        self.line, = self.ax.plot([], [])
        self.ax.set_xlim(0, max_points)
        self.ax.set_ylim(-1, 1)
        self.data = []
        self.cid = self.fig.canvas.mpl_connect('button_press_event', self.on_click)

    def on_click(self, event):
        if len(self.data) >= self.max_points:
            self.fig.canvas.mpl_disconnect(self.cid)
            print("已达到最大点数,停止更新 - how2matplotlib.com")
        else:
            self.data.append(np.random.random() * 2 - 1)
            self.line.set_data(range(len(self.data)), self.data)
            self.fig.canvas.draw()

    def show(self):
        plt.show()

plot = DynamicPlot()
plot.show()
这个例子创建了一个动态更新的图形,每次点击都会添加一个新的数据点。当达到最大点数时,它会自动停止更新并移除回调函数。
6. remove_callback()的注意事项和潜在问题
虽然remove_callback()是一个非常有用的方法,但在使用时也需要注意一些潜在的问题。
6.1 移除不存在的回调
尝试移除一个不存在的回调不会引发错误,但可能导致意外行为:
import matplotlib.pyplot as plt

fig, ax =plt.subplots()

# 尝试移除一个不存在的回调
non_existent_cid = 9999
fig.canvas.mpl_disconnect(non_existent_cid)

print("尝试移除不存在的回调 - how2matplotlib.com")
plt.show()
Output:
这个例子展示了尝试移除一个不存在的回调。虽然不会引发错误,但最好在移除之前检查回调是否存在。
6.2 重复移除同一个回调
重复移除同一个回调也不会引发错误,但可能导致混淆:
import matplotlib.pyplot as plt

def on_click(event):
    print(f"点击位置:({event.xdata}, {event.ydata}) - how2matplotlib.com")

fig, ax = plt.subplots()
cid = fig.canvas.mpl_connect('button_press_event', on_click)

# 第一次移除回调
fig.canvas.mpl_disconnect(cid)
print("第一次移除回调 - how2matplotlib.com")

# 尝试再次移除同一个回调
fig.canvas.mpl_disconnect(cid)
print("尝试第二次移除同一个回调 - how2matplotlib.com")

plt.show()
Output:
为了避免这种情况,可以在移除回调后将ID设置为None或从列表中删除。
6.3 在回调函数执行过程中移除回调
在回调函数执行过程中移除回调可能导致意外行为:
import matplotlib.pyplot as plt

def self_removing_callback(event):
    print("开始执行回调函数 - how2matplotlib.com")
    fig.canvas.mpl_disconnect(cid)
    print("回调函数已移除自身 - how2matplotlib.com")
    # 这里的代码仍然会执行
    print("回调函数继续执行 - how2matplotlib.com")

fig, ax = plt.subplots()
cid = fig.canvas.mpl_connect('button_press_event', self_removing_callback)

plt.show()
Output:
在这个例子中,即使回调函数在执行过程中移除了自身,剩余的代码仍然会继续执行。
7. remove_callback()与其他Matplotlib功能的集成
remove_callback()方法可以与Matplotlib的其他功能无缝集成,以创建更复杂和交互性更强的可视化。
7.1 与动画功能集成
在创建动画时,管理回调函数可以帮助控制动画的行为:
import matplotlib.pyplot as plt
import matplotlib.animation as animation
import numpy as np

class AnimatedScatter:
    def __init__(self, numpoints=50):
        self.numpoints = numpoints
        self.fig, self.ax = plt.subplots()
        self.scat = self.ax.scatter([], [], animated=True)
        self.ax.set_xlim(0, 1)
        self.ax.set_ylim(0, 1)
        self.ani = None
        self.paused = False
        self.cid = self.fig.canvas.mpl_connect('button_press_event', self.toggle_pause)

    def update(self, frame):
        data = np.random.random((self.numpoints, 2))
        self.scat.set_offsets(data)
        return self.scat,

    def toggle_pause(self, event):
        if self.paused:
            self.ani.resume()
        else:
            self.ani.pause()
        self.paused = not self.paused
        print(f"动画已{'暂停' if self.paused else '恢复'} - how2matplotlib.com")

    def start_animation(self):
        self.ani = animation.FuncAnimation(self.fig, self.update, frames=200,
                                           interval=50, blit=True)
        plt.show()

    def stop_animation(self):
        if self.ani:
            self.ani.event_source.stop()
        self.fig.canvas.mpl_disconnect(self.cid)
        print("动画已停止,回调已移除 - how2matplotlib.com")

anim = AnimatedScatter()
anim.start_animation()
这个例子创建了一个动画散点图,可以通过点击来暂停和恢复动画。stop_animation方法展示了如何停止动画并移除相关的回调。
7.2 与交互式工具集成
Matplotlib的交互式工具也可以与回调管理结合使用:
import matplotlib.pyplot as plt
from matplotlib.widgets import RectangleSelector

class InteractiveSelector:
    def __init__(self):
        self.fig, self.ax = plt.subplots()
        self.ax.plot([1, 2, 3], [1, 2, 3])
        self.selector = RectangleSelector(self.ax, self.on_select,
                                          drawtype='box', useblit=True)
        self.cid = self.fig.canvas.mpl_connect('key_press_event', self.on_key_press)

    def on_select(self, eclick, erelease):
        x1, y1 = eclick.xdata, eclick.ydata
        x2, y2 = erelease.xdata, erelease.ydata
        print(f"选择区域:({x1:.2f}, {y1:.2f}) 到 ({x2:.2f}, {y2:.2f}) - how2matplotlib.com")

    def on_key_press(self, event):
        if event.key == 'q':
            self.disable_selector()

    def disable_selector(self):
        self.selector.set_active(False)
        self.fig.canvas.mpl_disconnect(self.cid)
        print("选择器已禁用,键盘事件监听器已移除 - how2matplotlib.com")

    def show(self):
        plt.show()

selector = InteractiveSelector()
selector.show()
这个例子创建了一个交互式区域选择器,可以通过按’q’键来禁用选择器并移除相关的回调。
8. remove_callback()在大型项目中的应用
在大型项目中,有效管理回调函数变得更加重要。以下是一些在大型项目中使用remove_callback()的策略和模式。
8.1 使用回调管理器
创建一个专门的回调管理器类可以大大简化回调的管理:
import matplotlib.pyplot as plt

class CallbackManager:
    def __init__(self):
        self.callbacks = {}

    def add(self, event_type, func):
        if event_type not in self.callbacks:
            self.callbacks[event_type] = []
        self.callbacks[event_type].append(func)

    def remove(self, event_type, func):
        if event_type in self.callbacks:
            self.callbacks[event_type] = [cb for cb in self.callbacks[event_type] if cb != func]

    def trigger(self, event_type, *args, **kwargs):
        if event_type in self.callbacks:
            for func in self.callbacks[event_type]:
                func(*args, **kwargs)

class Application:
    def __init__(self):
        self.fig, self.ax = plt.subplots()
        self.callback_manager = CallbackManager()
        self.setup_callbacks()

    def setup_callbacks(self):
        self.callback_manager.add('click', self.on_click)
        self.fig.canvas.mpl_connect('button_press_event',
                                    lambda event: self.callback_manager.trigger('click', event))

    def on_click(self, event):
        print(f"点击位置:({event.xdata}, {event.ydata}) - how2matplotlib.com")

    def run(self):
        plt.show()

app = Application()
app.run()
这个例子展示了如何使用回调管理器来集中管理和触发回调函数。
8.2 使用装饰器管理回调
装饰器可以用来自动添加和移除回调:
import matplotlib.pyplot as plt
from functools import wraps

def manage_callback(event_type):
    def decorator(func):
        @wraps(func)
        def wrapper(self, *args, **kwargs):
            cid = self.fig.canvas.mpl_connect(event_type, func)
            result = func(self, *args, **kwargs)
            self.fig.canvas.mpl_disconnect(cid)
            return result
        return wrapper
    return decorator

class Interactiveplot:
    def __init__(self):
        self.fig, self.ax = plt.subplots()
        self.ax.plot([1, 2, 3], [1, 2, 3])

    @manage_callback('button_press_event')
    def on_click(self, event):
        print(f"点击位置:({event.xdata}, {event.ydata}) - how2matplotlib.com")
        # 这个方法执行完后,回调会自动被移除

    def run(self):
        self.on_click()  # 添加回调
        plt.show()

plot = Interactiveplot()
plot.run()
这个例子使用装饰器来自动管理回调的添加和移除,简化了代码并减少了错误的可能性。
8.3 使用上下文管理器
上下文管理器可以用来临时添加和移除回调:
import matplotlib.pyplot as plt
from contextlib import contextmanager

class PlotWithTemporaryCallback:
    def __init__(self):
        self.fig, self.ax = plt.subplots()
        self.ax.plot([1, 2, 3], [1, 2, 3])

    @contextmanager
    def temporary_callback(self, event_type, callback):
        cid = self.fig.canvas.mpl_connect(event_type, callback)
        try:
            yield
        finally:
            self.fig.canvas.mpl_disconnect(cid)

    def on_click(self, event):
        print(f"临时回调:点击位置 ({event.xdata}, {event.ydata}) - how2matplotlib.com")

    def run(self):
        with self.temporary_callback('button_press_event', self.on_click):
            plt.show()

plot = PlotWithTemporaryCallback()
plot.run()
这个例子使用上下文管理器来管理临时回调,确保回调在不再需要时被正确移除。
9. 总结
Artist.remove_callback()方法是Matplotlib中管理回调函数的重要工具。通过本文的详细介绍,我们了解了该方法的基本用法、常见应用场景、注意事项以及在大型项目中的应用策略。正确使用remove_callback()可以帮助我们创建更加灵活、高效和可维护的数据可视化应用。
在实际应用中,合理管理回调函数不仅可以提高代码的性能,还能避免潜在的内存泄漏和意外行为。无论是创建简单的静态图表还是复杂的交互式可视化,掌握remove_callback()方法都将使您的Matplotlib使用更上一层楼。
记住,回调管理是一个持续的过程,需要根据具体的应用场景和项目需求来调整策略。通过实践和经验积累,您将能够更加熟练地运用remove_callback()方法,创造出更加出色的数据可视化作品。
 极客笔记
极客笔记