Matplotlib中使用annotate创建加粗注释的全面指南
Matplotlib是Python中最流行的数据可视化库之一,它提供了丰富的功能来创建各种类型的图表和图形。在数据可视化中,注释是一个非常重要的元素,它可以帮助我们突出显示重要信息,解释数据点,或者为图表添加额外的上下文。本文将深入探讨Matplotlib中的annotate函数,特别关注如何创建加粗的注释,以增强图表的可读性和视觉吸引力。
1. Matplotlib annotate函数简介
annotate函数是Matplotlib中用于添加注释的主要工具。它允许我们在图表上的任何位置添加文本,并可以通过各种参数来自定义注释的外观和位置。
以下是annotate函数的基本语法:
import matplotlib.pyplot as plt

fig, ax = plt.subplots()
ax.plot([1, 2, 3, 4], [1, 4, 2, 3], label='Data from how2matplotlib.com')
ax.annotate('Important point', xy=(2, 4), xytext=(3, 4.5),
            arrowprops=dict(facecolor='black', shrink=0.05))

plt.title('Basic Annotation Example')
plt.legend()
plt.show()
Output:
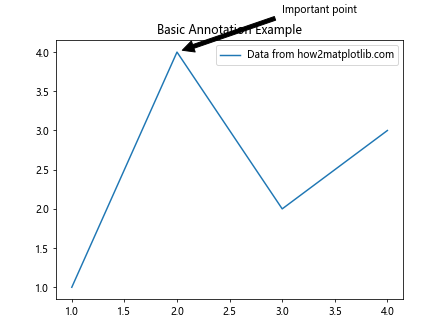
在这个例子中,我们创建了一个简单的线图,并在(2, 4)点添加了一个注释。注释文本”Important point”被放置在(3, 4.5)的位置,并用一个箭头指向数据点。
2. 创建加粗注释
要创建加粗的注释,我们可以使用fontweight参数。这个参数可以设置为’bold’或者数值(如700)来增加文本的粗细。
import matplotlib.pyplot as plt

fig, ax = plt.subplots()
ax.plot([1, 2, 3, 4], [1, 4, 2, 3], label='Data from how2matplotlib.com')
ax.annotate('Bold Annotation', xy=(2, 4), xytext=(3, 4.5),
            fontweight='bold',
            arrowprops=dict(facecolor='black', shrink=0.05))

plt.title('Bold Annotation Example')
plt.legend()
plt.show()
Output:
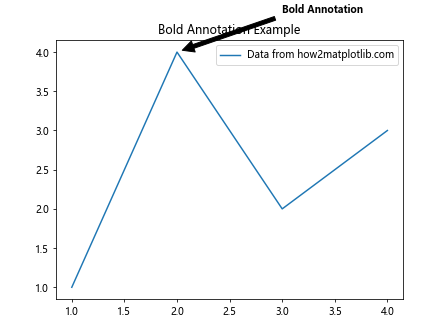
在这个例子中,我们添加了fontweight='bold'参数来使注释文本变粗。这种方法简单直接,适用于大多数情况。
3. 使用不同的字体样式
除了简单地加粗文本,我们还可以使用不同的字体样式来增强注释的视觉效果。Matplotlib支持多种字体样式,我们可以通过fontname参数来指定。
import matplotlib.pyplot as plt

fig, ax = plt.subplots()
ax.plot([1, 2, 3, 4], [1, 4, 2, 3], label='Data from how2matplotlib.com')
ax.annotate('Custom Font Annotation', xy=(2, 4), xytext=(3, 4.5),
            fontweight='bold', fontname='Times New Roman',
            arrowprops=dict(facecolor='black', shrink=0.05))

plt.title('Custom Font Annotation Example')
plt.legend()
plt.show()
Output:
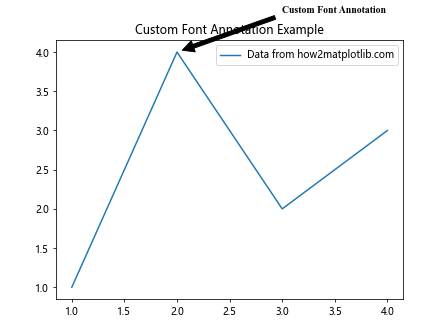
在这个例子中,我们使用了’Times New Roman’字体,并将其设置为粗体。这种组合可以创造出更加专业和正式的注释效果。
4. 调整注释文本大小
文本大小是另一个可以用来强调注释的重要参数。我们可以使用fontsize参数来调整注释文本的大小。
import matplotlib.pyplot as plt

fig, ax = plt.subplots()
ax.plot([1, 2, 3, 4], [1, 4, 2, 3], label='Data from how2matplotlib.com')
ax.annotate('Large Bold Annotation', xy=(2, 4), xytext=(3, 4.5),
            fontweight='bold', fontsize=16,
            arrowprops=dict(facecolor='black', shrink=0.05))

plt.title('Large Bold Annotation Example')
plt.legend()
plt.show()
Output:
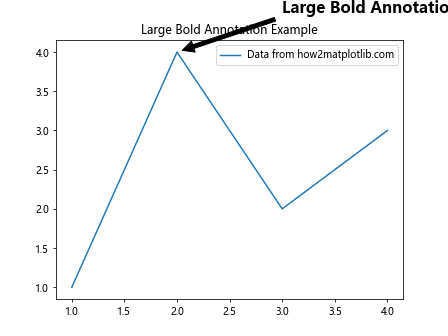
在这个例子中,我们将注释文本的大小设置为16点,同时保持粗体样式。这种组合可以创造出非常醒目的注释效果。
5. 使用颜色增强注释效果
颜色是另一个可以用来强调注释的有效工具。我们可以使用color参数来设置注释文本的颜色。
import matplotlib.pyplot as plt

fig, ax = plt.subplots()
ax.plot([1, 2, 3, 4], [1, 4, 2, 3], label='Data from how2matplotlib.com')
ax.annotate('Colored Bold Annotation', xy=(2, 4), xytext=(3, 4.5),
            fontweight='bold', color='red',
            arrowprops=dict(facecolor='red', shrink=0.05))

plt.title('Colored Bold Annotation Example')
plt.legend()
plt.show()
Output:
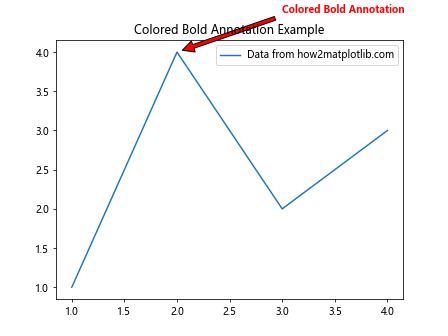
在这个例子中,我们将注释文本和箭头的颜色都设置为红色,同时保持文本为粗体。这种组合可以创造出非常引人注目的注释效果。
6. 使用背景框突出显示注释
为注释添加背景框是另一种增强其可见性的方法。我们可以使用bbox参数来添加背景框。
import matplotlib.pyplot as plt

fig, ax = plt.subplots()
ax.plot([1, 2, 3, 4], [1, 4, 2, 3], label='Data from how2matplotlib.com')
ax.annotate('Bold Annotation with Box', xy=(2, 4), xytext=(3, 4.5),
            fontweight='bold',
            bbox=dict(boxstyle="round,pad=0.3", fc="yellow", ec="black", lw=2),
            arrowprops=dict(arrowstyle="->"))

plt.title('Bold Annotation with Background Box')
plt.legend()
plt.show()
Output:
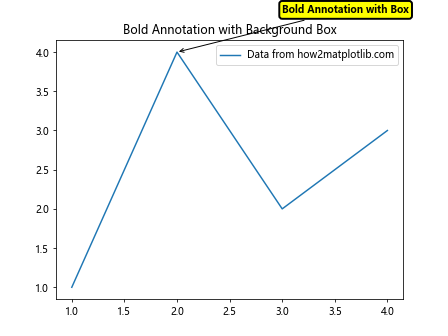
在这个例子中,我们为粗体注释添加了一个黄色的圆角背景框,并用黑色边框围绕。这种方法可以使注释在复杂的图表中更加突出。
7. 创建多行注释
有时,我们可能需要添加多行注释。Matplotlib允许我们使用换行符\n来创建多行注释。
import matplotlib.pyplot as plt

fig, ax = plt.subplots()
ax.plot([1, 2, 3, 4], [1, 4, 2, 3], label='Data from how2matplotlib.com')
ax.annotate('Bold Multi-line\nAnnotation', xy=(2, 4), xytext=(3, 4.5),
            fontweight='bold',
            ha='center', va='center',
            arrowprops=dict(facecolor='black', shrink=0.05))

plt.title('Multi-line Bold Annotation Example')
plt.legend()
plt.show()
Output:
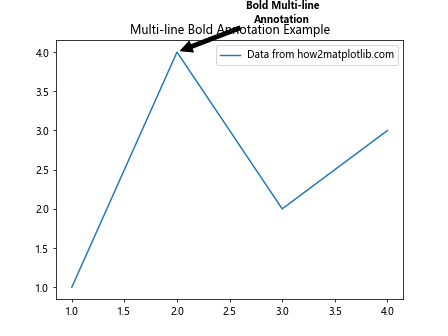
在这个例子中,我们创建了一个两行的粗体注释。ha='center'和va='center'参数用于将文本在水平和垂直方向上居中对齐。
8. 使用LaTeX渲染数学公式
Matplotlib支持使用LaTeX来渲染数学公式,这在创建包含数学表达式的注释时非常有用。
import matplotlib.pyplot as plt

fig, ax = plt.subplots()
ax.plot([1, 2, 3, 4], [1, 4, 2, 3], label='Data from how2matplotlib.com')
ax.annotate(r'\mathbf{y=x^2}', xy=(2, 4), xytext=(3, 4.5),
            fontsize=16,
            arrowprops=dict(facecolor='black', shrink=0.05))

plt.title('LaTeX Rendered Bold Annotation')
plt.legend()
plt.show()
Output:
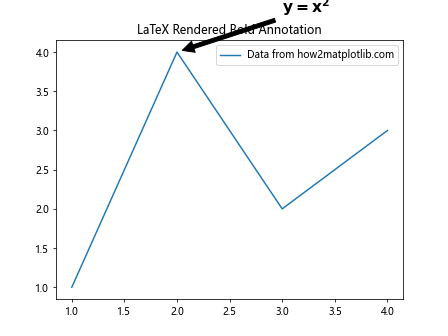
在这个例子中,我们使用LaTeX语法创建了一个包含数学公式的粗体注释。注意使用r'...'来创建原始字符串,这样可以正确处理LaTeX语法中的反斜杠。
9. 创建带有自定义箭头的注释
Matplotlib提供了多种箭头样式,我们可以通过arrowprops参数来自定义箭头的外观。
import matplotlib.pyplot as plt

fig, ax = plt.subplots()
ax.plot([1, 2, 3, 4], [1, 4, 2, 3], label='Data from how2matplotlib.com')
ax.annotate('Custom Arrow Annotation', xy=(2, 4), xytext=(3, 4.5),
            fontweight='bold',
            arrowprops=dict(arrowstyle='fancy', fc='0.6', ec='none',
                            connectionstyle="angle3,angleA=0,angleB=-90"))

plt.title('Bold Annotation with Custom Arrow')
plt.legend()
plt.show()
Output:
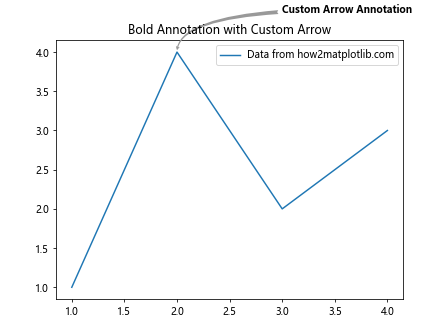
在这个例子中,我们使用了一个自定义的箭头样式,并设置了连接样式。这种方法可以创造出更加独特和引人注目的注释效果。
10. 使用阴影效果增强注释
添加阴影效果可以使注释在视觉上更加突出。我们可以使用path_effects来实现这一效果。
import matplotlib.pyplot as plt
import matplotlib.patheffects as path_effects

fig, ax = plt.subplots()
ax.plot([1, 2, 3, 4], [1, 4, 2, 3], label='Data from how2matplotlib.com')
text = ax.annotate('Shadow Effect Annotation', xy=(2, 4), xytext=(3, 4.5),
                   fontweight='bold', fontsize=14,
                   arrowprops=dict(facecolor='black', shrink=0.05))

text.set_path_effects([path_effects.withStroke(linewidth=3, foreground='gray')])

plt.title('Bold Annotation with Shadow Effect')
plt.legend()
plt.show()
Output:
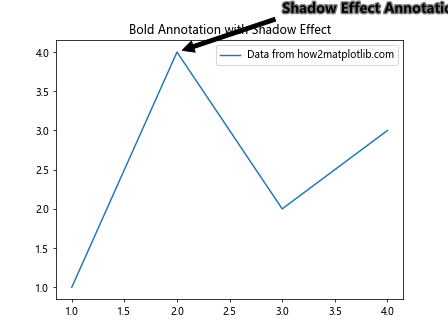
在这个例子中,我们为粗体注释添加了一个灰色的阴影效果。这种效果可以使注释在复杂的背景中更加清晰可见。
11. 创建动态注释
在某些情况下,我们可能需要根据数据动态创建注释。以下是一个根据数据值动态添加注释的例子。
import matplotlib.pyplot as plt
import numpy as np

x = np.linspace(0, 10, 100)
y = np.sin(x)

fig, ax = plt.subplots()
ax.plot(x, y, label='Sin curve from how2matplotlib.com')

max_index = np.argmax(y)
min_index = np.argmin(y)

ax.annotate('Maximum', xy=(x[max_index], y[max_index]), xytext=(x[max_index]+1, y[max_index]+0.1),
            fontweight='bold', arrowprops=dict(facecolor='black', shrink=0.05))
ax.annotate('Minimum', xy=(x[min_index], y[min_index]), xytext=(x[min_index]+1, y[min_index]-0.1),
            fontweight='bold', arrowprops=dict(facecolor='black', shrink=0.05))

plt.title('Dynamic Bold Annotations')
plt.legend()
plt.show()
Output:
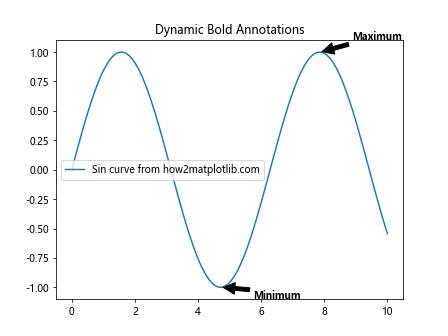
在这个例子中,我们创建了一个正弦曲线,并自动标注了最大值和最小值点。注释的位置是根据数据动态计算的。
12. 在3D图表中使用注释
Matplotlib也支持在3D图表中添加注释,尽管这需要稍微不同的方法。
import matplotlib.pyplot as plt
from mpl_toolkits.mplot3d import Axes3D
import numpy as np

fig = plt.figure()
ax = fig.add_subplot(111, projection='3d')

x = np.linspace(-5, 5, 100)
y = np.linspace(-5, 5, 100)
X, Y = np.meshgrid(x, y)
Z = np.sin(np.sqrt(X**2 + Y**2))

surf = ax.plot_surface(X, Y, Z, cmap='viridis')

ax.text(0, 0, 1, "Peak", fontweight='bold', fontsize=16)

plt.title('3D Surface with Bold Annotation')
fig.colorbar(surf)
plt.show()
Output:
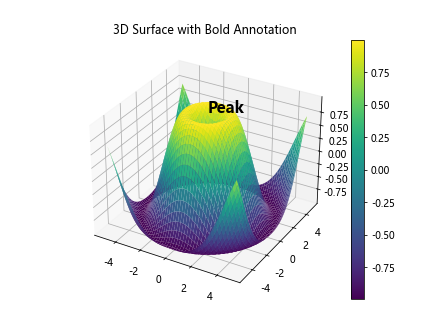
在这个3D图表例子中,我们使用ax.text()方法而不是annotate()来添加注释。这是因为annotate()在3D图表中的行为可能不如预期。
13. 使用注释创建图例
虽然Matplotlib提供了专门的图例功能,但有时我们可能想要更灵活的控制。我们可以使用annotate()来创建自定义的图例。
import matplotlib.pyplot as plt
import numpy as np

x = np.linspace(0, 10, 100)
y1 = np.sin(x)
y2 = np.cos(x)

fig, ax = plt.subplots()
ax.plot(x, y1, 'b-')
ax.plot(x, y2, 'r-')

ax.annotate('Sin curve', xy=(5, 0.5), xytext=(6, 0.7),
            fontweight='bold', color='blue',
            arrowprops=dict(arrowstyle='->', color='blue'))
ax.annotate('Cos curve', xy=(5, -0.5), xytext=(6, -0.7),
            fontweight='bold', color='red',
            arrowprops=dict(arrowstyle='->', color='red'))

plt.title('Custom Legend using Bold Annotations')
plt.text(0.5, -0.15, 'Data from how2matplotlib.com', transform=ax.transAxes)
plt.show()
Output:
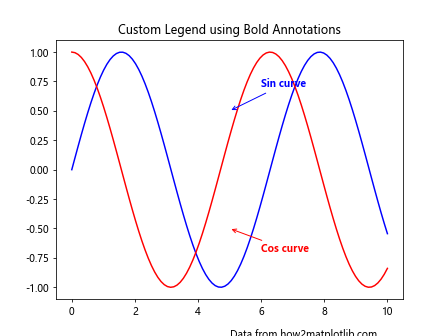
在这个例子中,我们使用粗体注释创建了一个自定义的图例。这种方法允许我们更灵活地控制图例的位置和样式。
14. 使用注释标注时间序列数据
在处理时间序列数据时,我们可能需要标注特定的时间点。以下是一个使用annotate()来标注时间序列数据的例子。
import matplotlib.pyplot as plt
import pandas as pd
import numpy as np

# 创建示例时间序列数据
dates = pd.date_range('20230101', periods=100)
y = np.cumsum(np.random.randn(100))

fig, ax = plt.subplots(figsize=(12, 6))
ax.plot(dates, y, label='Time series from how2matplotlib.com')

# 标注最高点和最低点
max_date = dates[np.argmax(y)]
min_date = dates[np.argmin(y)]

ax.annotate(f'Peak: {max_date.strftime("%Y-%m-%d")}',
            xy=(max_date, y.max()), xytext=(10, 10),
            textcoords='offset points', ha='left', va='bottom',
            fontweight='bold',
            bbox=dict(boxstyle='round,pad=0.5', fc='yellow', alpha=0.5),
            arrowprops=dict(arrowstyle='->', connectionstyle='arc3,rad=0'))

ax.annotate(f'Trough: {min_date.strftime("%Y-%m-%d")}',
            xy=(min_date, y.min()), xytext=(10, -10),
            textcoords='offset points', ha='left', va='top',
            fontweight='bold',
            bbox=dict(boxstyle='round,pad=0.5', fc='yellow', alpha=0.5),
            arrowprops=dict(arrowstyle='->', connectionstyle='arc3,rad=0'))

plt.title('Time Series with Bold Annotations')
plt.legend()
plt.gcf().autofmt_xdate()  # 自动格式化x轴日期标签
plt.show()
Output:
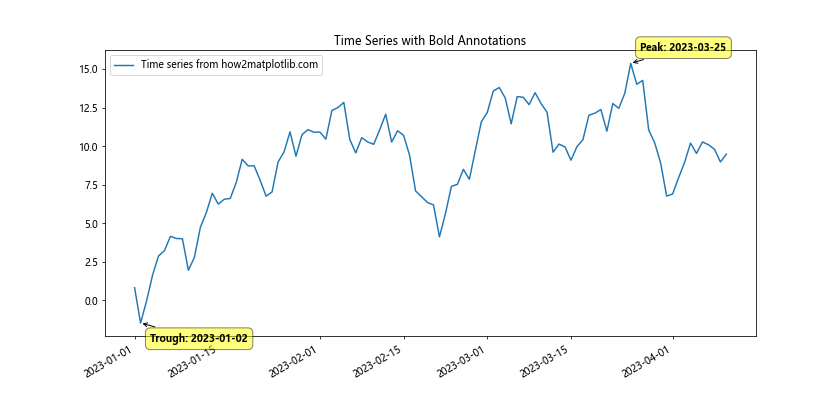
在这个例子中,我们创建了一个随机的时间序列数据,并使用粗体注释标注了最高点和最低点。注释包含了具体的日期信息,使用了黄色背景框来增强可读性。
15. 在散点图中使用注释
散点图是另一种常见的图表类型,我们可以使用注释来突出显示特定的数据点。
import matplotlib.pyplot as plt
import numpy as np

# 生成随机数据
np.random.seed(42)
x = np.random.rand(50)
y = np.random.rand(50)
sizes = np.random.rand(50) * 1000

fig, ax = plt.subplots()
scatter = ax.scatter(x, y, s=sizes, alpha=0.5)

# 标注最大的点
max_size_index = np.argmax(sizes)
ax.annotate('Largest Point', xy=(x[max_size_index], y[max_size_index]),
            xytext=(0.8, 0.95), textcoords='axes fraction',
            fontweight='bold',
            arrowprops=dict(facecolor='black', shrink=0.05),
            bbox=dict(boxstyle="round,pad=0.3", fc="yellow", ec="black", lw=2))

plt.title('Scatter Plot with Bold Annotation')
plt.text(0.5, -0.1, 'Data from how2matplotlib.com', transform=ax.transAxes, ha='center')
plt.show()
Output:
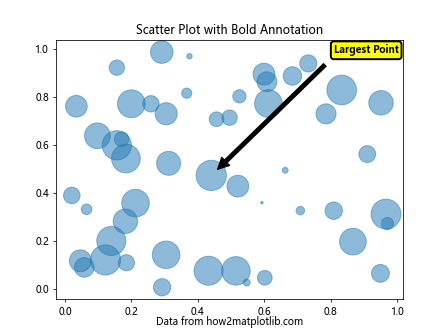
在这个例子中,我们创建了一个散点图,其中点的大小是随机的。我们使用粗体注释标注了最大的点,并将注释放在图表的右上角。
16. 使用注释创建文本框
有时,我们可能想在图表中添加一个独立的文本框来提供额外的信息。我们可以使用annotate()函数来实现这一点。
import matplotlib.pyplot as plt
import numpy as np

x = np.linspace(0, 10, 100)
y = np.sin(x)

fig, ax = plt.subplots()
ax.plot(x, y, label='Sin curve from how2matplotlib.com')

# 创建一个文本框
textstr = 'This is a\nmulti-line\ntext box'
ax.annotate(textstr, xy=(0.95, 0.95), xycoords='axes fraction',
            fontweight='bold', fontsize=12,
            va='top', ha='right',
            bbox=dict(boxstyle='round,pad=0.5', fc='white', ec='gray', lw=2))

plt.title('Sin Curve with Text Box Annotation')
plt.legend()
plt.show()
Output:
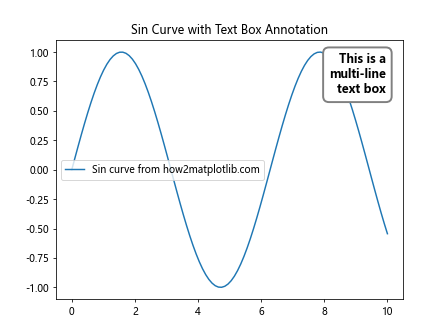
在这个例子中,我们在图表的右上角创建了一个多行文本框。文本框使用白色背景和灰色边框,使其在图表中清晰可见。
17. 在子图中使用注释
当我们有多个子图时,我们可能需要在每个子图中添加注释。以下是一个在多个子图中使用注释的例子。
import matplotlib.pyplot as plt
import numpy as np

fig, (ax1, ax2) = plt.subplots(1, 2, figsize=(12, 5))

# 第一个子图
x1 = np.linspace(0, 5, 100)
y1 = np.sin(x1)
ax1.plot(x1, y1)
ax1.annotate('Peak', xy=(np.pi/2, 1), xytext=(3, 0.5),
             fontweight='bold', arrowprops=dict(facecolor='black', shrink=0.05))

# 第二个子图
x2 = np.linspace(0, 5, 100)
y2 = np.cos(x2)
ax2.plot(x2, y2)
ax2.annotate('Trough', xy=(np.pi, -1), xytext=(4, -0.5),
             fontweight='bold', arrowprops=dict(facecolor='black', shrink=0.05))

fig.suptitle('Subplots with Bold Annotations')
plt.text(0.5, -0.1, 'Data from how2matplotlib.com', transform=fig.transFigure, ha='center')
plt.tight_layout()
plt.show()
Output:
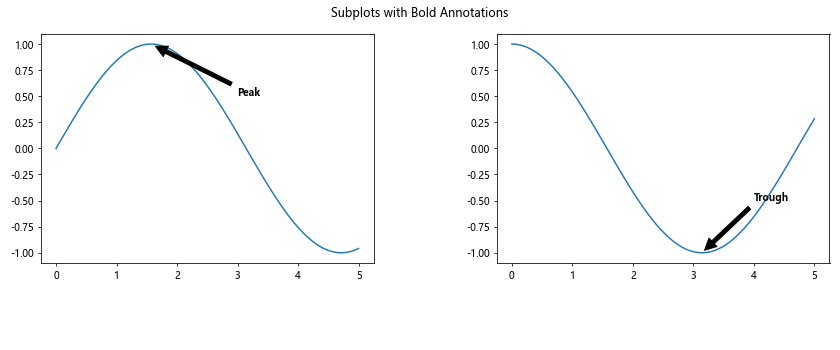
在这个例子中,我们创建了两个子图,分别显示正弦和余弦函数。我们在每个子图中添加了粗体注释,指出了重要的特征点。
18. 使用注释创建标签
注释不仅可以用于指出特定的数据点,还可以用于为图表的不同部分创建标签。
import matplotlib.pyplot as plt
import numpy as np

theta = np.linspace(0, 2*np.pi, 100)
r = 2*theta

fig, ax = plt.subplots(subplot_kw=dict(projection='polar'))
ax.plot(theta, r)

# 添加标签
ax.annotate('Start', xy=(0, 0), xytext=(0.2, 0.2),
            fontweight='bold', xycoords='figure fraction',
            arrowprops=dict(facecolor='black', shrink=0.05))

ax.annotate('End', xy=(2*np.pi, 4*np.pi), xytext=(0.8, 0.8),
            fontweight='bold', xycoords='figure fraction',
            arrowprops=dict(facecolor='black', shrink=0.05))

plt.title('Polar Plot with Bold Label Annotations')
plt.text(0.5, -0.1, 'Data from how2matplotlib.com', transform=ax.transAxes, ha='center')
plt.show()
Output:
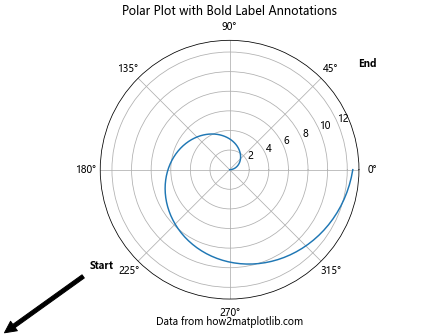
在这个例子中,我们创建了一个极坐标图,并使用粗体注释为曲线的起点和终点添加了标签。
19. 使用注释突出显示数据范围
我们可以使用注释来突出显示数据的特定范围或区域。
import matplotlib.pyplot as plt
import numpy as np

x = np.linspace(0, 10, 100)
y = np.sin(x)

fig, ax = plt.subplots()
ax.plot(x, y, label='Sin curve from how2matplotlib.com')

# 突出显示一个范围
ax.annotate('', xy=(2, 0.5), xytext=(4, 0.5),
            arrowprops=dict(arrowstyle='<->', color='red', lw=2))
ax.annotate('Interesting\nRegion', xy=(3, 0.6), xytext=(3, 1),
            fontweight='bold', ha='center',
            arrowprops=dict(facecolor='black', shrink=0.05))

plt.title('Sin Curve with Highlighted Region')
plt.legend()
plt.show()
Output:
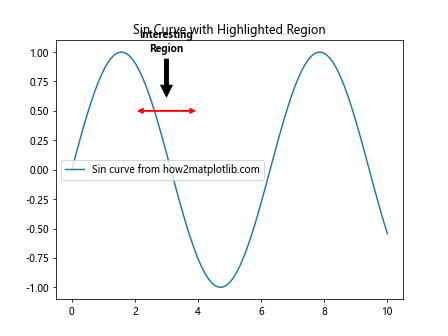
在这个例子中,我们使用一个双向箭头注释突出显示了正弦曲线的一个特定区域,并添加了一个粗体文本标签来描述这个区域。
20. 使用注释创建交互式图表
最后,我们可以结合Matplotlib的事件处理功能,使用注释创建交互式图表。
import matplotlib.pyplot as plt
import numpy as np

x = np.linspace(0, 10, 100)
y = np.sin(x)

fig, ax = plt.subplots()
line, = ax.plot(x, y, label='Sin curve from how2matplotlib.com')
annot = ax.annotate("", xy=(0,0), xytext=(20,20), textcoords="offset points",
                    bbox=dict(boxstyle="round", fc="w"),
                    arrowprops=dict(arrowstyle="->"))
annot.set_visible(False)

def update_annot(ind):
    x, y = line.get_data()
    annot.xy = (x[ind["ind"][0]], y[ind["ind"][0]])
    text = f"({x[ind['ind'][0]]:.2f}, {y[ind['ind'][0]]:.2f})"
    annot.set_text(text)
    annot.get_bbox_patch().set_alpha(0.4)

def hover(event):
    vis = annot.get_visible()
    if event.inaxes == ax:
        cont, ind = line.contains(event)
        if cont:
            update_annot(ind)
            annot.set_visible(True)
            fig.canvas.draw_idle()
        else:
            if vis:
                annot.set_visible(False)
                fig.canvas.draw_idle()

fig.canvas.mpl_connect("motion_notify_event", hover)

plt.title('Interactive Plot with Hover Annotations')
plt.legend()
plt.show()
Output:
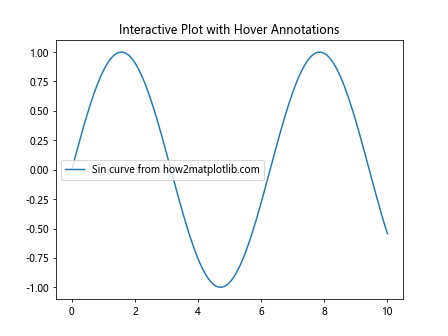
在这个例子中,我们创建了一个交互式图表,当鼠标悬停在数据点上时,会显示一个带有坐标信息的粗体注释。这种交互式功能可以大大增强数据可视化的用户体验。
总结起来,Matplotlib的annotate函数是一个强大的工具,可以用来创建各种类型的注释,包括加粗注释。通过调整字体重量、大小、颜色、背景等属性,我们可以创建出既美观又信息丰富的图表注释。无论是简单的数据点标注,还是复杂的交互式图表,annotate函数都能满足各种需求。在数据可视化过程中,合理使用注释可以有效地传达信息,突出重点,使图表更加清晰易懂。
 极客笔记
极客笔记