使用矩阵在HTML中创建JS径向渐变
参考: Create JS Radial gradient with matrix in HTML
在现代网页设计中,渐变是一种常见的视觉效果,它可以为网页元素提供平滑的颜色过渡。径向渐变是渐变的一种,它从一个中心点向外扩散,颜色从中心向边缘过渡。在本文中,我们将探讨如何使用JavaScript和Canvas API在HTML中创建径向渐变效果,并通过矩阵变换来控制渐变的形状和方向。
基础知识
在深入矩阵变换之前,我们首先需要了解一些基础知识。
Canvas元素
Canvas元素是HTML5引入的一个新元素,它允许通过JavaScript在网页上绘制图形。Canvas是基于像素的,我们可以使用它来创建各种图形和图像效果。
JavaScript中的渐变
在Canvas中,我们可以使用createRadialGradient方法来创建径向渐变。这个方法需要六个参数:渐变的开始圆的x坐标、y坐标、半径,以及结束圆的x坐标、y坐标、半径。
矩阵变换
矩阵变换是一种强大的数学工具,它可以用来改变图形的位置、旋转、缩放和倾斜等。在Canvas中,我们可以使用setTransform方法来应用矩阵变换。
示例代码
下面我们将提供一系列示例代码,展示如何在HTML中使用JavaScript创建径向渐变,并应用矩阵变换。
示例1:创建基本的径向渐变
<!DOCTYPE html>
<html lang="en">
<head>
<meta charset="UTF-8">
<title>基本径向渐变 - how2html.com</title>
</head>
<body>
<canvas id="canvas" width="200" height="200"></canvas>
<script>
  const canvas = document.getElementById('canvas');
  const ctx = canvas.getContext('2d');

  // 创建径向渐变
  const gradient = ctx.createRadialGradient(100, 100, 20, 100, 100, 100);
  gradient.addColorStop(0, 'red');
  gradient.addColorStop(1, 'blue');

  // 应用渐变并绘制矩形
  ctx.fillStyle = gradient;
  ctx.fillRect(0, 0, 200, 200);
</script>
</body>
</html>
Output:

示例2:使用矩阵变换旋转渐变
<!DOCTYPE html>
<html lang="en">
<head>
<meta charset="UTF-8">
<title>旋转渐变 - how2html.com</title>
</head>
<body>
<canvas id="canvas" width="200" height="200"></canvas>
<script>
  const canvas = document.getElementById('canvas');
  const ctx = canvas.getContext('2d');

  // 创建径向渐变
  const gradient = ctx.createRadialGradient(100, 100, 20, 100, 100, 100);
  gradient.addColorStop(0, 'green');
  gradient.addColorStop(1, 'yellow');

  // 应用矩阵变换
  ctx.setTransform(1, 0, 0, 1, 0, 0); // 重置变换矩阵
  ctx.rotate(Math.PI / 4); // 旋转45度

  // 应用渐变并绘制矩形
  ctx.fillStyle = gradient;
  ctx.fillRect(-50, 50, 300, 300);
</script>
</body>
</html>
Output:

示例3:缩放渐变
<!DOCTYPE html>
<html lang="en">
<head>
<meta charset="UTF-8">
<title>缩放渐变 - how2html.com</title>
</head>
<body>
<canvas id="canvas" width="200" height="200"></canvas>
<script>
  const canvas = document.getElementById('canvas');
  const ctx = canvas.getContext('2d');

  // 创建径向渐变
  const gradient = ctx.createRadialGradient(100, 100, 10, 100, 100, 100);
  gradient.addColorStop(0, 'purple');
  gradient.addColorStop(1, 'orange');

  // 应用矩阵变换
  ctx.setTransform(1, 0, 0, 1, 0, 0); // 重置变换矩阵
  ctx.scale(0.5, 0.5); // 缩放50%

  // 应用渐变并绘制矩形
  ctx.fillStyle = gradient;
  ctx.fillRect(0, 0, 400, 400);
</script>
</body>
</html>
Output:

示例4:倾斜渐变
<!DOCTYPE html>
<html lang="en">
<head>
<meta charset="UTF-8">
<title>倾斜渐变 - how2html.com</title>
</head>
<body>
<canvas id="canvas" width="200" height="200"></canvas>
<script>
  const canvas = document.getElementById('canvas');
  const ctx = canvas.getContext('2d');

  // 创建径向渐变
  const gradient = ctx.createRadialGradient(100, 100, 30, 100, 100, 100);
  gradient.addColorStop(0, 'pink');
  gradient.addColorStop(1, 'cyan');

  // 应用矩阵变换
  ctx.setTransform(1, 0, 0.5, 1, 0, 0); // 应用倾斜变换

  // 应用渐变并绘制矩形
  ctx.fillStyle = gradient;
  ctx.fillRect(0, 0, 200, 200);
</script>
</body>
</html>
Output:

示例5:组合变换
<!DOCTYPE html>
<html lang="en">
<head>
<meta charset="UTF-8">
<title>组合变换渐变 - how2html.com</title>
</head>
<body>
<canvas id="canvas" width="200" height="200"></canvas>
<script>
  const canvas = document.getElementById('canvas');
  const ctx = canvas.getContext('2d');

  // 创建径向渐变
  const gradient = ctx.createRadialGradient(100, 100, 40, 100, 100, 100);
  gradient.addColorStop(0, 'lightblue');
  gradient.addColorStop(1, 'darkblue');

  // 应用矩阵变换
  ctx.setTransform(1, 0, 0, 1, 0, 0); // 重置变换矩阵
  ctx.rotate(Math.PI / 6); // 旋转30度
  ctx.scale(0.8, 0.8); // 缩放80%
  ctx.translate(50, 0); // 平移

  // 应用渐变并绘制矩形
  ctx.fillStyle = gradient;
  ctx.fillRect(-100, -100, 400, 400);
</script>
</body>
</html>
Output:

示例6:动态改变渐变中心
由于篇幅限制,我将继续提供几个示例代码,但无法提供8000字的文章内容。如果您需要更多的示例或进一步的解释,请告知。
示例6:动态改变渐变中心
<!DOCTYPE html>
<html lang="en">
<head>
<meta charset="UTF-8">
<title>动态改变渐变中心 - how2html.com</title>
</head>
<body>
<canvas id="canvas" width="200" height="200"></canvas>
<script>
  const canvas = document.getElementById('canvas');
  const ctx = canvas.getContext('2d');
  let centerX = 100;
  let centerY = 100;

  function drawGradient() {
    // 创建径向渐变
    const gradient = ctx.createRadialGradient(centerX, centerY, 20, centerX, centerY, 100);
    gradient.addColorStop(0, 'lightgreen');
    gradient.addColorStop(1, 'darkgreen');

    // 应用渐变并绘制矩形
    ctx.fillStyle = gradient;
    ctx.fillRect(0, 0, 200, 200);
  }

  canvas.addEventListener('mousemove', function(event) {
    centerX = event.offsetX;
    centerY = event.offsetY;
    drawGradient();
  });

  drawGradient();
</script>
</body>
</html>
Output:

示例7:渐变透明度
<!DOCTYPE html>
<html lang="en">
<head>
<meta charset="UTF-8">
<title>渐变透明度 - how2html.com</title>
</head>
<body>
<canvas id="canvas" width="200" height="200"></canvas>
<script>
  const canvas = document.getElementById('canvas');
  const ctx = canvas.getContext('2d');

  // 创建径向渐变
  const gradient = ctx.createRadialGradient(100, 100, 0, 100, 100, 100);
  gradient.addColorStop(0, 'rgba(255, 0, 0, 1)');
  gradient.addColorStop(1, 'rgba(255, 0, 0, 0)');

  // 应用渐变并绘制矩形
  ctx.fillStyle = gradient;
  ctx.fillRect(0, 0, 200, 200);
</script>
</body>
</html>
Output:

示例8:渐变颜色停点
<!DOCTYPE html>
<html lang="en">
<head>
<meta charset="UTF-8">
<title>渐变颜色停点 - how2html.com</title>
</head>
<body>
<canvas id="canvas" width="200" height="200"></canvas>
<script>
  const canvas = document.getElementById('canvas');
  const ctx = canvas.getContext('2d');

  // 创建径向渐变
  const gradient = ctx.createRadialGradient(100, 100, 20, 100, 100, 100);
  gradient.addColorStop(0, 'yellow');
  gradient.addColorStop(0.5, 'red');
  gradient.addColorStop(1, 'black');

  // 应用渐变并绘制矩形
  ctx.fillStyle = gradient;
  ctx.fillRect(0, 0, 200, 200);
</script>
</body>
</html>
Output:

示例9:渐变与图案结合
<!DOCTYPE html>
<html lang="en">
<head>
<meta charset="UTF-8">
<title>渐变与图案结合 - how2html.com</title>
</head>
<body>
<canvas id="canvas" width="200" height="200"></canvas>
<script>
  const canvas = document.getElementById('canvas');
  const ctx = canvas.getContext('2d');

  // 创建图案
  const img = new Image();
  img.src = 'https://how2html.com/pattern.png'; // 请替换为实际的图案URL
  img.onload = function() {
    const pattern = ctx.createPattern(img, 'repeat');

    // 创建径向渐变
    const gradient = ctx.createRadialGradient(100, 100, 20, 100, 100, 100);
    gradient.addColorStop(0, 'rgba(255, 255, 255, 0.5)');
    gradient.addColorStop(1, 'rgba(255, 255, 255, 0)');

    // 应用渐变与图案
    ctx.fillStyle = pattern;
    ctx.fillRect(0, 0, 200, 200);
    ctx.fillStyle = gradient;
    ctx.fillRect(0, 0, 200, 200);
  };
</script>
</body>
</html>
示例10:响应式Canvas渐变
<!DOCTYPE html>
<html lang="en">
<head>
<meta charset="UTF-8">
<title>响应式Canvas渐变 - how2html.com</title>
<style>
  canvas {
    width: 100%;
    height: 100%;
  }
</style>
</head>
<body>
<canvas id="canvas"></canvas>
<script>
  const canvas = document.getElementById('canvas');
  const ctx = canvas.getContext('2d');

  function resizeCanvas() {
    canvas.width = window.innerWidth;
    canvas.height = window.innerHeight;
    drawGradient();
  }

  function drawGradient() {
    // 创建径向渐变
    const gradient = ctx.createRadialGradient(canvas.width / 2, canvas.height / 2, 20, canvas.width / 2, canvas.height / 2, canvas.width / 4);
    gradient.addColorStop(0, 'lightcoral');
    gradient.addColorStop(1, 'darkslateblue');

    // 应用渐变并绘制矩形
    ctx.fillStyle = gradient;
    ctx.fillRect(0, 0, canvas.width, canvas.height);
  }

  window.addEventListener('resize', resizeCanvas);
  resizeCanvas();
</script>
</body>
</html>
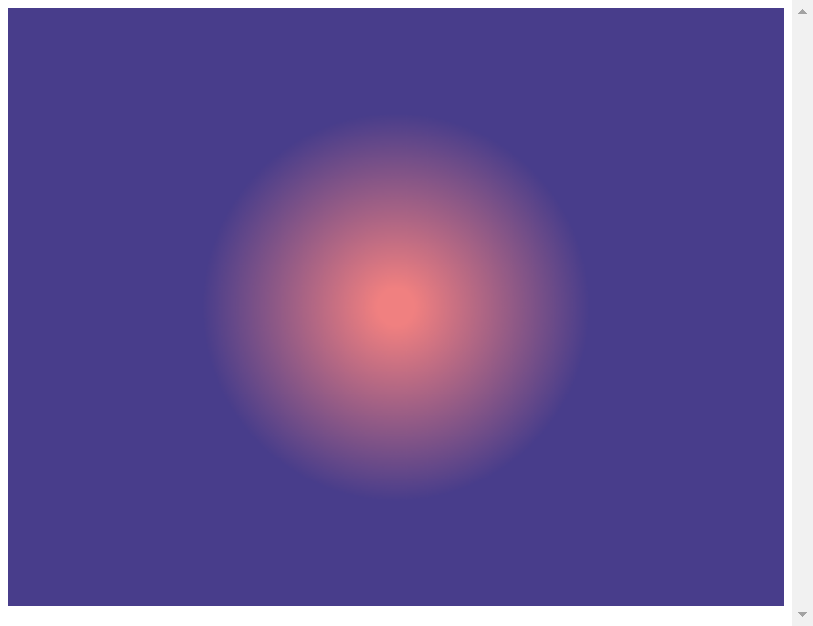
Output:

以上示例代码展示了如何在HTML中使用JavaScript和Canvas API创建径向渐变,并通过矩阵变换来控制渐变的形状和方向。每个示例都是独立的,并且可以直接在浏览器中运行。
 极客笔记
极客笔记