PHP imagepolygon() 函数
imagepolygon() 函数 是PHP内置函数之一,用于在给定的坐标上绘制多边形。该函数利用PHP编译器自动导出的x和y轴来工作,我们只需要设置图像绘制的起始点的坐标即可。起始点坐标(0, 0)位于阅读窗口的左上角。您可以根据需要相应调整起始点的坐标来得到所需的多边形。该函数返回一个布尔值,成功绘制返回true,否则返回false。
语法
bool imagepolygon( image , points , num points , color )
参数: 此函数接受各种参数,如下所示:
| S.No | 参数 | 描述 | 可选/必选 |
|---|---|---|---|
| 1 | $image | 该参数用于指定要显示的图片的尺寸。该参数由图片资源(如imagecreatetruecolor()函数)使用,该函数用于返回图片源。 | 必选 |
| 2 | $points | 该参数用于设置多边形的理想顶点,从原点开始。 | 必选 |
| 3 | $num – points | 该参数用于设置多边形中的顶点总数。此外,它应大于3,因为没有多边形可以少于三边,否则称为一条直线。 | 必选 |
| 4 | $color | 该参数用于指定图片的颜色。此参数用于创建如imagecolorallocate()函数一样的颜色标识。 | 可选 |
imagearc()函数在程序执行成功时返回TRUE,在尝试失败时返回FALSE。
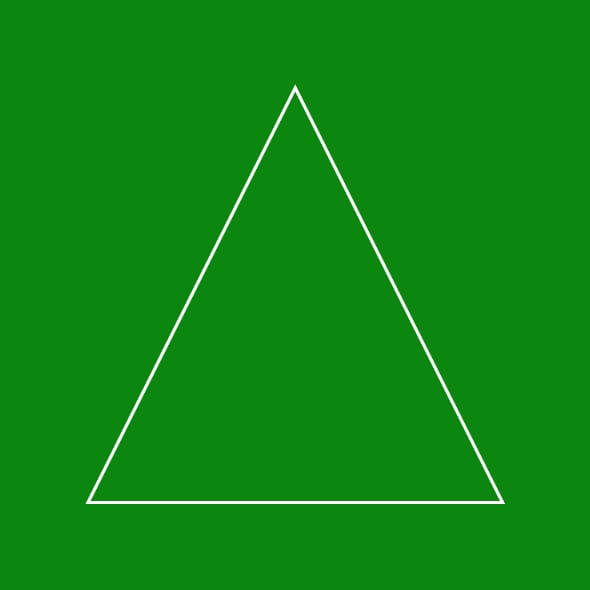
程序1: 展示PHP程序如何使用 imagepolygon() 函数绘制多边形。
<!DOCTYPE html>
<html lang = " en ">
<head>
  <meta charse t= " UTF - 8 ">
  <meta http - equiv = " X - UA - Compatible " content = " IE = edge ">
  <meta name = " viewport " content = " width = device - width, initial - scale = 1 .0">
  <title> PHP </title>
</head>
<body>
<?php

// to mark out the size of the image
image = imagecreatetruecolor ( 410 , 210 );

// to mark out the vertices of the polygon we need to mark outvalues = array (
            161 ,  61,  // Point 1 ( x , y )
            61 , 261 ,  // Point 2 ( x , y )
            261 , 261 ,  // Point 3 ( x ,  y )
                   );
// in order to distinguish the background colour of the image
background-color = imagecolorallocate (image , 1 , 155 , 1 );

Imagefill ( image , 1 , 1 ,background-color );

// to mark out the text color of the polygon
text-color = imagecolorallocate (image , 250 , 250 , 250 );

// polygon
imagepolygon( image ,values , 3 , text-color );

header( ' Content - type : image / png ' );

imagepng (image );
?>
</body>
</html>
输出:

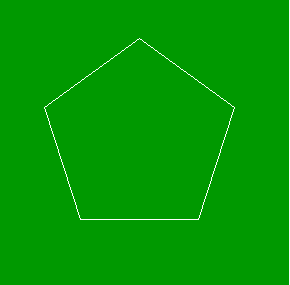
程序2: PHP程序展示了 imagepolygon() 函数绘制实现一个多边形的用法。
<!DOCTYPE html>
<html lang = " en ">
<head>
  <meta charse t= " UTF - 8 ">
  <meta http - equiv = " X - UA - Compatible " content = " IE = edge ">
  <meta name = " viewport " content = " width = device - width, initial - scale = 1 .0">
  <title> PHP </title>
</head>
<body>
<?php
// to mark out the size of the image
image = imagecreatetruecolor ( 400 , 200 );

// to mark out the vertices of the polygon we need to mark outvalues = array (
            161 ,  61,  // Point 1 ( x , y )
            61 , 261 ,  // Point 2 ( x , y )
            95 , 235 , // Point 3 ( x , y )
            215 , 235 // Point 4 ( x , y)
            261 , 261 ,  // Point 3 ( x ,  y )
                   );
// to mark out the background color of the image
background-color = imagecolorallocate (image , 1 , 145 , 1 );

Imagefill ( image , 1 , 1 ,background-color );

// to mark out the text color of the polygon
text-color = imagecolorallocate (image , 250 , 250 , 250 );

// polygon
imagepolygon( image ,values , 5 , text-color );

header( ' Content - type : image / png ' );

imagepng (image );
?>
</body>
</html>
输出:

在这个程序中,我们宣布了不同的因素,如 $image 来传输我们需要的图片的大小, $background 变量来检查我们需要的背景颜色, $text 变量来传输我们需要的文本颜色,展示 $value 变量来设定我们想要显示的多边形的方向,我们使用了 imagepolygon() 函数来展示我们想要展示的多边形作为一张图片,为了在浏览器上显示图片的结果,我们使用了内置的PHP命令 header() 和 imagepng() 。
程序3: 基本的PHP程序,展示了使用 imagepolygon() 函数绘制一个多边形。
<!DOCTYPE html>
<html lang = " en ">
<head>
  <meta charse t= " UTF - 8 ">
  <meta http - equiv = " X - UA - Compatible " content = " IE = edge ">
  <meta name = " viewport " content = " width = device - width, initial - scale = 1 .0">
  <title> PHP </title>
</head>
<body>
<?php

// to mark out the size of the image
image = imagecreatetruecolor ( 410 , 210 );

// to mark out the vertices of the polygon we need to mark outvalues = array (
            61 ,  61,  // Point 1 ( x , y )
            61 , 261 ,  // Point 2 ( x , y )
            261 , 61 ,  // Point 3 ( x ,  y )
            261 ,  261 // Point 4 ( x , y )
        );
// to mark out the background color of the image
background-color = imagecolorallocate (image , 161 , 200 , 171 );

Imagefill ( image , 1 , 1 ,background-color );

// to mark out the text color of the polygon
text-color = imagecolorallocate (image , 250 , 250 , 250 );

// polygon
imagepolygon( image ,values , 4 , text-color );

header( ' Content - type : image / png ' );

imagepng (image );
?>
</body>
</html>
输出:

在上面的程序中,我们声称了不同的因素,比如 $image 来描述我们需要的图片的大小, $background 来描述我们需要的背景色, $text 来描述我们需要的文本颜色,以及一个 $values 来设置我们想要声明的多边形的方向,并且我们使用了 image polygon() 来显示我们想要显示的多边形作为一张图片,为了在浏览器上显示图片的结果,我们使用了内置的PHP命令 header 和 image png 来显示。
 极客笔记
极客笔记