Matplotlib等高线绘制:掌握数据可视化的精髓
Matplotlib是Python中最流行的数据可视化库之一,而等高线(contour lines)绘制是其中一个强大而versatile的功能。等高线图能够直观地展示三维数据在二维平面上的分布,广泛应用于地形图、气象图、热力图等领域。本文将深入探讨Matplotlib中等高线的绘制技巧,从基础概念到高级应用,帮助你全面掌握这一数据可视化利器。
1. 等高线基础
等高线是连接具有相同高度或值的点的曲线。在Matplotlib中,我们可以使用contour()和contourf()函数来绘制等高线图。
1.1 基本等高线图
让我们从一个简单的例子开始:
import numpy as np
import matplotlib.pyplot as plt

x = np.linspace(-5, 5, 100)
y = np.linspace(-5, 5, 100)
X, Y = np.meshgrid(x, y)
Z = np.sin(np.sqrt(X**2 + Y**2))

plt.figure(figsize=(10, 8))
plt.contour(X, Y, Z)
plt.title('Basic Contour Plot - how2matplotlib.com')
plt.xlabel('X')
plt.ylabel('Y')
plt.show()
Output:
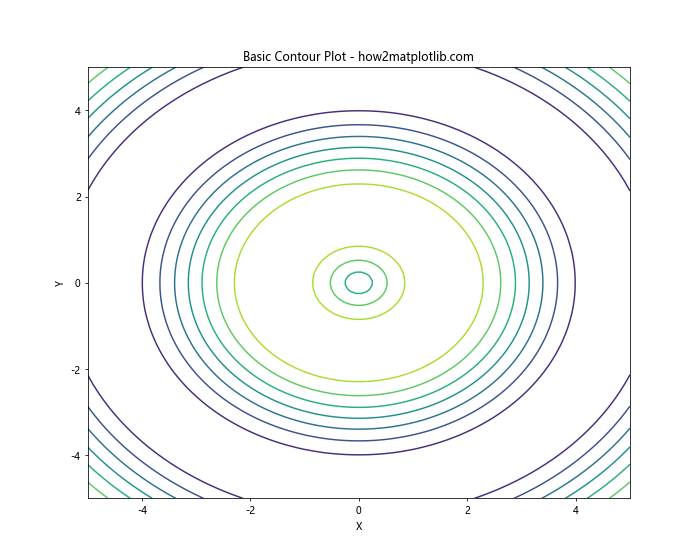
在这个例子中,我们创建了一个简单的二维函数Z = sin(sqrt(X^2 + Y^2)),然后使用contour()函数绘制等高线。X和Y是通过np.meshgrid()函数生成的网格坐标。
1.2 填充等高线图
如果我们想要填充等高线之间的区域,可以使用contourf()函数:
import numpy as np
import matplotlib.pyplot as plt

x = np.linspace(-5, 5, 100)
y = np.linspace(-5, 5, 100)
X, Y = np.meshgrid(x, y)
Z = np.sin(np.sqrt(X**2 + Y**2))

plt.figure(figsize=(10, 8))
plt.contourf(X, Y, Z, cmap='viridis')
plt.title('Filled Contour Plot - how2matplotlib.com')
plt.xlabel('X')
plt.ylabel('Y')
plt.colorbar(label='Z Value')
plt.show()
Output:
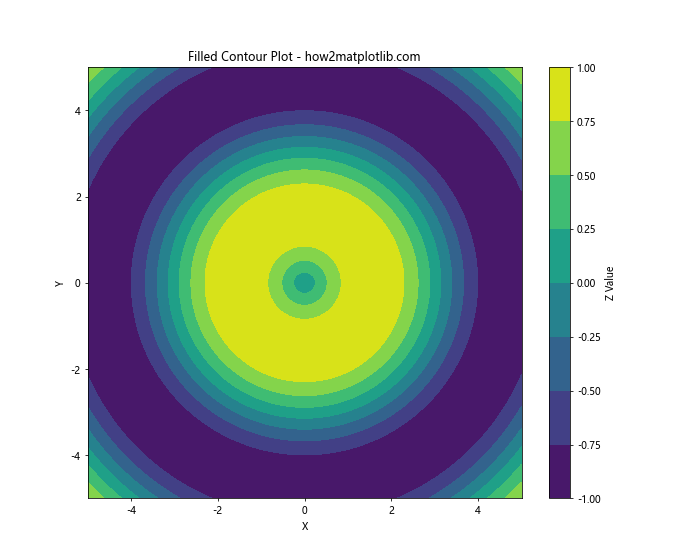
这个例子使用了contourf()函数来创建填充的等高线图。我们还添加了一个颜色条(colorbar)来显示Z值的范围。
2. 自定义等高线
Matplotlib提供了多种方式来自定义等高线的外观和行为。
2.1 设置等高线级别
我们可以通过指定levels参数来控制等高线的数量和位置:
import numpy as np
import matplotlib.pyplot as plt

x = np.linspace(-5, 5, 100)
y = np.linspace(-5, 5, 100)
X, Y = np.meshgrid(x, y)
Z = np.sin(np.sqrt(X**2 + Y**2))

plt.figure(figsize=(10, 8))
levels = [-0.5, 0, 0.5]
plt.contour(X, Y, Z, levels=levels)
plt.title('Custom Contour Levels - how2matplotlib.com')
plt.xlabel('X')
plt.ylabel('Y')
plt.show()
Output:
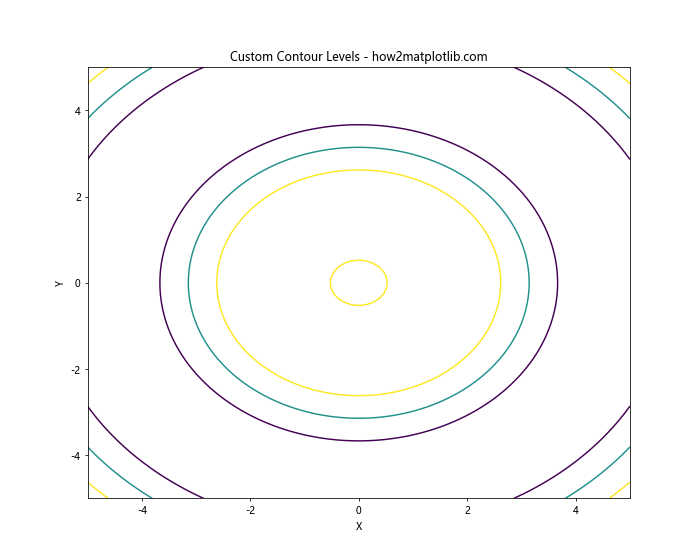
在这个例子中,我们只绘制了Z值为-0.5、0和0.5的等高线。
2.2 设置等高线颜色
我们可以为等高线指定自定义颜色:
import numpy as np
import matplotlib.pyplot as plt

x = np.linspace(-5, 5, 100)
y = np.linspace(-5, 5, 100)
X, Y = np.meshgrid(x, y)
Z = np.sin(np.sqrt(X**2 + Y**2))

plt.figure(figsize=(10, 8))
colors = ['red', 'green', 'blue']
plt.contour(X, Y, Z, levels=3, colors=colors)
plt.title('Custom Contour Colors - how2matplotlib.com')
plt.xlabel('X')
plt.ylabel('Y')
plt.show()
Output:
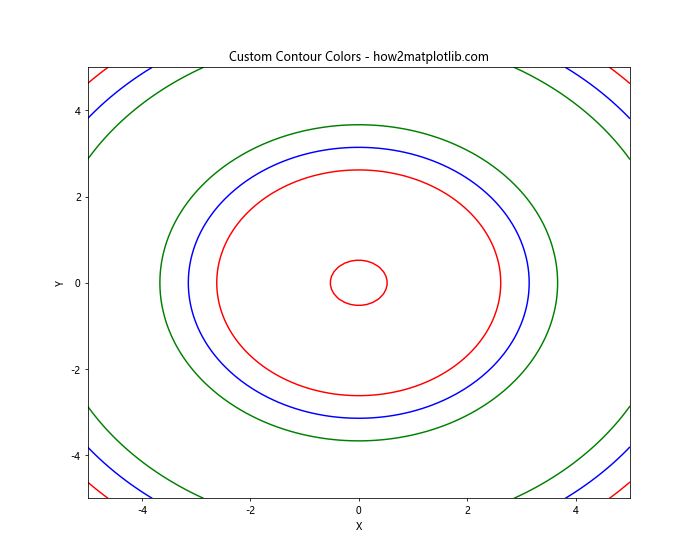
这个例子中,我们为三条等高线分别指定了红、绿、蓝三种颜色。
2.3 设置等高线样式
我们还可以自定义等高线的线型和宽度:
import numpy as np
import matplotlib.pyplot as plt

x = np.linspace(-5, 5, 100)
y = np.linspace(-5, 5, 100)
X, Y = np.meshgrid(x, y)
Z = np.sin(np.sqrt(X**2 + Y**2))

plt.figure(figsize=(10, 8))
plt.contour(X, Y, Z, levels=3, linestyles=['solid', 'dashed', 'dotted'], linewidths=[1, 2, 3])
plt.title('Custom Contour Styles - how2matplotlib.com')
plt.xlabel('X')
plt.ylabel('Y')
plt.show()
Output:
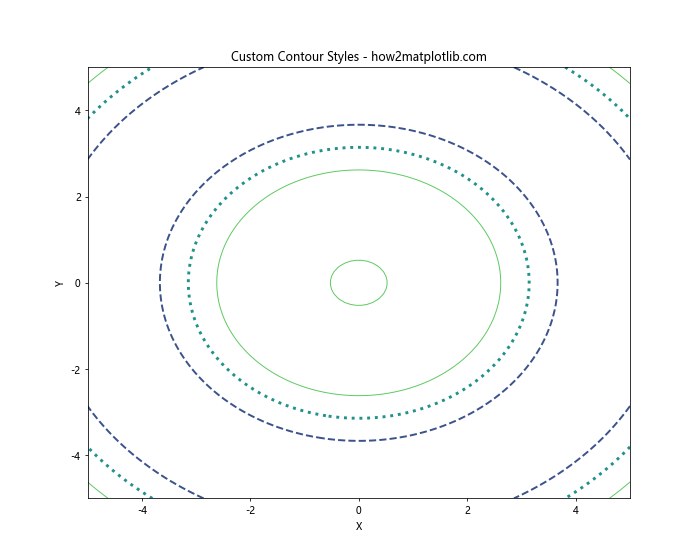
在这个例子中,我们为三条等高线分别设置了不同的线型和线宽。
3. 等高线标签
为等高线添加标签可以帮助读者更好地理解数据。
3.1 基本标签
使用clabel()函数可以为等高线添加标签:
import numpy as np
import matplotlib.pyplot as plt

x = np.linspace(-5, 5, 100)
y = np.linspace(-5, 5, 100)
X, Y = np.meshgrid(x, y)
Z = np.sin(np.sqrt(X**2 + Y**2))

plt.figure(figsize=(10, 8))
CS = plt.contour(X, Y, Z)
plt.clabel(CS, inline=True, fontsize=10)
plt.title('Contour Plot with Labels - how2matplotlib.com')
plt.xlabel('X')
plt.ylabel('Y')
plt.show()
Output:
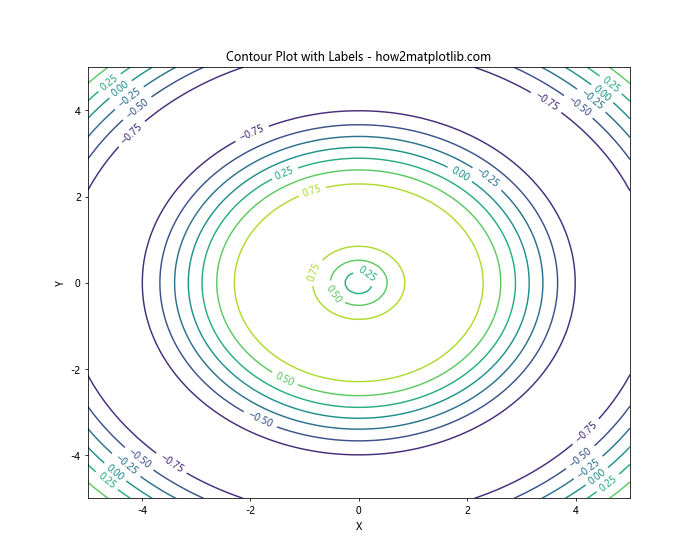
这个例子中,我们使用clabel()函数为等高线添加了标签。inline=True参数确保标签不会与等高线重叠。
3.2 自定义标签格式
我们可以自定义标签的格式:
import numpy as np
import matplotlib.pyplot as plt

x = np.linspace(-5, 5, 100)
y = np.linspace(-5, 5, 100)
X, Y = np.meshgrid(x, y)
Z = np.sin(np.sqrt(X**2 + Y**2))

plt.figure(figsize=(10, 8))
CS = plt.contour(X, Y, Z)
plt.clabel(CS, inline=True, fmt='%1.2f', fontsize=10)
plt.title('Contour Plot with Custom Label Format - how2matplotlib.com')
plt.xlabel('X')
plt.ylabel('Y')
plt.show()
Output:
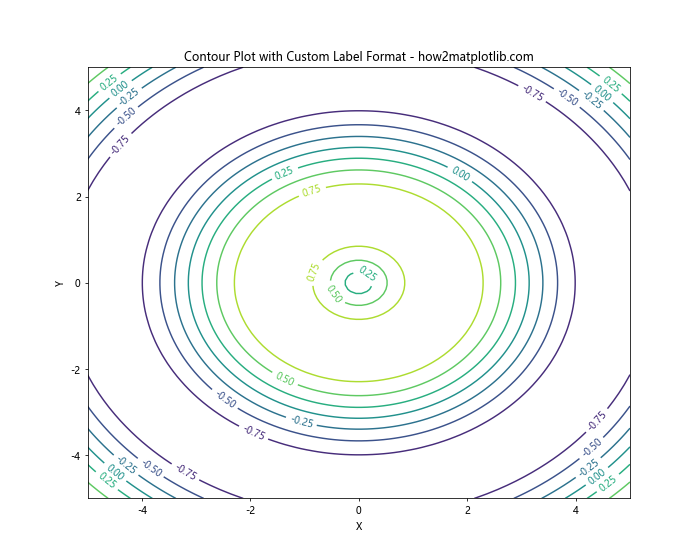
在这个例子中,我们使用fmt='%1.2f'参数将标签格式化为两位小数。
4. 组合等高线和其他图形
等高线图可以与其他类型的图形结合,创造出更丰富的可视化效果。
4.1 等高线和散点图
我们可以在等高线图上添加散点图:
import numpy as np
import matplotlib.pyplot as plt

x = np.linspace(-5, 5, 100)
y = np.linspace(-5, 5, 100)
X, Y = np.meshgrid(x, y)
Z = np.sin(np.sqrt(X**2 + Y**2))

plt.figure(figsize=(10, 8))
plt.contourf(X, Y, Z, cmap='viridis', alpha=0.8)
plt.scatter(np.random.rand(20)*10-5, np.random.rand(20)*10-5, c='red', s=50)
plt.title('Contour Plot with Scatter Points - how2matplotlib.com')
plt.xlabel('X')
plt.ylabel('Y')
plt.colorbar(label='Z Value')
plt.show()
Output:
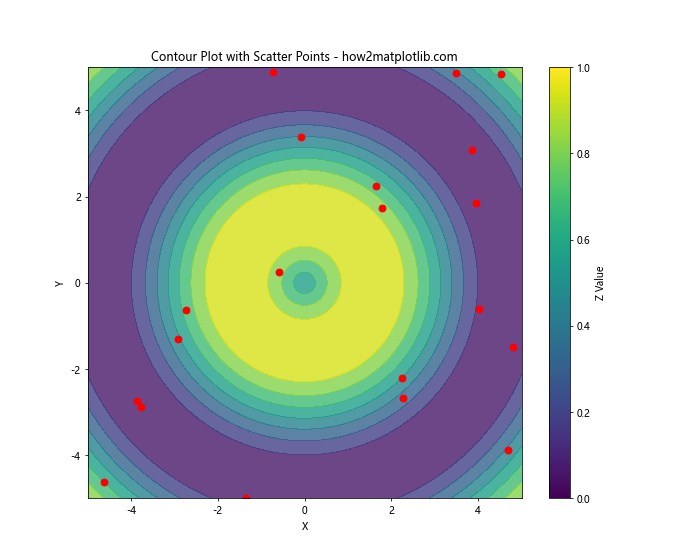
这个例子在填充的等高线图上添加了20个随机散点。
4.2 等高线和向量场
我们可以将等高线图与向量场结合:
import numpy as np
import matplotlib.pyplot as plt

x = np.linspace(-5, 5, 20)
y = np.linspace(-5, 5, 20)
X, Y = np.meshgrid(x, y)
Z = np.sin(np.sqrt(X**2 + Y**2))
U = -Y / (X**2 + Y**2)
V = X / (X**2 + Y**2)

plt.figure(figsize=(10, 8))
plt.contourf(X, Y, Z, cmap='viridis', alpha=0.8)
plt.quiver(X, Y, U, V, scale=50)
plt.title('Contour Plot with Vector Field - how2matplotlib.com')
plt.xlabel('X')
plt.ylabel('Y')
plt.colorbar(label='Z Value')
plt.show()
Output:
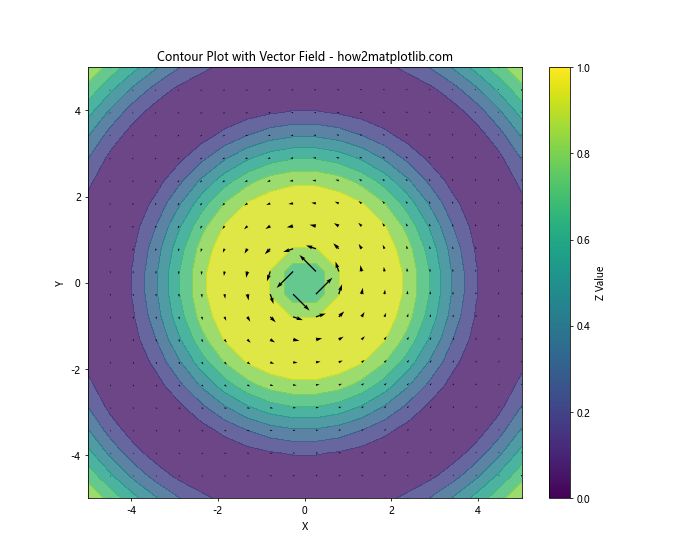
这个例子结合了填充等高线图和向量场。向量场使用quiver()函数绘制。
5. 3D等高线图
Matplotlib还支持在3D空间中绘制等高线图。
5.1 基本3D等高线图
使用contour3D()函数可以在3D空间中绘制等高线:
import numpy as np
import matplotlib.pyplot as plt
from mpl_toolkits.mplot3d import Axes3D

x = np.linspace(-5, 5, 100)
y = np.linspace(-5, 5, 100)
X, Y = np.meshgrid(x, y)
Z = np.sin(np.sqrt(X**2 + Y**2))

fig = plt.figure(figsize=(10, 8))
ax = fig.add_subplot(111, projection='3d')
ax.contour3D(X, Y, Z, 50)
ax.set_title('3D Contour Plot - how2matplotlib.com')
ax.set_xlabel('X')
ax.set_ylabel('Y')
ax.set_zlabel('Z')
plt.show()
Output:
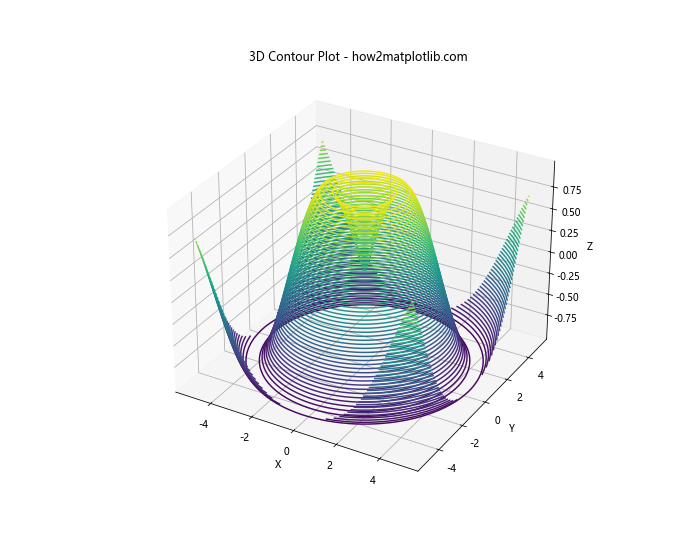
这个例子在3D空间中绘制了等高线图。
5.2 3D表面图和等高线
我们可以将3D表面图和等高线结合:
import numpy as np
import matplotlib.pyplot as plt
from mpl_toolkits.mplot3d import Axes3D

x = np.linspace(-5, 5, 100)
y = np.linspace(-5, 5, 100)
X, Y = np.meshgrid(x, y)
Z = np.sin(np.sqrt(X**2 + Y**2))

fig = plt.figure(figsize=(10, 8))
ax = fig.add_subplot(111, projection='3d')
surf = ax.plot_surface(X, Y, Z, cmap='viridis', alpha=0.8)
ax.contour(X, Y, Z, zdir='z', offset=-1, cmap='viridis')
ax.set_title('3D Surface with Contour - how2matplotlib.com')
ax.set_xlabel('X')
ax.set_ylabel('Y')
ax.set_zlabel('Z')
ax.set_zlim(-1, 1)
fig.colorbar(surf, shrink=0.5, aspect=5)
plt.show()
Output:
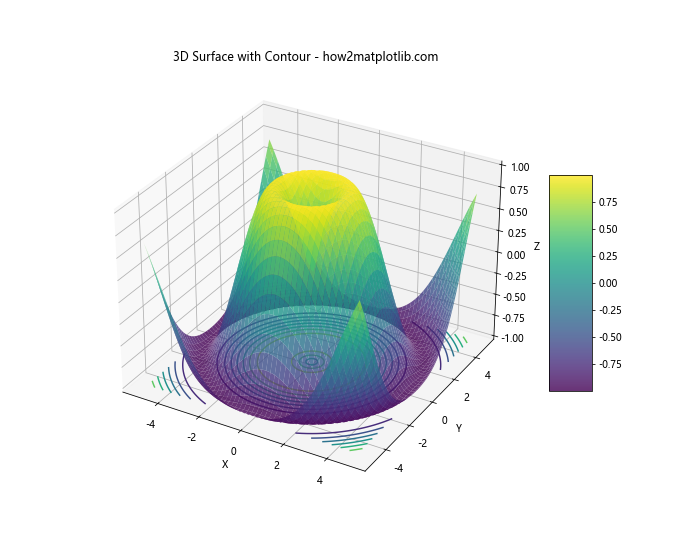
这个例子结合了3D表面图和在底部投影的等高线图。
6. 高级技巧
6.1 等高线平滑
有时候,我们可能需要平滑等高线以获得更好的视觉效果:
import numpy as np
import matplotlib.pyplot as plt
from scipy.ndimage import gaussian_filter

x = np.linspace(-5, 5, 100)
y = np.linspace(-5, 5, 100)
X, Y = np.meshgrid(x, y)
Z = np.sin(np.sqrt(X**2 + Y**2))

Z_smooth = gaussian_filter(Z, sigma=1)

plt.figure(figsize=(12, 5))
plt.subplot(121)
plt.contourf(X, Y, Z, cmap='viridis')
plt.title('Original Contour - how2matplotlib.com')
plt.subplot(122)
plt.contourf(X, Y, Z_smooth, cmap='viridis')
plt.title('Smoothed Contour - how2matplotlib.com')
plt.tight_layout()
plt.show()
Output:
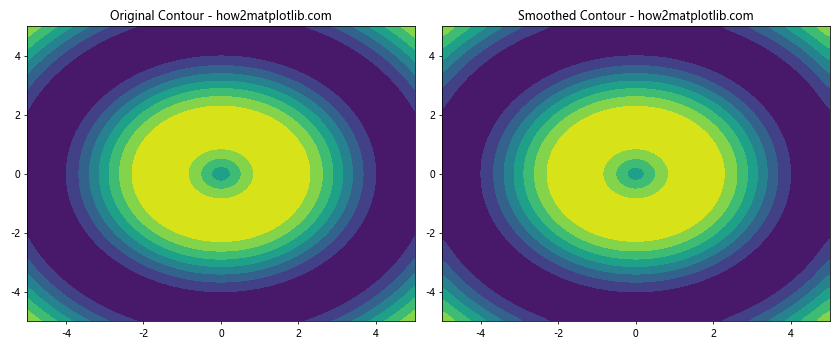
这个例子使用scipy.ndimage.gaussian_filter函数来平滑等高线数据。
6.2 等高线插值
当数据点较少时,我们可能需要进行插值以获得更平滑的等高线:
import numpy as np
import matplotlib.pyplot as plt
from scipy.interpolate import griddata

# 生成稀疏数据
np.random.seed(0)
x = np.random.rand(100) * 4 - 2
y = np.random.rand(100) * 4 - 2
z = x*np.exp(-x**2 - y**2)

# 创建网格
xi = np.linspace(-2, 2, 100)
yi = np.linspace(-2, 2, 100)
Xi, Yi = np.meshgrid(xi, yi)

# 插值
Zi = griddata((x, y), z, (Xi, Yi), method='cubic')

plt.figure(figsize=(10, 8))
plt.contourf(Xi, Yi, Zi, cmap='viridis')
plt.scatter(x, y, c='red', s=5)
plt.title('Interpolated Contour Plot - how2matplotlib.com')
plt.xlabel('X')
plt.ylabel('Y')
plt.colorbar(label='Z Value')
plt.show()
Output:
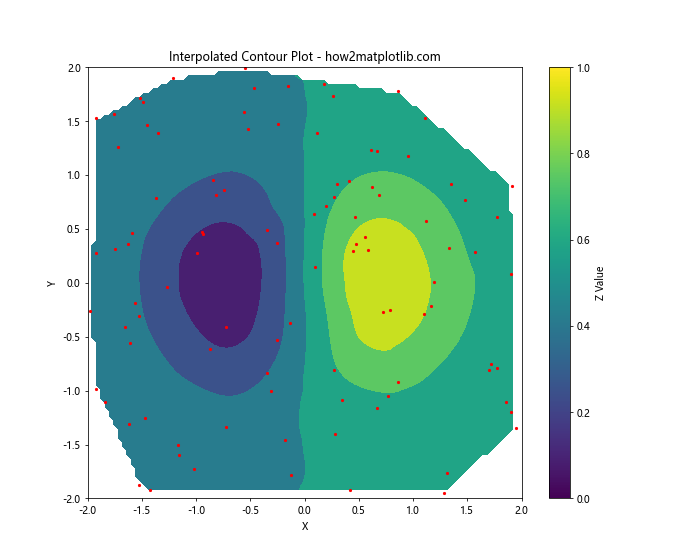
这个例子使用scipy.interpolate.griddata函数对稀疏数据进行插值,然后绘制等高线图。
6.3 等高线动画
我们可以创建等高线的动画效果:
import numpy as np
import matplotlib.pyplot as plt
from matplotlib.animation import FuncAnimation

x = np.linspace(-5, 5, 100)
y = np.linspace(-5, 5, 100)
X, Y = np.meshgrid(x, y)

fig, ax = plt.subplots(figsize=(10, 8))

def animate(i):
    Z = np.sin(np.sqrt(X**2 + Y**2) - i * 0.1)
    ax.clear()
    cs = ax.contourf(X, Y, Z, cmap='viridis')
    ax.set_title(f'Animated Contour Plot - Frame {i} - how2matplotlib.com')
    ax.set_xlabel('X')
    ax.set_ylabel('Y')
    return cs

anim = FuncAnimation(fig, animate, frames=100, interval=50, blit=False)
plt.show()
这个例子创建了一个简单的等高线动画,通过改变Z值的计算方式来实现动画效果。
7. 实际应用案例
7.1 地形图
等高线图在地形可视化中有广泛应用。以下是一个简单的地形图示例:
import numpy as np
import matplotlib.pyplot as plt

def terrain(x, y):
    return np.sin(x*0.1) + np.cos(y*0.1) + np.random.rand(x.shape[0], y.shape[0])*0.1

x = np.linspace(0, 50, 100)
y = np.linspace(0, 50, 100)
X, Y = np.meshgrid(x, y)
Z = terrain(X, Y)

plt.figure(figsize=(12, 8))
cs = plt.contourf(X, Y, Z, levels=20, cmap='terrain')
plt.colorbar(cs, label='Elevation')
plt.title('Terrain Contour Map - how2matplotlib.com')
plt.xlabel('X (km)')
plt.ylabel('Y (km)')
plt.show()
这个例子模拟了一个简单的地形,并使用等高线图来可视化地形高度。
7.2 气象图
等高线图在气象学中也有重要应用。以下是一个简单的气压图示例:
import numpy as np
import matplotlib.pyplot as plt

def pressure_field(x, y):
    return 1013 + 10*np.sin(x*0.1) + 10*np.cos(y*0.1) + np.random.rand(x.shape[0], y.shape[0])*2

x = np.linspace(0, 100, 100)
y = np.linspace(0, 100, 100)
X, Y = np.meshgrid(x, y)
P = pressure_field(X, Y)

plt.figure(figsize=(12, 8))
cs = plt.contour(X, Y, P, levels=15, colors='black', linewidths=0.5)
plt.clabel(cs, inline=True, fontsize=8, fmt='%1.0f')
plt.contourf(X, Y, P, levels=15, cmap='RdYlBu_r', alpha=0.7)
plt.colorbar(label='Pressure (hPa)')
plt.title('Atmospheric Pressure Contour Map - how2matplotlib.com')
plt.xlabel('Longitude')
plt.ylabel('Latitude')
plt.show()
这个例子模拟了一个简单的气压场,并使用等高线图来可视化气压分布。
8. 性能优化
当处理大量数据时,等高线图的绘制可能会变得很慢。以下是一些优化技巧:
8.1 减少数据点
如果可能的话,减少数据点可以显著提高性能:
import numpy as np
import matplotlib.pyplot as plt
import time

def plot_contour(n):
    x = np.linspace(-5, 5, n)
    y = np.linspace(-5, 5, n)
    X, Y = np.meshgrid(x, y)
    Z = np.sin(np.sqrt(X**2 + Y**2))

    start_time = time.time()
    plt.figure(figsize=(10, 8))
    plt.contourf(X, Y, Z)
    plt.title(f'Contour Plot with {n}x{n} points - how2matplotlib.com')
    plt.xlabel('X')
    plt.ylabel('Y')
    end_time = time.time()

    print(f"Time taken for {n}x{n} points: {end_time - start_time:.2f} seconds")

plot_contour(100)
plot_contour(500)
这个例子比较了不同数据点数量对绘图时间的影响。
8.2 使用适当的等高线级别
减少等高线的数量也可以提高性能:
import numpy as np
import matplotlib.pyplot as plt
import time

x = np.linspace(-5, 5, 500)
y = np.linspace(-5, 5, 500)
X, Y = np.meshgrid(x, y)
Z = np.sin(np.sqrt(X**2 + Y**2))

def plot_contour(levels):
    start_time = time.time()
    plt.figure(figsize=(10, 8))
    plt.contourf(X, Y, Z, levels=levels)
    plt.title(f'Contour Plot with {levels} levels - how2matplotlib.com')
    plt.xlabel('X')
    plt.ylabel('Y')
    end_time = time.time()

    print(f"Time taken for {levels} levels: {end_time - start_time:.2f} seconds")

plot_contour(10)
plot_contour(50)
这个例子比较了不同等高线级别数量对绘图时间的影响。
9. 常见问题和解决方案
9.1 等高线不平滑
如果等高线看起来不平滑,可以尝试增加数据点或使用插值:
import numpy as np
import matplotlib.pyplot as plt
from scipy.interpolate import griddata

# 原始数据
x = np.linspace(-5, 5, 20)
y = np.linspace(-5, 5, 20)
X, Y = np.meshgrid(x, y)
Z = np.sin(np.sqrt(X**2 + Y**2))

# 插值
xi = np.linspace(-5, 5, 100)
yi = np.linspace(-5, 5, 100)
Xi, Yi = np.meshgrid(xi, yi)
Zi = griddata((X.flatten(), Y.flatten()), Z.flatten(), (Xi, Yi), method='cubic')

plt.figure(figsize=(12, 5))
plt.subplot(121)
plt.contourf(X, Y, Z)
plt.title('Original Contour - how2matplotlib.com')
plt.subplot(122)
plt.contourf(Xi, Yi, Zi)
plt.title('Interpolated Contour - how2matplotlib.com')
plt.tight_layout()
plt.show()
这个例子展示了如何使用插值来获得更平滑的等高线。
9.2 等高线标签重叠
当等高线很密集时,标签可能会重叠。可以通过调整标签间距来解决:
import numpy as np
import matplotlib.pyplot as plt

x = np.linspace(-5, 5, 100)
y = np.linspace(-5, 5, 100)
X, Y = np.meshgrid(x, y)
Z = np.sin(np.sqrt(X**2 + Y**2))

plt.figure(figsize=(10, 8))
CS = plt.contour(X, Y, Z, levels=20)
plt.clabel(CS, inline=True, fontsize=8, inline_spacing=10)
plt.title('Contour Plot with Adjusted Label Spacing - how2matplotlib.com')
plt.xlabel('X')
plt.ylabel('Y')
plt.show()
这个例子通过调整inline_spacing参数来减少标签重叠。
10. 总结
Matplotlib的等高线绘制功能强大而灵活,可以应用于各种数据可视化场景。从基本的2D等高线图到复杂的3D可视化,从简单的数据展示到动态动画,等高线图都能胜任。通过本文的详细介绍和丰富的示例,相信你已经掌握了使用Matplotlib绘制等高线图的核心技巧。
记住,数据可视化不仅仅是技术,更是一门艺术。在实际应用中,要根据数据的特性和目标受众的需求来选择合适的可视化方式。等高线图虽然强大,但并不是所有场景下的最佳选择。要灵活运用,结合其他图表类型,才能创造出最有效的数据可视化作品。
 极客笔记
极客笔记