Matplotlib中如何在条形图上显示百分比标签
参考:Display percentage above bar chart in Matplotlib
Matplotlib是Python中最流行的数据可视化库之一,它提供了丰富的绘图功能,包括创建条形图。在数据分析和展示中,我们经常需要在条形图上显示百分比标签,以便更直观地展示数据的比例关系。本文将详细介绍如何在Matplotlib中的条形图上显示百分比标签,包括各种常见场景和技巧。
1. 基础条形图及百分比标签
首先,让我们从最基本的条形图开始,然后逐步添加百分比标签。
1.1 创建简单的条形图
以下是创建一个简单条形图的示例代码:
import matplotlib.pyplot as plt

categories = ['A', 'B', 'C', 'D']
values = [25, 40, 30, 55]

plt.figure(figsize=(10, 6))
plt.bar(categories, values)
plt.title('Simple Bar Chart - how2matplotlib.com')
plt.xlabel('Categories')
plt.ylabel('Values')
plt.show()
Output:
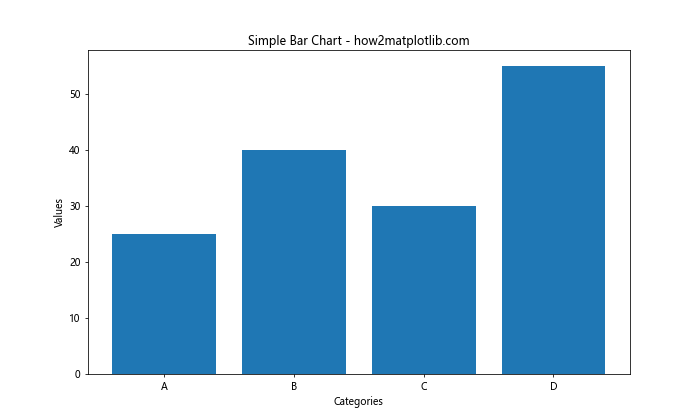
这段代码创建了一个基本的条形图,包含四个类别和对应的数值。
1.2 添加简单的百分比标签
现在,让我们在条形图上添加百分比标签:
import matplotlib.pyplot as plt

categories = ['A', 'B', 'C', 'D']
values = [25, 40, 30, 55]

fig, ax = plt.subplots(figsize=(10, 6))
bars = ax.bar(categories, values)

for bar in bars:
    height = bar.get_height()
    ax.text(bar.get_x() + bar.get_width()/2, height,
            f'{height/sum(values):.1%}',
            ha='center', va='bottom')

plt.title('Bar Chart with Percentage Labels - how2matplotlib.com')
plt.xlabel('Categories')
plt.ylabel('Values')
plt.show()
Output:
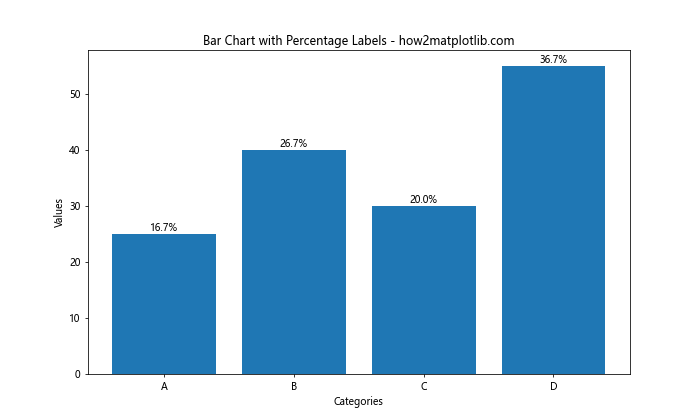
在这个例子中,我们遍历每个条形,计算其高度占总和的百分比,并使用ax.text()方法在每个条形上方添加文本标签。
2. 自定义百分比标签样式
为了使百分比标签更加美观和易读,我们可以自定义标签的样式。
2.1 调整标签位置
import matplotlib.pyplot as plt

categories = ['A', 'B', 'C', 'D']
values = [25, 40, 30, 55]

fig, ax = plt.subplots(figsize=(10, 6))
bars = ax.bar(categories, values)

for bar in bars:
    height = bar.get_height()
    ax.text(bar.get_x() + bar.get_width()/2, height,
            f'{height/sum(values):.1%}',
            ha='center', va='bottom', fontweight='bold', fontsize=12)

plt.title('Bar Chart with Custom Label Style - how2matplotlib.com')
plt.xlabel('Categories')
plt.ylabel('Values')
plt.ylim(0, max(values) * 1.1)  # Increase y-axis limit to accommodate labels
plt.show()
Output:
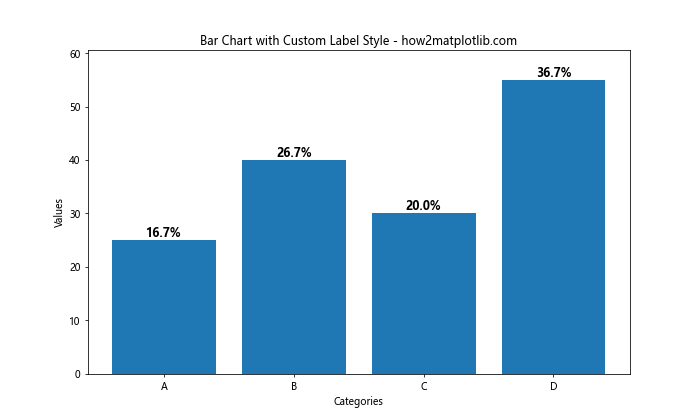
在这个例子中,我们调整了标签的字体粗细、大小,并增加了y轴的范围以确保标签不会被截断。
2.2 添加背景色和边框
为了使标签更加突出,我们可以为其添加背景色和边框:
import matplotlib.pyplot as plt

categories = ['A', 'B', 'C', 'D']
values = [25, 40, 30, 55]

fig, ax = plt.subplots(figsize=(10, 6))
bars = ax.bar(categories, values)

for bar in bars:
    height = bar.get_height()
    ax.text(bar.get_x() + bar.get_width()/2, height,
            f'{height/sum(values):.1%}',
            ha='center', va='bottom', fontweight='bold', fontsize=12,
            bbox=dict(facecolor='white', edgecolor='gray', alpha=0.8, pad=2))

plt.title('Bar Chart with Styled Percentage Labels - how2matplotlib.com')
plt.xlabel('Categories')
plt.ylabel('Values')
plt.ylim(0, max(values) * 1.1)
plt.show()
Output:
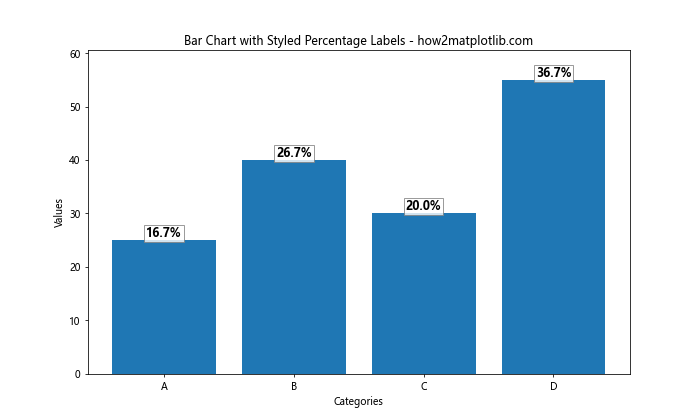
这个例子中,我们使用bbox参数为标签添加了白色背景和灰色边框,使标签更加醒目。
3. 处理负值和零值
在实际应用中,我们可能会遇到包含负值或零值的数据。这些情况需要特殊处理。
3.1 处理负值
import matplotlib.pyplot as plt

categories = ['A', 'B', 'C', 'D', 'E']
values = [25, -15, 30, 0, -10]

fig, ax = plt.subplots(figsize=(10, 6))
bars = ax.bar(categories, values)

for bar in bars:
    height = bar.get_height()
    y_value = height if height >= 0 else height - 0.5
    ax.text(bar.get_x() + bar.get_width()/2, y_value,
            f'{height/sum(abs(v) for v in values):.1%}',
            ha='center', va='bottom' if height >= 0 else 'top',
            fontweight='bold', fontsize=12)

plt.title('Bar Chart with Negative Values - how2matplotlib.com')
plt.xlabel('Categories')
plt.ylabel('Values')
plt.axhline(y=0, color='k', linestyle='-', linewidth=0.5)
plt.show()
Output:
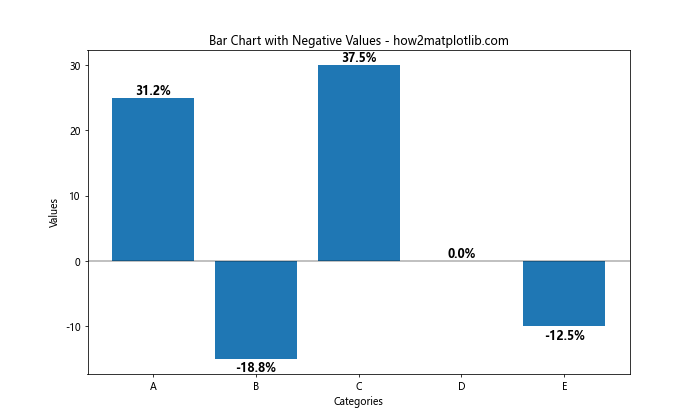
在这个例子中,我们调整了标签的位置,使其在负值条形下方显示。同时,我们添加了一条水平线来表示零点。
3.2 处理零值
import matplotlib.pyplot as plt

categories = ['A', 'B', 'C', 'D', 'E']
values = [25, 40, 0, 30, 55]

fig, ax = plt.subplots(figsize=(10, 6))
bars = ax.bar(categories, values)

for bar in bars:
    height = bar.get_height()
    if height > 0:
        ax.text(bar.get_x() + bar.get_width()/2, height,
                f'{height/sum(values):.1%}',
                ha='center', va='bottom', fontweight='bold', fontsize=12)
    elif height == 0:
        ax.text(bar.get_x() + bar.get_width()/2, 0.5,
                '0%', ha='center', va='bottom', fontweight='bold', fontsize=12)

plt.title('Bar Chart with Zero Values - how2matplotlib.com')
plt.xlabel('Categories')
plt.ylabel('Values')
plt.ylim(0, max(values) * 1.1)
plt.show()
Output:
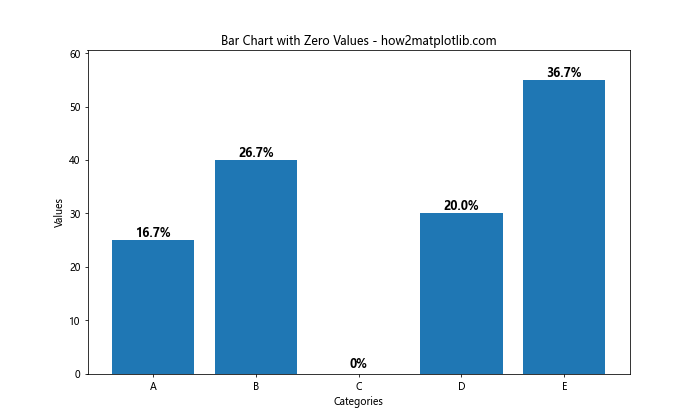
这个例子展示了如何处理零值,我们为零值条形添加了特殊的标签处理。
4. 堆叠条形图中的百分比标签
堆叠条形图是另一种常见的图表类型,在这种图表中显示百分比标签需要特殊处理。
4.1 基本堆叠条形图
import matplotlib.pyplot as plt
import numpy as np

categories = ['A', 'B', 'C', 'D']
values1 = [20, 35, 30, 35]
values2 = [25, 25, 15, 30]
values3 = [15, 15, 10, 20]

fig, ax = plt.subplots(figsize=(10, 6))
bars1 = ax.bar(categories, values1, label='Group 1')
bars2 = ax.bar(categories, values2, bottom=values1, label='Group 2')
bars3 = ax.bar(categories, values3, bottom=np.array(values1) + np.array(values2), label='Group 3')

ax.set_ylabel('Values')
ax.set_title('Stacked Bar Chart - how2matplotlib.com')
ax.legend()

plt.show()
Output:
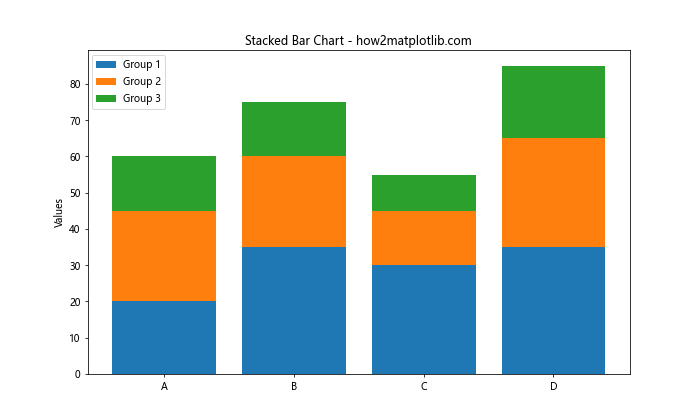
这个例子创建了一个基本的堆叠条形图,包含三组数据。
4.2 在堆叠条形图中添加百分比标签
import matplotlib.pyplot as plt
import numpy as np

categories = ['A', 'B', 'C', 'D']
values1 = [20, 35, 30, 35]
values2 = [25, 25, 15, 30]
values3 = [15, 15, 10, 20]

fig, ax = plt.subplots(figsize=(10, 6))
bars1 = ax.bar(categories, values1, label='Group 1')
bars2 = ax.bar(categories, values2, bottom=values1, label='Group 2')
bars3 = ax.bar(categories, values3, bottom=np.array(values1) + np.array(values2), label='Group 3')

def add_labels(bars, values, bottom=None):
    for bar, value in zip(bars, values):
        height = bar.get_height()
        if bottom is None:
            y_value = height / 2
        else:
            y_value = bottom + height / 2
        ax.text(bar.get_x() + bar.get_width()/2, y_value,
                f'{value/sum(values1+values2+values3):.1%}',
                ha='center', va='center', fontweight='bold', fontsize=10)

add_labels(bars1, values1)
add_labels(bars2, values2, np.array(values1))
add_labels(bars3, values3, np.array(values1) + np.array(values2))

ax.set_ylabel('Values')
ax.set_title('Stacked Bar Chart with Percentage Labels - how2matplotlib.com')
ax.legend()

plt.show()
在这个例子中,我们定义了一个辅助函数add_labels来为每组堆叠的条形添加百分比标签。标签位于每个条形的中心,显示该部分占总和的百分比。
5. 水平条形图中的百分比标签
水平条形图是条形图的另一种变体,在某些情况下更适合展示数据。
5.1 基本水平条形图
import matplotlib.pyplot as plt

categories = ['Category A', 'Category B', 'Category C', 'Category D', 'Category E']
values = [25, 40, 30, 55, 60]

fig, ax = plt.subplots(figsize=(10, 6))
bars = ax.barh(categories, values)

ax.set_xlabel('Values')
ax.set_title('Horizontal Bar Chart - how2matplotlib.com')

plt.show()
Output:
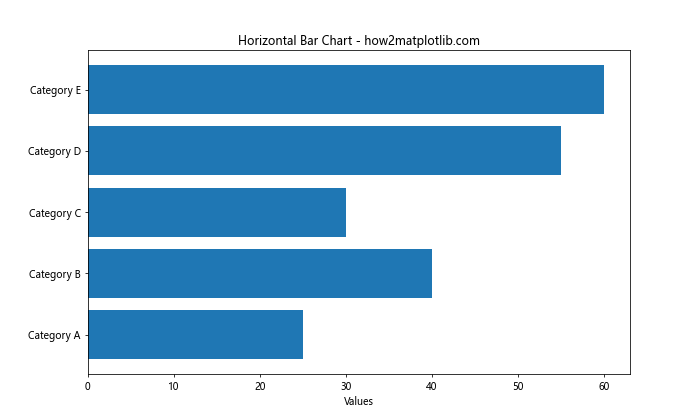
这个例子创建了一个基本的水平条形图。
5.2 在水平条形图中添加百分比标签
import matplotlib.pyplot as plt

categories = ['Category A', 'Category B', 'Category C', 'Category D', 'Category E']
values = [25, 40, 30, 55, 60]

fig, ax = plt.subplots(figsize=(10, 6))
bars = ax.barh(categories, values)

for bar in bars:
    width = bar.get_width()
    ax.text(width, bar.get_y() + bar.get_height()/2,
            f'{width/sum(values):.1%}',
            ha='left', va='center', fontweight='bold', fontsize=10,
            bbox=dict(facecolor='white', edgecolor='gray', alpha=0.8, pad=2))

ax.set_xlabel('Values')
ax.set_title('Horizontal Bar Chart with Percentage Labels - how2matplotlib.com')
plt.xlim(0, max(values) * 1.1)

plt.show()
Output:
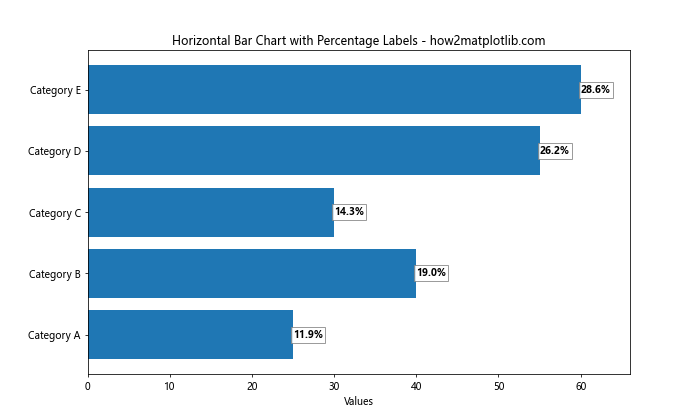
在这个例子中,我们在每个水平条形的右侧添加了百分比标签,并使用bbox参数为标签添加了背景和边框。
6. 动态调整标签位置
在某些情况下,条形的高度可能会有很大差异,这时我们需要动态调整标签的位置以确保它们都能清晰可见。
import matplotlib.pyplot as plt

categories = ['A', 'B', 'C', 'D', 'E']
values = [5, 20, 80, 40, 95]

fig, ax = plt.subplots(figsize=(10, 6))
bars = ax.bar(categories, values)

for bar in bars:
    height = bar.get_height()
    percentage = height / sum(values)
    if percentage < 0.1:  # 如果百分比小于10%,将标签放在条形上方
        ax.text(bar.get_x() + bar.get_width()/2, height,
                f'{percentage:.1%}',
                ha='center', va='bottom', fontweight='bold', fontsize=10)
    else:  # 否则将标签放在条形内部
        ax.text(bar.get_x() + bar.get_width()/2, height/2,
                f'{percentage:.1%}',
                ha='center', va='center', fontweight='bold', fontsize=10,
                color='white')

plt.title('Bar Chart with Dynamic Label Placement - how2matplotlib.com')
plt.xlabel('Categories')
plt.ylabel('Values')
plt.ylim(0, max(values) * 1.1)
plt.show()
Output:
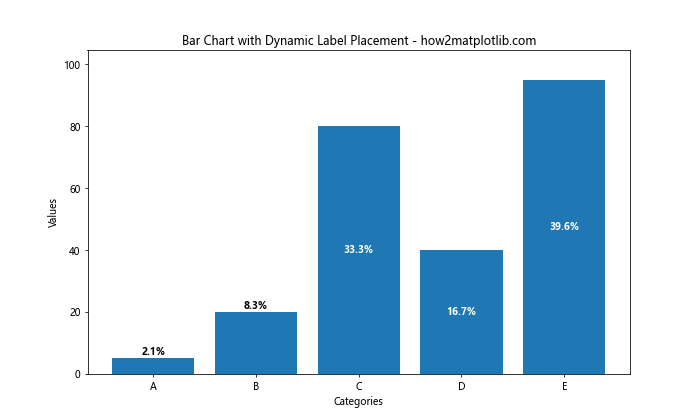
在这个例子中,我们根据条形的高度(即百分比的大小)来决定标签的位置。对于较小的值,标签放在条形上方;对于较大的值,标签放在条形内部,并使用白色以提高可读性。
7. 使用自定义颜色和渐变
为了使图表更加吸引人,我们可以使用自定义颜色和渐变效果。
7.1 使用自定义颜色
import matplotlib.pyplot as plt

categories = ['A', 'B', 'C', 'D', 'E']
values = [25, 40, 30, 55, 60]
colors = ['#FF9999', '#66B2FF', '#99FF99', '#FFCC99', '#FF99CC']

fig, ax = plt.subplots(figsize=(10, 6))
bars = ax.bar(categories, values, color=colors)

for bar in bars:
    height = bar.get_height()
    ax.text(bar.get_x() + bar.get_width()/2, height,
            f'{height/sum(values):.1%}',
            ha='center', va='bottom', fontweight='bold', fontsize=10)

plt.title('Bar Chart with Custom Colors - how2matplotlib.com')
plt.xlabel('Categories')
plt.ylabel('Values')
plt.ylim(0, max(values) * 1.1)
plt.show()
Output:
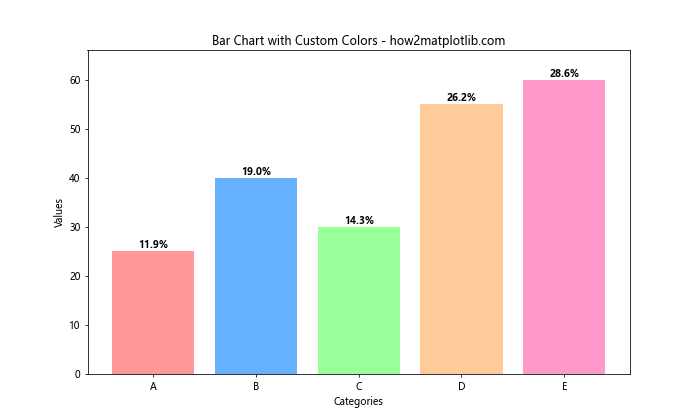
在这个例子中,我们为每个条形指定了不同的颜色,使图表更加丰富多彩。
7.2 使用颜色渐变
import matplotlib.pyplot as plt
import matplotlib.colors as mcolors

categories = ['A', 'B', 'C', 'D', 'E']
values = [25, 40, 30, 55, 60]

# 创建颜色渐变
cmap = plt.get_cmap('coolwarm')
norm = mcolors.Normalize(vmin=min(values), vmax=max(values))
colors = [cmap(norm(value)) for value in values]

fig, ax = plt.subplots(figsize=(10, 6))
bars = ax.bar(categories, values, color=colors)

for bar in bars:
    height = bar.get_height()
    ax.text(bar.get_x() + bar.get_width()/2, height,
            f'{height/sum(values):.1%}',
            ha='center', va='bottom', fontweight='bold', fontsize=10)

plt.title('Bar Chart with Color Gradient - how2matplotlib.com')
plt.xlabel('Categories')
plt.ylabel('Values')
plt.ylim(0, max(values) * 1.1)

# 添加颜色条
sm = plt.cm.ScalarMappable(cmap=cmap, norm=norm)
sm.set_array([])
plt.colorbar(sm)

plt.show()
这个例子使用了颜色渐变来表示数值的大小,并添加了一个颜色条来解释颜色的含义。
8. 处理大量数据
当处理大量数据时,我们需要考虑如何使图表保持清晰和可读性。
8.1 旋转标签
import matplotlib.pyplot as plt
import numpy as np

categories = [f'Category {i}' for i in range(20)]
values = np.random.randint(10, 100, 20)

fig, ax = plt.subplots(figsize=(15, 8))
bars = ax.bar(categories, values)

for bar in bars:
    height = bar.get_height()
    ax.text(bar.get_x() + bar.get_width()/2, height,
            f'{height/sum(values):.1%}',
            ha='center', va='bottom', fontweight='bold', fontsize=8, rotation=90)

plt.title('Bar Chart with Rotated Labels - how2matplotlib.com')
plt.xlabel('Categories')
plt.ylabel('Values')
plt.xticks(rotation=45, ha='right')
plt.ylim(0, max(values) * 1.2)
plt.tight_layout()
plt.show()
Output:
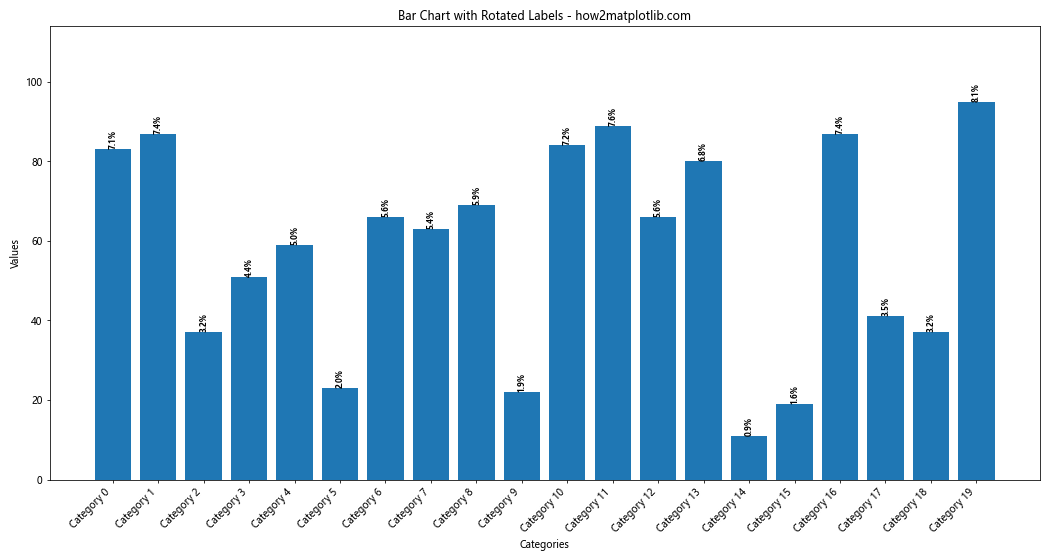
在这个例子中,我们旋转了x轴的标签和百分比标签,以适应更多的类别。
8.2 使用对数刻度
当数据范围很大时,使用对数刻度可以更好地展示数据:
import matplotlib.pyplot as plt
import numpy as np

categories = [f'Category {i}' for i in range(10)]
values = np.random.randint(1, 10000, 10)

fig, ax = plt.subplots(figsize=(12, 6))
bars = ax.bar(categories, values)

for bar in bars:
    height = bar.get_height()
    ax.text(bar.get_x() + bar.get_width()/2, height,
            f'{height/sum(values):.1%}',
            ha='center', va='bottom', fontweight='bold', fontsize=8)

plt.title('Bar Chart with Logarithmic Scale - how2matplotlib.com')
plt.xlabel('Categories')
plt.ylabel('Values (log scale)')
plt.yscale('log')
plt.xticks(rotation=45, ha='right')
plt.tight_layout()
plt.show()
Output:
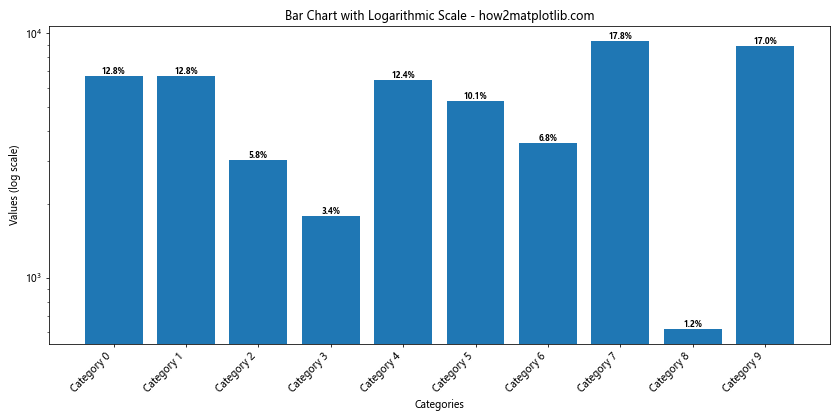
这个例子使用了对数刻度来展示范围很大的数据,同时保留了百分比标签。
9. 组合图表
有时,我们可能需要在同一个图表中组合多种类型的可视化。
9.1 条形图和折线图的组合
import matplotlib.pyplot as plt

categories = ['A', 'B', 'C', 'D', 'E']
bar_values = [25, 40, 30, 55, 60]
line_values = [30, 45, 35, 50, 65]

fig, ax1 = plt.subplots(figsize=(10, 6))

# 绘制条形图
bars = ax1.bar(categories, bar_values, color='skyblue')
ax1.set_xlabel('Categories')
ax1.set_ylabel('Bar Values', color='skyblue')
ax1.tick_params(axis='y', labelcolor='skyblue')

# 添加百分比标签
for bar in bars:
    height = bar.get_height()
    ax1.text(bar.get_x() + bar.get_width()/2, height,
             f'{height/sum(bar_values):.1%}',
             ha='center', va='bottom', fontweight='bold', fontsize=10)

# 创建第二个y轴
ax2 = ax1.twinx()

# 绘制折线图
line = ax2.plot(categories, line_values, color='orange', marker='o')
ax2.set_ylabel('Line Values', color='orange')
ax2.tick_params(axis='y', labelcolor='orange')

plt.title('Combined Bar and Line Chart - how2matplotlib.com')
plt.tight_layout()
plt.show()
Output:
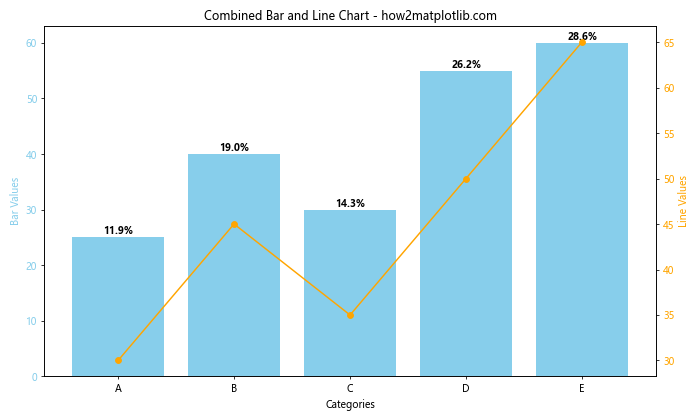
这个例子展示了如何在同一个图表中组合条形图和折线图,同时保留条形图上的百分比标签。
10. 交互式图表
虽然Matplotlib主要用于静态图表,但我们也可以创建简单的交互式图表。
10.1 使用滑块调整数据
import matplotlib.pyplot as plt
from matplotlib.widgets import Slider
import numpy as np

# 初始数据
categories = ['A', 'B', 'C', 'D']
initial_values = [25, 40, 30, 55]

fig, ax = plt.subplots(figsize=(10, 8))
plt.subplots_adjust(bottom=0.25)

bars = ax.bar(categories, initial_values)

def update_labels():
    for bar in bars:
        height = bar.get_height()
        ax.text(bar.get_x() + bar.get_width()/2, height,
                f'{height/sum([b.get_height() for b in bars]):.1%}',
                ha='center', va='bottom', fontweight='bold', fontsize=10)

update_labels()

ax.set_title('Interactive Bar Chart - how2matplotlib.com')
ax.set_xlabel('Categories')
ax.set_ylabel('Values')

# 创建滑块
slider_axes = [plt.axes([0.1, 0.05 + 0.03*i, 0.65, 0.03]) for i in range(4)]
sliders = [Slider(ax, f'Category {cat}', 0, 100, valinit=val) for ax, cat, val in zip(slider_axes, categories, initial_values)]

def update(val):
    for bar, slider in zip(bars, sliders):
        bar.set_height(slider.val)
    ax.texts.clear()
    update_labels()
    fig.canvas.draw_idle()

for slider in sliders:
    slider.on_changed(update)

plt.show()
Output:
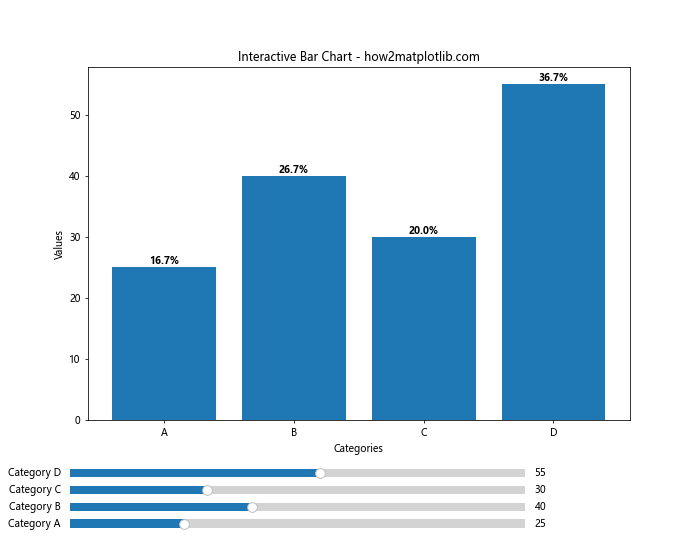
这个例子创建了一个交互式的条形图,用户可以通过滑块调整每个类别的值,百分比标签会实时更新。
结论
在Matplotlib中为条形图添加百分比标签是一个强大的数据可视化技巧,它可以让你的图表更加信息丰富和直观。通过本文介绍的各种方法和技巧,你可以根据具体需求创建出既美观又实用的条形图。
记住,好的数据可视化不仅仅是展示数据,更是讲述数据背后的故事。通过合理使用颜色、布局和标签,你可以创建出既能吸引观众注意力,又能清晰传达信息的图表。
在实际应用中,你可能需要根据具体的数据特征和展示需求来调整这些方法。不断实践和尝试新的可视化技巧,将帮助你更好地掌握Matplotlib,创造出更加出色的数据可视化作品。
最后,希望这篇文章能够帮助你更好地理解和使用Matplotlib中的条形图百分比标签功能。随着你对Matplotlib的深入学习,你将能够创建出更加复杂和精美的数据可视化图表。
 极客笔记
极客笔记