Matplotlib中自定义次要刻度:仅在Y轴启用次要刻度的详细指南
参考:Customizing Minor Ticks in Matplotlib: Turning on Minor Ticks Only on the Y-Axis
Matplotlib是Python中最流行的数据可视化库之一,它提供了丰富的功能来创建各种类型的图表和绘图。在数据可视化中,刻度是一个重要的元素,它们帮助读者更好地理解和解释图表中的数据。Matplotlib允许我们自定义主要刻度和次要刻度,以增强图表的可读性和美观性。本文将深入探讨如何在Matplotlib中自定义次要刻度,特别是如何仅在Y轴上启用次要刻度。
1. 理解Matplotlib中的刻度系统
在Matplotlib中,刻度系统由主要刻度和次要刻度组成。主要刻度是默认显示的,而次要刻度通常需要手动启用。刻度不仅仅是轴上的标记,它们还包括刻度线、刻度标签和网格线。
让我们从一个基本的例子开始,展示默认的刻度设置:
import matplotlib.pyplot as plt
import numpy as np

x = np.linspace(0, 10, 100)
y = np.sin(x)

plt.figure(figsize=(10, 6))
plt.plot(x, y)
plt.title('Default Ticks in Matplotlib - how2matplotlib.com')
plt.xlabel('X-axis')
plt.ylabel('Y-axis')
plt.show()
Output:
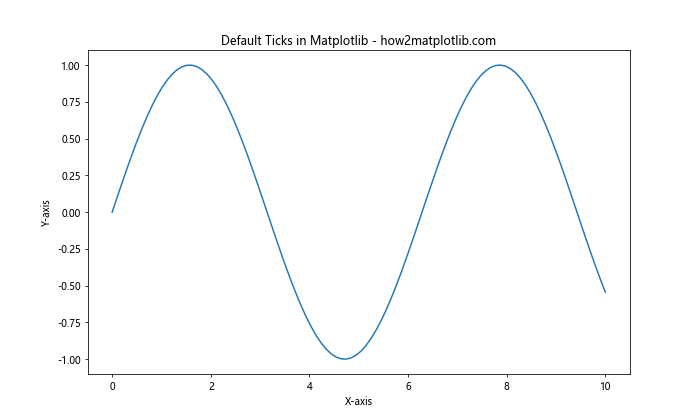
在这个例子中,我们绘制了一个简单的正弦曲线。默认情况下,只显示主要刻度,次要刻度是不可见的。
2. 启用次要刻度
要启用次要刻度,我们需要使用minorticks_on()方法。这个方法会在X轴和Y轴上都启用次要刻度。
import matplotlib.pyplot as plt
import numpy as np

x = np.linspace(0, 10, 100)
y = np.sin(x)

plt.figure(figsize=(10, 6))
plt.plot(x, y)
plt.title('Minor Ticks Enabled - how2matplotlib.com')
plt.xlabel('X-axis')
plt.ylabel('Y-axis')
plt.minorticks_on()
plt.show()
Output:
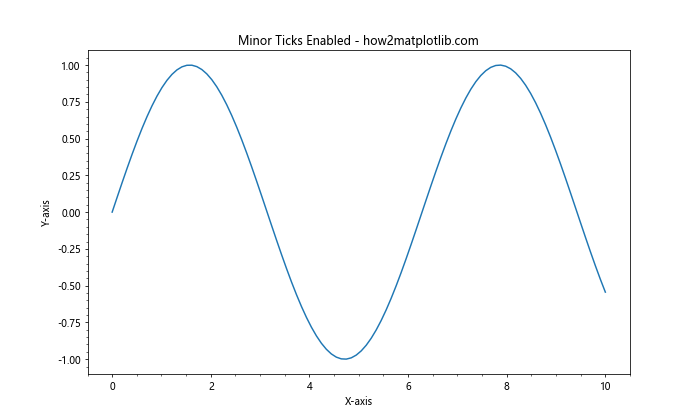
在这个例子中,我们可以看到X轴和Y轴上都出现了次要刻度。次要刻度的默认设置可能不太明显,我们可以通过自定义来使它们更加清晰。
3. 仅在Y轴启用次要刻度
有时,我们可能只想在Y轴上显示次要刻度。这可以通过获取轴对象并单独设置Y轴的次要刻度来实现。
import matplotlib.pyplot as plt
import numpy as np

x = np.linspace(0, 10, 100)
y = np.sin(x)

fig, ax = plt.subplots(figsize=(10, 6))
ax.plot(x, y)
ax.set_title('Minor Ticks Only on Y-axis - how2matplotlib.com')
ax.set_xlabel('X-axis')
ax.set_ylabel('Y-axis')

ax.yaxis.set_minor_locator(plt.AutoMinorLocator())
plt.show()
在这个例子中,我们使用ax.yaxis.set_minor_locator()方法来仅在Y轴上设置次要刻度。AutoMinorLocator()会自动计算合适的次要刻度位置。
4. 自定义次要刻度的外观
次要刻度的外观可以通过多种方式进行自定义,包括改变刻度线的长度、颜色和宽度等。
import matplotlib.pyplot as plt
import numpy as np

x = np.linspace(0, 10, 100)
y = np.sin(x)

fig, ax = plt.subplots(figsize=(10, 6))
ax.plot(x, y)
ax.set_title('Customized Minor Ticks on Y-axis - how2matplotlib.com')
ax.set_xlabel('X-axis')
ax.set_ylabel('Y-axis')

ax.yaxis.set_minor_locator(plt.AutoMinorLocator())
ax.tick_params(axis='y', which='minor', length=4, color='r', width=1.5)
plt.show()
在这个例子中,我们使用ax.tick_params()方法来自定义Y轴次要刻度的外观。我们将次要刻度的长度设置为4,颜色设置为红色,宽度设置为1.5。
5. 设置次要刻度的数量
我们可以控制主要刻度之间的次要刻度数量。这可以通过MultipleLocator来实现。
import matplotlib.pyplot as plt
import numpy as np
from matplotlib.ticker import MultipleLocator

x = np.linspace(0, 10, 100)
y = np.sin(x)

fig, ax = plt.subplots(figsize=(10, 6))
ax.plot(x, y)
ax.set_title('Controlled Number of Minor Ticks - how2matplotlib.com')
ax.set_xlabel('X-axis')
ax.set_ylabel('Y-axis')

ax.yaxis.set_minor_locator(MultipleLocator(0.1))
plt.show()
Output:
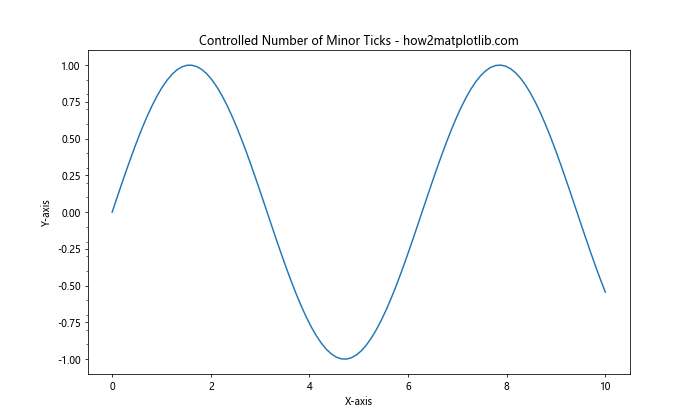
在这个例子中,我们使用MultipleLocator(0.1)来设置次要刻度的间隔为0.1。这意味着在每两个主要刻度之间会有9个次要刻度。
6. 添加次要网格线
次要刻度通常与次要网格线一起使用,以提供更详细的参考线。
import matplotlib.pyplot as plt
import numpy as np

x = np.linspace(0, 10, 100)
y = np.sin(x)

fig, ax = plt.subplots(figsize=(10, 6))
ax.plot(x, y)
ax.set_title('Minor Grid Lines - how2matplotlib.com')
ax.set_xlabel('X-axis')
ax.set_ylabel('Y-axis')

ax.yaxis.set_minor_locator(plt.AutoMinorLocator())
ax.grid(which='major', linestyle='-', linewidth='0.5', color='red')
ax.grid(which='minor', linestyle=':', linewidth='0.5', color='black')
plt.show()
在这个例子中,我们添加了主要网格线(红色实线)和次要网格线(黑色虚线)。次要网格线与Y轴的次要刻度对应。
7. 对数刻度上的次要刻度
在对数刻度上,次要刻度的设置变得特别重要,因为它们可以帮助读者更好地理解数据的分布。
import matplotlib.pyplot as plt
import numpy as np

x = np.logspace(0, 3, 100)
y = x**2

fig, ax = plt.subplots(figsize=(10, 6))
ax.plot(x, y)
ax.set_title('Minor Ticks on Logarithmic Scale - how2matplotlib.com')
ax.set_xlabel('X-axis (log scale)')
ax.set_ylabel('Y-axis (log scale)')

ax.set_xscale('log')
ax.set_yscale('log')
ax.yaxis.set_minor_locator(plt.LogLocator(subs=np.arange(2, 10)))
plt.show()
Output:
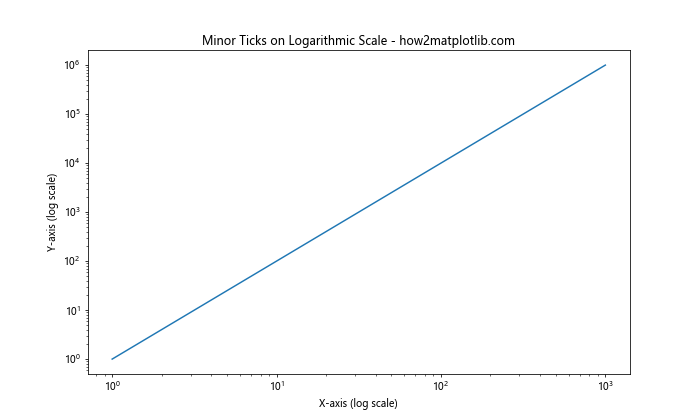
在这个例子中,我们使用对数刻度,并使用LogLocator来设置次要刻度。subs=np.arange(2, 10)参数指定了在每个主要刻度之间添加2到9的次要刻度。
8. 使用FuncFormatter自定义刻度标签
有时,我们可能需要自定义刻度标签的格式。这可以通过FuncFormatter来实现。
import matplotlib.pyplot as plt
import numpy as np
from matplotlib.ticker import FuncFormatter

def format_func(value, tick_number):
    return f'{value:.2f}°C'

x = np.linspace(0, 10, 100)
y = np.sin(x) * 20 + 25  # Temperature in Celsius

fig, ax = plt.subplots(figsize=(10, 6))
ax.plot(x, y)
ax.set_title('Custom Tick Labels - how2matplotlib.com')
ax.set_xlabel('Time (hours)')
ax.set_ylabel('Temperature')

ax.yaxis.set_minor_locator(plt.AutoMinorLocator())
ax.yaxis.set_major_formatter(FuncFormatter(format_func))
plt.show()
在这个例子中,我们创建了一个自定义函数format_func来格式化Y轴的刻度标签,将数值转换为温度表示。
9. 在极坐标图中使用次要刻度
极坐标图也可以使用次要刻度来增强可读性。
import matplotlib.pyplot as plt
import numpy as np

r = np.arange(0, 2, 0.01)
theta = 2 * np.pi * r

fig, ax = plt.subplots(figsize=(10, 10), subplot_kw=dict(projection='polar'))
ax.plot(theta, r)
ax.set_title('Minor Ticks in Polar Plot - how2matplotlib.com')

ax.yaxis.set_minor_locator(plt.AutoMinorLocator())
ax.grid(which='major', linestyle='-', linewidth='0.5', color='red')
ax.grid(which='minor', linestyle=':', linewidth='0.5', color='black')
plt.show()
在这个极坐标图例子中,我们在径向轴(Y轴)上添加了次要刻度和网格线。
10. 在3D图中使用次要刻度
Matplotlib也支持在3D图中使用次要刻度。
import matplotlib.pyplot as plt
import numpy as np
from mpl_toolkits.mplot3d import Axes3D

fig = plt.figure(figsize=(10, 8))
ax = fig.add_subplot(111, projection='3d')

x = np.arange(-5, 5, 0.25)
y = np.arange(-5, 5, 0.25)
X, Y = np.meshgrid(x, y)
Z = np.sin(np.sqrt(X**2 + Y**2))

surf = ax.plot_surface(X, Y, Z, cmap='viridis')
ax.set_title('Minor Ticks in 3D Plot - how2matplotlib.com')

ax.zaxis.set_minor_locator(plt.AutoMinorLocator())
ax.tick_params(axis='z', which='minor', length=4, color='r', width=1.5)
plt.show()
在这个3D图例子中,我们在Z轴上添加了次要刻度,并自定义了它们的外观。
11. 使用Symlog刻度
Symlog刻度是对数刻度的一种变体,它在接近零的区域使用线性刻度,在远离零的区域使用对数刻度。这对于包含正负值和零的数据特别有用。
import matplotlib.pyplot as plt
import numpy as np

x = np.linspace(-10, 10, 1000)
y = x**3 - x

fig, ax = plt.subplots(figsize=(10, 6))
ax.plot(x, y)
ax.set_title('Minor Ticks with Symlog Scale - how2matplotlib.com')
ax.set_xlabel('X-axis')
ax.set_ylabel('Y-axis (symlog scale)')

ax.set_yscale('symlog', linthresh=2)
ax.yaxis.set_minor_locator(plt.AutoMinorLocator())
plt.show()
在这个例子中,我们使用symlog刻度来显示一个立方函数。linthresh=2参数指定了线性区域的范围。
12. 在多子图中使用次要刻度
当我们有多个子图时,可能需要在不同的子图中使用不同的次要刻度设置。
import matplotlib.pyplot as plt
import numpy as np

x = np.linspace(0, 10, 100)
y1 = np.sin(x)
y2 = np.cos(x)

fig, (ax1, ax2) = plt.subplots(2, 1, figsize=(10, 10))
fig.suptitle('Minor Ticks in Multiple Subplots - how2matplotlib.com')

ax1.plot(x, y1)
ax1.set_ylabel('sin(x)')
ax1.yaxis.set_minor_locator(plt.AutoMinorLocator())

ax2.plot(x, y2)
ax2.set_ylabel('cos(x)')
ax2.set_xlabel('x')
ax2.yaxis.set_minor_locator(plt.MultipleLocator(0.1))

plt.tight_layout()
plt.show()
在这个例子中,我们创建了两个子图,上面的子图使用AutoMinorLocator,下面的子图使用MultipleLocator来设置次要刻度。
13. 使用Ticker类自定义刻度
Matplotlib的ticker模块提供了更高级的刻度定制选项。我们可以使用Ticker类来创建完全自定义的刻度。
import matplotlib.pyplot as plt
import numpy as np
from matplotlib.ticker import Ticker

class CustomTicker(Ticker):
    def __init__(self, minor_thresholds=(0.4, 0.6)):
        self.minor_thresholds = minor_thresholds

    def __call__(self):
        vmin, vmax = self.axis.get_view_interval()
        return np.array([i for i in np.arange(vmin, vmax, 0.1)
                         if i % 1 not in self.minor_thresholds])

x = np.linspace(0, 10, 100)
y = np.sin(x)

fig, ax = plt.subplots(figsize=(10, 6))
ax.plot(x, y)
ax.set_title('Custom Ticker for Minor Ticks - how2matplotlib.com')
ax.set_xlabel('X-axis')
ax.set_ylabel('Y-axis')

ax.yaxis.set_minor_locator(CustomTicker())
plt.show()
在这个例子中,我们创建了一个自定义的CustomTicker类,它生成次要刻度,但排除了特定阈值附近的刻度。这种方法允许我们对次要刻度的位置进行精细控制。
14. 动态调整次要刻度
在某些情况下,我们可能需要根据数据的范围动态调整次要刻度的数量和位置。以下是一个根据数据范围自动调整次要刻度的例子:
import matplotlib.pyplot as plt
import numpy as np

def adjust_minor_ticks(ax, num_minors):
    ax.yaxis.set_minor_locator(plt.AutoMinorLocator(num_minors))

x = np.linspace(0, 10, 100)
y = np.exp(x/2)

fig, ax = plt.subplots(figsize=(10, 6))
ax.plot(x, y)
ax.set_title('Dynamic Minor Ticks Adjustment - how2matplotlib.com')
ax.set_xlabel('X-axis')
ax.set_ylabel('Y-axis')

y_range = ax.get_ylim()[1] - ax.get_ylim()[0]
if y_range > 1000:
    adjust_minor_ticks(ax, 2)
elif y_range > 100:
    adjust_minor_ticks(ax, 4)
else:
    adjust_minor_ticks(ax, 5)

plt.show()
这个例子展示了如何根据Y轴的数据范围动态调整次要刻度的数量。当数据范围较大时,我们减少次要刻度的数量,反之则增加。
15. 在柱状图中使用次要刻度
虽然柱状图通常不使用次要刻度,但在某些情况下,添加次要刻度可以提高精确度。以下是一个在柱状图Y轴上添加次要刻度的例子:
import matplotlib.pyplot as plt
import numpy as np

categories = ['A', 'B', 'C', 'D', 'E']
values = [23, 35, 14, 28, 39]

fig, ax = plt.subplots(figsize=(10, 6))
ax.bar(categories, values)
ax.set_title('Bar Chart with Minor Ticks on Y-axis - how2matplotlib.com')
ax.set_xlabel('Categories')
ax.set_ylabel('Values')

ax.yaxis.set_minor_locator(plt.AutoMinorLocator())
ax.tick_params(axis='y', which='minor', length=4, color='r', width=1)

plt.show()
在这个例子中,我们在柱状图的Y轴上添加了次要刻度,这有助于更精确地读取柱子的高度。
16. 在极坐标图中自定义角度刻度
在极坐标图中,我们不仅可以自定义径向刻度,还可以自定义角度刻度。以下是一个例子:
import matplotlib.pyplot as plt
import numpy as np

r = np.arange(0, 2, 0.01)
theta = 2 * np.pi * r

fig, ax = plt.subplots(figsize=(10, 10), subplot_kw=dict(projection='polar'))
ax.plot(theta, r)
ax.set_title('Custom Angular Ticks in Polar Plot - how2matplotlib.com')

ax.set_thetagrids(np.arange(0, 360, 30))
ax.set_thetaticks(np.arange(0, 360, 5))
ax.set_yticklabels([])

plt.show()
在这个例子中,我们设置了每30度一个主要角度刻度,每5度一个次要角度刻度。我们还移除了径向刻度的标签,以突出角度刻度。
17. 在对数刻度上使用自定义次要刻度
对于对数刻度,我们可能需要更精细的控制over次要刻度的位置。以下是一个使用自定义函数来生成对数刻度次要刻度的例子:
import matplotlib.pyplot as plt
import numpy as np

def custom_log_minor_ticks(ax, axis='both'):
    locmin = plt.LogLocator(base=10.0, subs=(0.1, 0.2, 0.3, 0.4, 0.5, 0.6, 0.7, 0.8, 0.9), numticks=12)
    if axis in ['x', 'both']:
        ax.xaxis.set_minor_locator(locmin)
        ax.xaxis.set_minor_formatter(plt.NullFormatter())
    if axis in ['y', 'both']:
        ax.yaxis.set_minor_locator(locmin)
        ax.yaxis.set_minor_formatter(plt.NullFormatter())

x = np.logspace(0, 5, 100)
y = x**2

fig, ax = plt.subplots(figsize=(10, 6))
ax.plot(x, y)
ax.set_title('Custom Log Minor Ticks - how2matplotlib.com')
ax.set_xlabel('X-axis (log scale)')
ax.set_ylabel('Y-axis (log scale)')

ax.set_xscale('log')
ax.set_yscale('log')
custom_log_minor_ticks(ax)

plt.show()
Output:
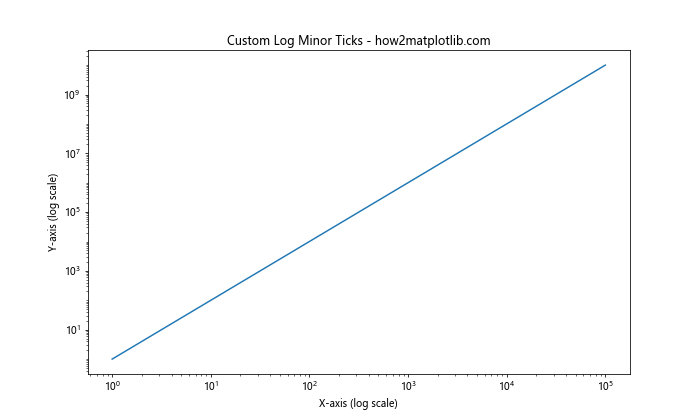
这个例子展示了如何在对数刻度上创建自定义的次要刻度,使得刻度分布更加均匀和美观。
18. 在时间序列数据中使用次要刻度
对于时间序列数据,适当的次要刻度可以大大提高可读性。以下是一个在时间序列图表中使用次要刻度的例子:
import matplotlib.pyplot as plt
import numpy as np
import pandas as pd

dates = pd.date_range(start='2023-01-01', end='2023-12-31', freq='D')
values = np.cumsum(np.random.randn(len(dates)))

fig, ax = plt.subplots(figsize=(12, 6))
ax.plot(dates, values)
ax.set_title('Time Series with Minor Ticks - how2matplotlib.com')
ax.set_xlabel('Date')
ax.set_ylabel('Value')

ax.xaxis.set_major_locator(plt.MonthLocator())
ax.xaxis.set_minor_locator(plt.DayLocator(bymonthday=[5, 10, 15, 20, 25]))
ax.xaxis.set_major_formatter(plt.DateFormatter('%Y-%m'))

plt.setp(ax.xaxis.get_majorticklabels(), rotation=45, ha='right')
plt.tight_layout()
plt.show()
在这个例子中,我们使用MonthLocator设置主要刻度为每月,使用DayLocator设置次要刻度为每月的第5、10、15、20和25天。这种设置可以帮助读者更容易地定位具体日期。
结论
通过本文的详细探讨,我们深入了解了如何在Matplotlib中自定义次要刻度,特别是如何仅在Y轴上启用和自定义次要刻度。我们学习了如何控制次要刻度的位置、数量和外观,以及如何在不同类型的图表中应用这些技术。
次要刻度的恰当使用可以显著提高图表的可读性和精确度。它们可以帮助读者更好地理解数据的细节,尤其是在处理大范围数据或需要高精度读数的情况下。
在实际应用中,选择合适的次要刻度设置取决于你的数据特性和图表的目的。有时,简单的自动设置就足够了,而在其他情况下,你可能需要更复杂的自定义设置。无论如何,掌握这些技术将使你能够创建更专业、更有洞察力的数据可视化。
记住,好的数据可视化不仅仅是展示数据,更是讲述数据背后的故事。适当使用次要刻度,可以帮助你更好地讲述这个故事,使你的图表不仅美观,而且富有信息量和说服力。
 极客笔记
极客笔记